11 Minutes
Android Studio Tutorial: Build and Publish Your First App
Fix Bugs Faster! Log Collection Made Easy
Android app development is the process of building software for Android devices, such as smartphones, smart TVs, tablets and wearables. It’s a Linux-based system and open source, which means manufacturers can customize it.
Android version names used to be named after desserts, like Lollipop, Marshmallow, KitKat and Oreo. From version 10, Google switched to number-based names like Android 10, Android 11, Android 12, etc, up to the most recent, Android 15, which was released in September 2024. As with other software, the OS stands for Operating System.
The best tool for Android development is Android Studio. Visual Studio Code is a code editor, and does not provide IDE (Integrated Development Environment) support like Android Studio does. We can use VS Code for cross-platform apps, but for native apps Studio is ideal. Studio can support Java and Kotlin, but VS Code uses many languages via plugins (Dart, JavaScript , React, and Python).
Android Studio manages the JDK (Java Development Kit) internally. For Visual Studio Code, we need to install and configure the JDK using environment variables. The Android SDK is a tool that provides the Android developer with an environment to build, test and debug Android applications. With the help of SDK Manager, we can install, update and manage the SDK components. Android SDK is bundled with Android Studio, but can also be installed separately.
There are two types of devices (emulator and physical device) we can use during the development and testing of apps. In most cases, we use the Android Emulator because it can simulate multiple Android versions (API levels) on a single device. Depending on what Android versions your app needs to support, you can switch the emulator’s API level to test compatibility across different OS versions.
Table of Contents
Setting up Android Studio and creating a project
First, we need to download the Android Studio installation file from the official website. After downloading the file, we need to click on the .exe file and follow the installation window. During the installation time, we need to set up the SDK location and create an Android virtual device. Once the setup is finished, a shortcut will be created on the desktop to open Android Studio in one click.
Now we need to understand the initial window. It has a lot of features, like creating a new Android project, opening an existing app, reopening a recent Android project, plugin installation, theme customization, and many more. Here is a screenshot of the Android Studio initial window.
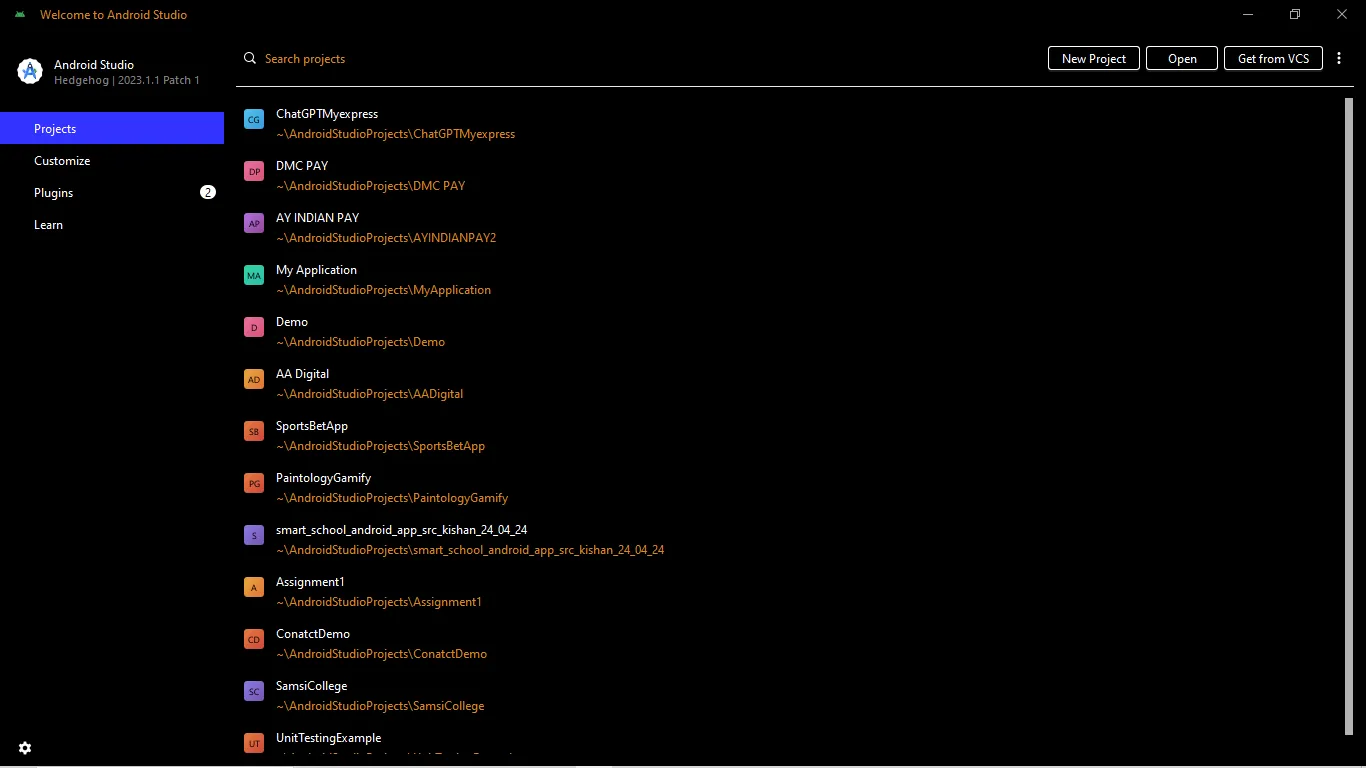
Let’s understand how to create a project. Just click on the New Project button, and a window will appear like below:
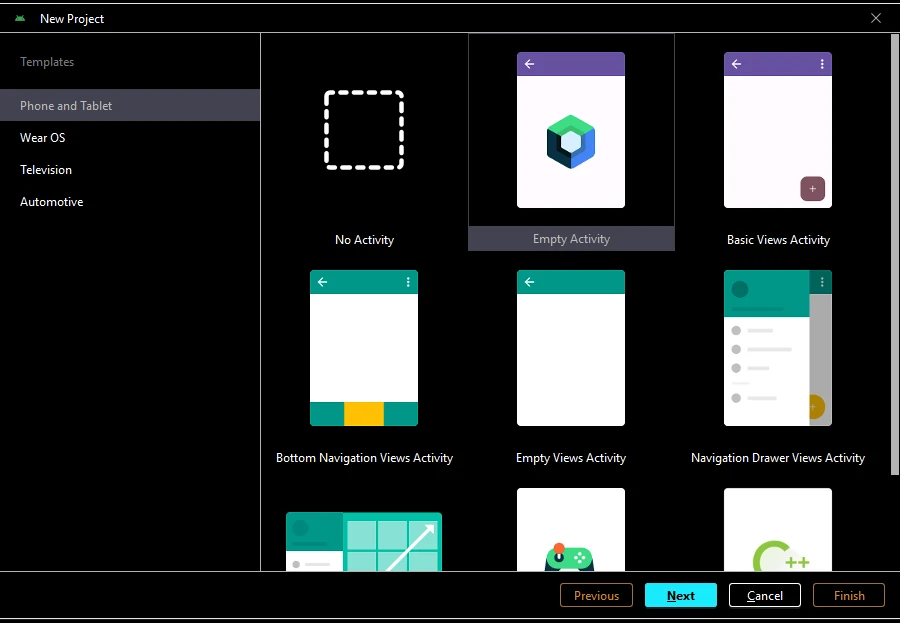
Now select the activity as per your need. If the above activity is not helpful, then select Empty Activity.
For the time being, we are selecting Empty Activity and clicking the Next button.
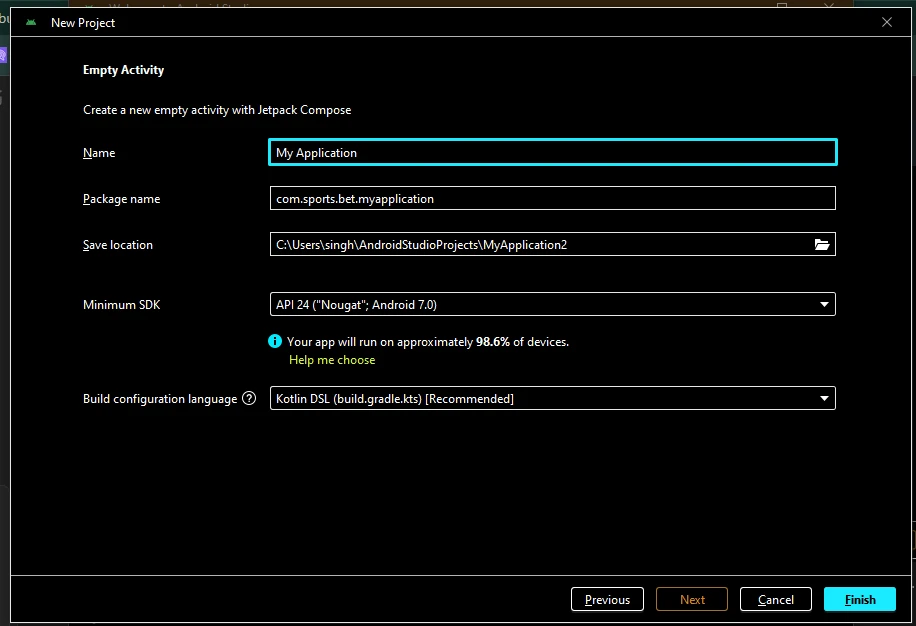
Next, create the project name, package name, save the project, build the configuration language and select the minimum SDK support.
Finally, click the finish button to complete the project creation. After that, a new window will open called the Project Window. Here we can find project structure, build file, app manifest file, and source code. Source code can be written in either Java or Kotlin.
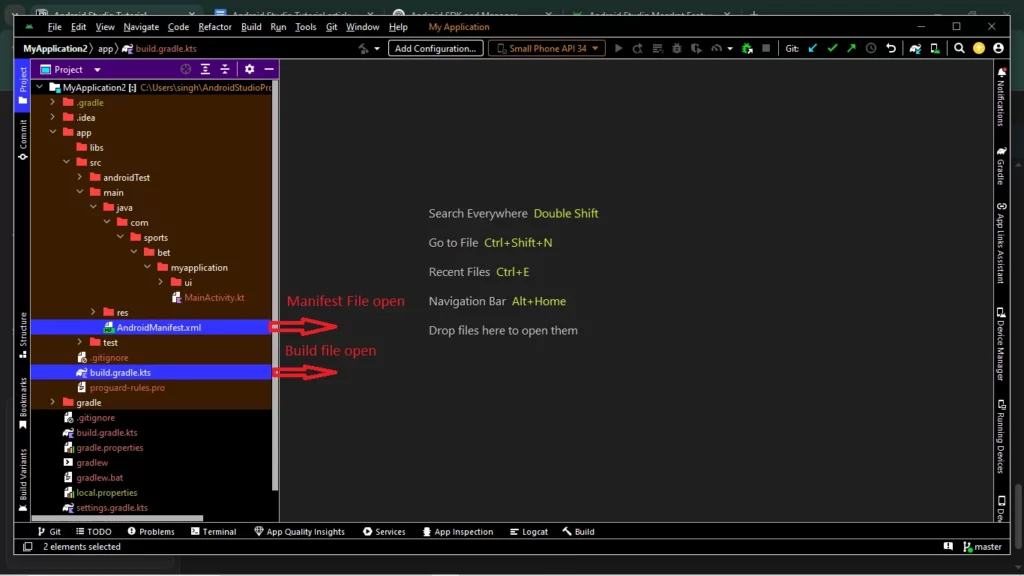
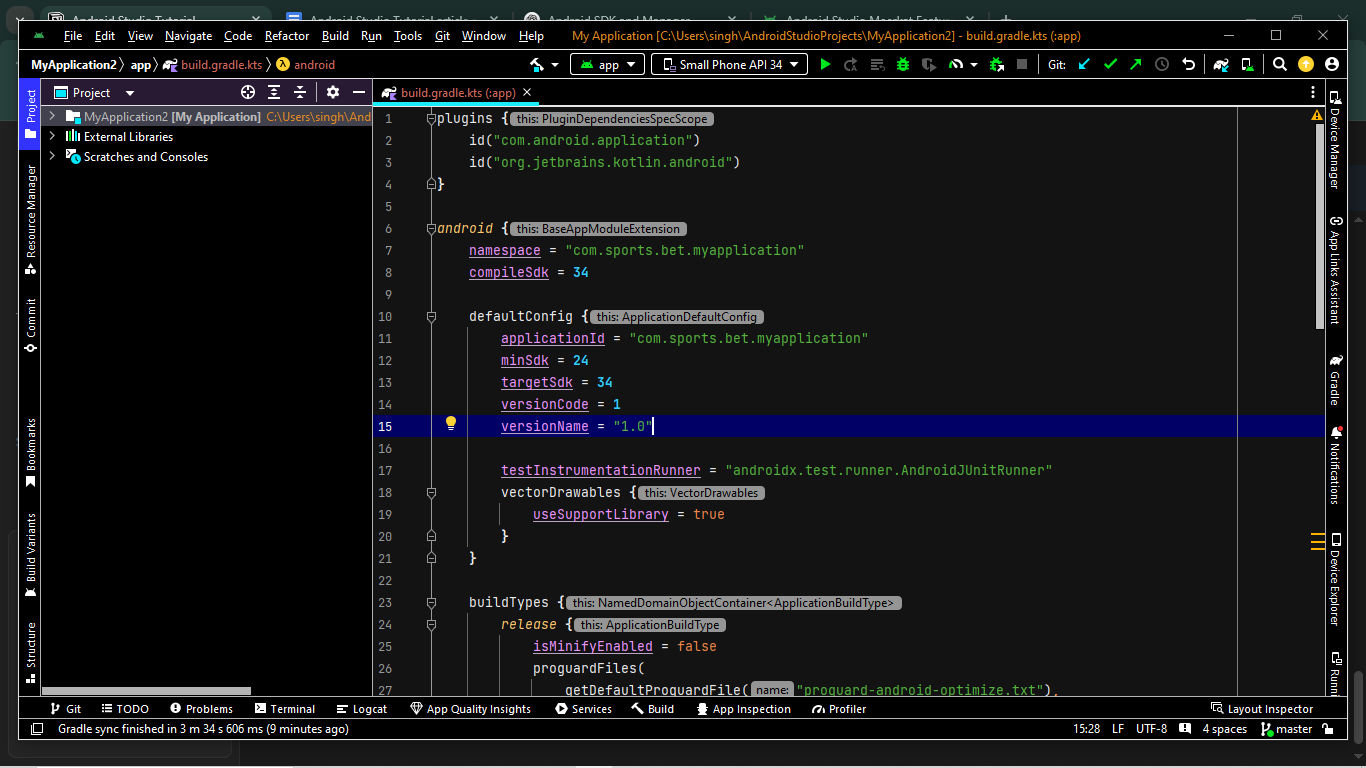
The build file and manifest file are two of the most important components in Android application development. In the build file, you can add third-party libraries like Retrofit and Picasso, and configure settings such as the minimum and target SDK versions, as well as the app’s version name and number. These version details are crucial for publishing updates to the Play Store — each new release must include a new version name and number.
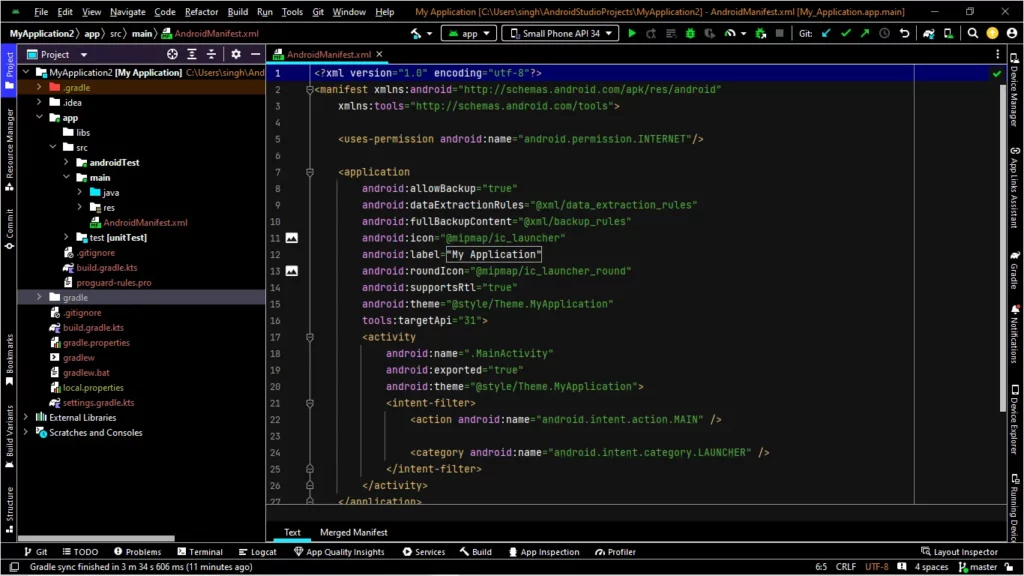
The manifest file, meanwhile, defines essential information about your app. It specifies which activity should launch first (known as the launcher activity), and declares permissions the app needs to function — such as access to the internet, camera, Wi-Fi, or photo gallery.
Creating a Basic Android App
With the set up complete it’s now time to design a basic user interface using XML. Before writing code in the XML file, we need to add a layout file in the res folder of our project. To do this, right-click on the res folder, then click New → Android Resource File. A dialog will open; select resource type layout and enter your file name then click OK .
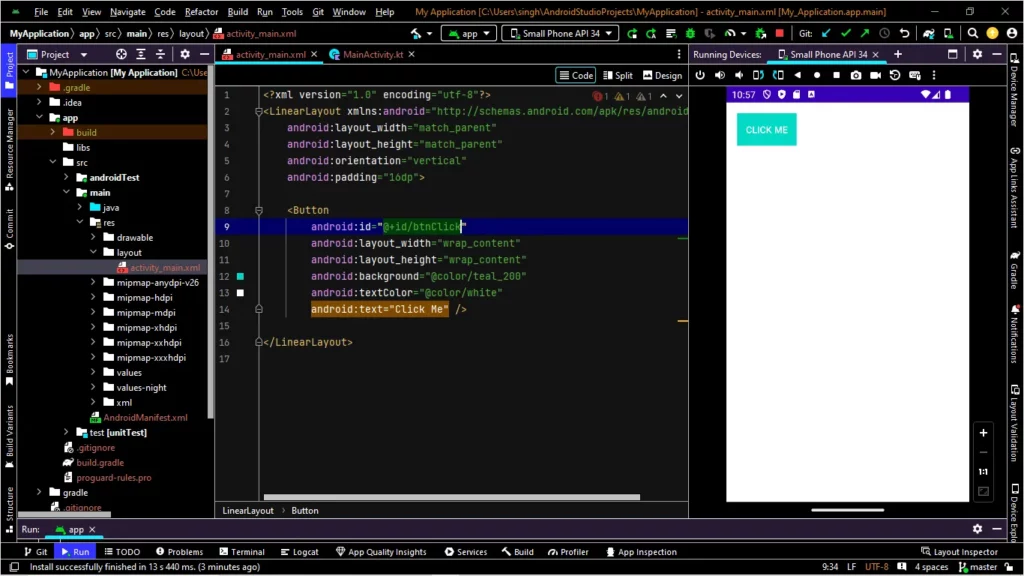
Now open the layout file and add whatever widget you require. For this example, we’ll add a button widget with a teal background color and white text. Here is the code snippet:
<?xml version="1.0" encoding="utf-8"?>
<LinearLayout xmlns:android="<http://schemas.android.com/apk/res/android>"
    android:layout_width="match_parent"
    android:layout_height="match_parent"
    android:orientation="vertical"
    android:padding="16dp">

    <Button
        android:id="@+id/btnClick"
        android:layout_width="wrap_content"
        android:layout_height="wrap_content"
        android:background="@color/teal_200"
        android:textColor="@color/white"
        android:text="Click Me" />

</LinearLayout>
The code is nice, clean and structured, while the design has a proper button shape. See the image below:
Okay, now we need to add backend logic in a Java or Kotlin file. Here we will use the Kotlin language to write backend code. To write code in Kotlin, we need to add an activity class. When the button is clicked, a dialog will appear.
val btnShowDialog: Button = findViewById(R.id.btnClick)

        btnShowDialog.setOnClickListener {
            AlertDialog.Builder(this)
                .setTitle("Dialog Title")
                .setMessage("This is the dialog message.")
                .setPositiveButton("OK") { dialog, _ ->
                    // Handle OK button
                }
                .setNegativeButton("Cancel", null)
                .show()
        }
The code is well-written, and the naming convention is clear. It’s easy for anyone to understand.
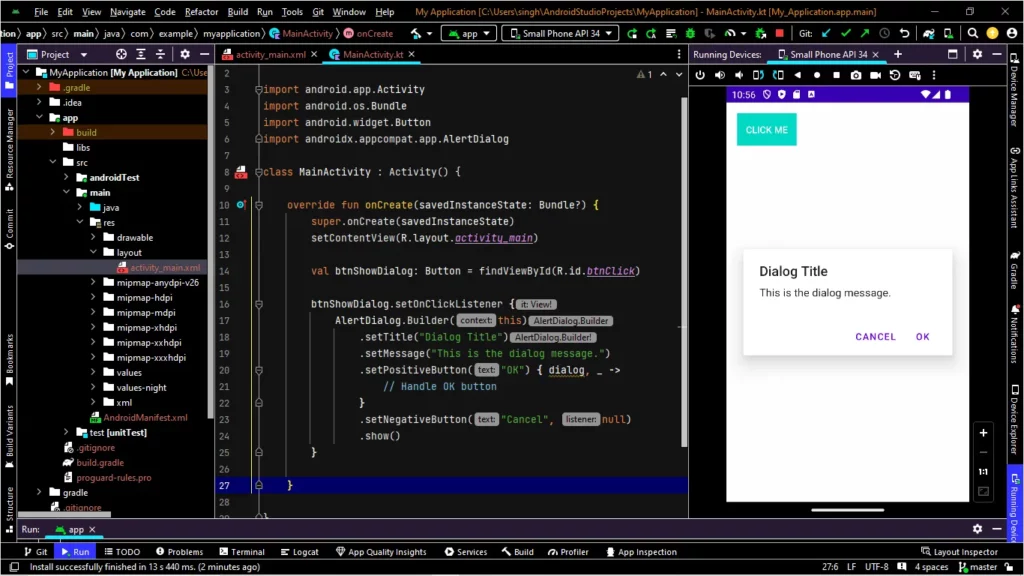
Great! These code samples and the screenshot clearly show how the dialog works. You can easily customize the dialog title, message and button text as needed.
Testing & Running the App
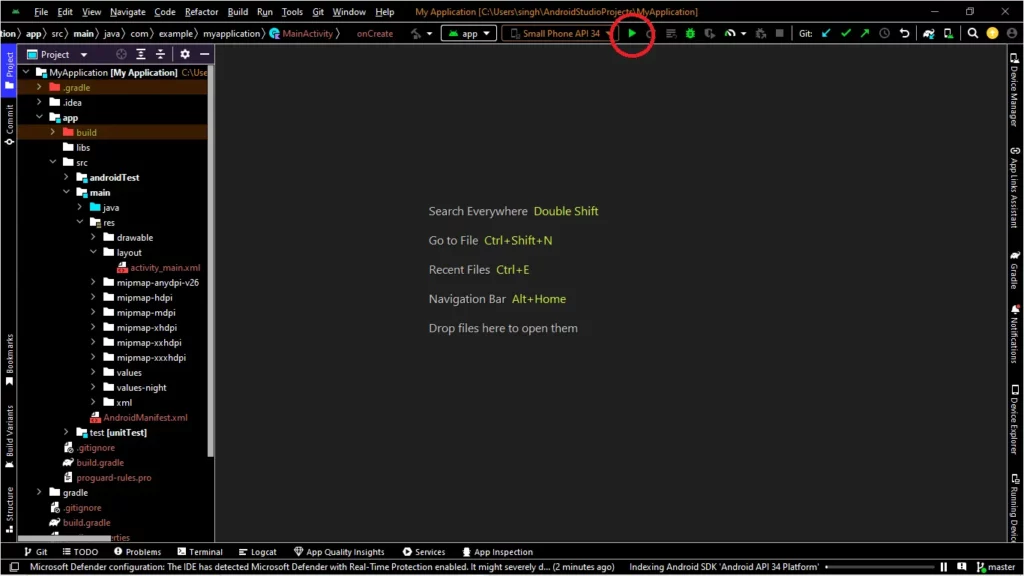
There are two ways we can test the app, either with an Android emulator or a physical device via USB debugging. Before we start testing, we need to create an emulator in Android Studio. We have already published an article about emulator setup in Android Studio. After setting up the emulator, we need to click Shift + F10 to run the app, or we can click the run icon in Android Studio, circled in red below.
Running an app on a physical Android device via USB debugging involves these key steps:
Enable Developer Option on Phone:
- Go to Settings > About Phone
- Tap Build number 7 times until we see “You are now a developer!”
Enable USB Debugging
- Go to Settings > System > Developer Options
- Scroll down and toggle on USB debugging
Connect the Device to a Computer
- Plug in your Android device using a USB cable
- When prompted on the device, tap Allow to enable USB debugging access
If you’re using an emulator, you can test against multiple Android API levels by creating virtual devices with different system images.
Debugging & Analytics
We can debug the Java or Kotlin code through the Android Studio debugger. First, we need to make sure the emulator is running or physical device is connected. Open a Java or Kotlin file, click to the left of the line number, and select the red dot (breakpoint), shown below. Now click on the debug icon from the toolbar or click shift+F9 to start debugging.

Now we need to integrate Google Analytics into our app for user tracking. We will use Google Analytics for Firebase. Here’s the step-by-step integration process:
Set Up Firebase Project
- Go to Firebase Console
- Click “Add project” and follow the setup instructions
- Once created, click “Add app” and choose Android
Register Android App
- Enter the Android package name (this must exactly match your app’s package in AndroidManifest.xml)
- Optionally enter a nickname and SHA-1 key (required for some services like Dynamic Links or Google Sign-In)
- Download the
google-services.jsonfile - Place it in the
app/directory of our Android Studio project (not the root project directory)
Add Firebase SDK
- Modify the root-level
build.gradle(Project-level)
buildscript {
    dependencies {
        classpath 'com.google.gms:google-services:4.3.15' // or latest
    }
}
- Modify the app-level
build.gradle
plugins {
    id 'com.android.application'
    id 'com.google.gms.google-services' // Add this line
}

dependencies {
    implementation 'com.google.firebase:firebase-analytics:21.5.0' // Use the latest version
}
Version 21.5.0 is fine, but always check Firebase release notes for the latest.
Now sync the Gradle file. After syncing is complete, we need to add analytics code in our main activity like below.
import com.google.firebase.analytics.FirebaseAnalytics

class MainActivity : AppCompatActivity() {
    private lateinit var firebaseAnalytics: FirebaseAnalytics

    override fun onCreate(savedInstanceState: Bundle?) {
        super.onCreate(savedInstanceState)
        setContentView(R.layout.activity_main)
        firebaseAnalytics = FirebaseAnalytics.getInstance(this)
    }
}
Publishing App to Google Play
Publishing an app to the Google Play Store is a multi-step process including account creation, uploading a signed APK or AAB file, creating an app, and uploading screenshots. First, we need to create an account in the Google Play Console.
Create a Play Console Account
- Visit: Google Play Console
- Pay a one-time $25 USD registration fee
- Fill in account details and verify your identity
After creating an account, you need to create an app in the Google Play Console. Here’s how:
Create a New App
- In the Google Play Console, click Create app
- Enter the app name
- Select the default language
- Select app or game
- Select free or paid
- Accept the policies and click create
Once the app is created, we need to fill out store listing forms, including screenshots.
Upload the Signed AAB File
- Go to Release > Production > Create new release
- Choose Google Play App Signing
- Upload the
.aabfile - Add release notes
- Save and review
Final Review and Publish
- Resolve any issues or warnings
- Click “Review Release” and then “Start rollout to production.”
- Confirm and publish
After publishing, you’ll need to wait a few days for Google to review the app and confirm your publish request. It may take between one and seven days, but sometimes longer. Once Google accepts the request, your app will be visible in the Play Store for all users to download.
If Google finds an issue, it will reject the app and send an email to the account owner. These issues must be resolved before you upload a new .aab file. Remember, you’ll need to update the version number and name every time you upload a new file. Otherwise you’ll receive an error message.
Bonus: Advanced Features
Animation is used to make the app more attractive and create smoother UI interactions, and for this many developers use the Lottie library. It’s a vector-based JSON library, and is well-suited for icons, logos and loading animations. Here’s how to add the Lottie library to your project:
implementation 'com.airbnb.android:lottie:6.1.0'
<com.airbnb.lottie.LottieAnimationView
    app:lottie_fileName="loading.json"
    app:autoPlay="true"
    app:loop="true" />
We now understand how to create a basic app in Android Studio, and how to debug and run it in an emulator or on a physical device. If planning a complex project, it is crucial to properly maintain project structure. Otherwise, you’ll face a constant string of issues and complexities as the app’s feature set grows. Here are a few tips to make scalable apps in Android.
- Maintain proper structure, like MVI or MVVM
- Break the code into different modules like API, Utils, Activity, Fragment, module, storage.
- Adopt Hilt to manage dependency injection like Dagger.
- Adopt Hilt to manage dependency injection like Dagger.
- Build apps with Jetpack Compose for better UIs.
- Use a third-party automated testing library for better testing, like JUnit for unit testing.
- Use Mockito for mock testing.
- Maintain the code base with Git, like Bitbucket.
- Use Firebase Analytics and Crashlytics for user tracking and error tracking.
To recap
Android Studio is ideal for native apps, Jetpack Compose-based apps, Firebase based apps and scalable apps. Frameworks like Flutter, React Native and Ionic help with cross-platform development. Android Studio is supported on Windows, macOS and Linux. A minimum of 8GB RAM is required to run it, but 16 GB is preferable.
Any other questions? Just write to us. We’re always happy to chat about this Android Studio tutorial or any other Android topic. So whatever questions you’ve got, we’re here to chat.
Happy coding!
Expect The Unexpected!
Debug Faster With Bugfender

Anupam Singh
Anupam Singh is a Native Android Developer as well as Hybrid Mobile App Developer. More than 10 years of experience in Developing Mobile Apps. He is a technology blogger. Follow him on Linkedin to stay connected.