Recommended Reading

9 Minutes
How to Submit an iOS App to the Apple App Store: Step-by-Step Guide for Developers
Fix Bugs Faster! Log Collection Made Easy
In less than 20 years, mobile apps have grown from a bright new idea to a cornerstone of our daily lives. And while Android accounts for the lion’s share of the market, iOS usage continues to grow exponentially: in 2024 alone, iOS apps and games were downloaded around 35 billion times.
The Apple App Store is both a shop window and a marketplace for this global industry. But as iOS developers, how do we actually submit a mobile app to the store? The internet is full of articles that tell us how to achieve that precious five-star rating, but there are relatively few articles about the submission process – even though it’s the most important bit of all.
So today we’re going to go through it. In this article, we’ll give you a clear, step-by-step guide to navigate the submission process and get your app live on the Apple Store, covering crucial topics like
- The fundamentals of App Store Optimization
- App Store Connect.
- The Apple Developer Program.
- App store review guidelines.
By the end, you should be able to publish an app effectively and efficiently. This process is the same if you’re aiming to publish an app to the iOS App Store, or the Mac App Store. So, whichever you’re using, you’ll be flying!
Table of Contents
But first: how does Apple actually review apps?
You might think the entire process is automatic, and you’d be right. Kinda.
Some parts of the process are automated. Apple’s crawlers will review our screenshots, and check whether our apps comply with Apple’s guidelines. But the bulk of the process is manual, handled by a team of experts who volunteer to pick up new submissions. As Apple itself says, “every week, over 500 dedicated experts around the world review over 100K apps.”
In other words, we’re dealing with real people, and we need to make their jobs as easy as possible.
2. Prerequisites Before Submission
2.1 Enrol in the Apple Developer program
To start distributing apps through the App Store, you first need to have an Apple Developer Account, and enrol in the Apple Developer program. It’s really straightforward. You can enrol by visiting this link from the App Developer portal and by following a few short, simple steps.
The most likely scenario is that you’re enrolling as an individual. In this case, you’ll need an Apple Account with two-factor authentication set up, and to provide some personal information. That’s it! After that, your new developer account will be ready for use!
2.2 Prepare your app submission
All apps need to meet basic standards before they can be posted on the App Store, and these are laid out in Apple’s App Review Guidelines. Here are some of the top lines:
- Your app should be original (i.e. you can’t copy anyone else’s big idea!)
- Your app should include features, content, and UI that elevate it beyond a repackaged website.
- The app must not contain any objectionable content.
- It can only use publicly available APIs.
- Your monetization model must be clearly laid out in your Metadata or App Review notes.
You can check out the full App Store review guidelines here, and we’ll give you a step-by-step guide to submitting your app for review later in the article. Be sure to read the guidelines in full: Apple says that over 1 million apps have already been rejected for their content alone!
2.3 Testing your app
We’ve got a lot of other articles that discuss testing your iOS app, so we won’t go into it in too much detail here. All we’ll say is that it’s good practice to test on as many real devices as you can, to make sure your new app is ready, and that you’ve finished its development for the first version.
3. Have the required assets and information ready
To be able to submit your app, you’ll need some things that you can collect before starting the process. Some of them are just general app information, and some, like the app icon, are actual designed assets.
Again, you can check them against the App Review Guidelines we mentioned earlier, but in short, this is what you’ll need to provide when you upload and submit your app:
- App Name
- Description
- Category
- App icon
- App Store screenshots (2796 x 1290 pixels, or 1290 x 2796)
- App privacy details
- App purchases and in-app purchase settings
4. App Store Connect
Now that we’ve seen the theory of what you need, let’s jump into the more practical (and fun) part: building an app that you can submit to the App Store!
4.1 Create a New App Record
Start by going into https://appstoreconnect.apple.com and once there, select ‘Apps’.

You probably won’t have created an app before (that’s why you’re here, right?!) so you’ll see a white screen at this stage:
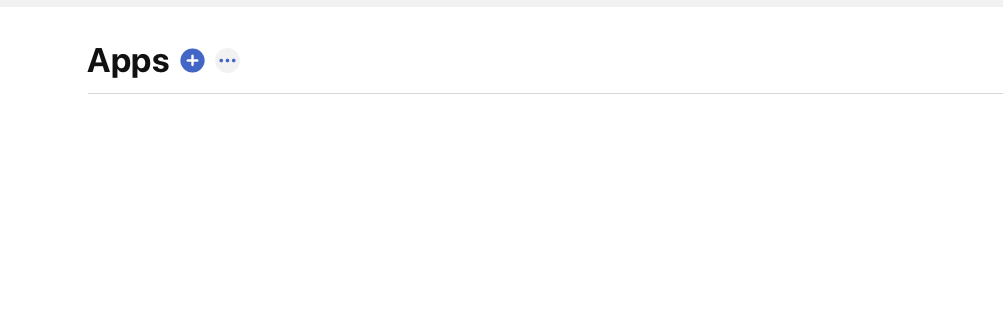
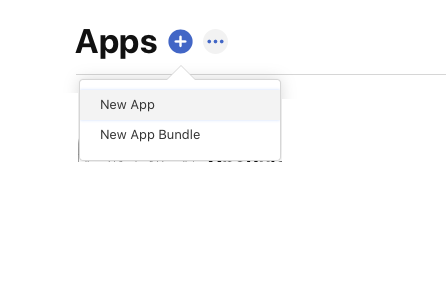
By pressing the top “+” button, you can choose to create a new app:
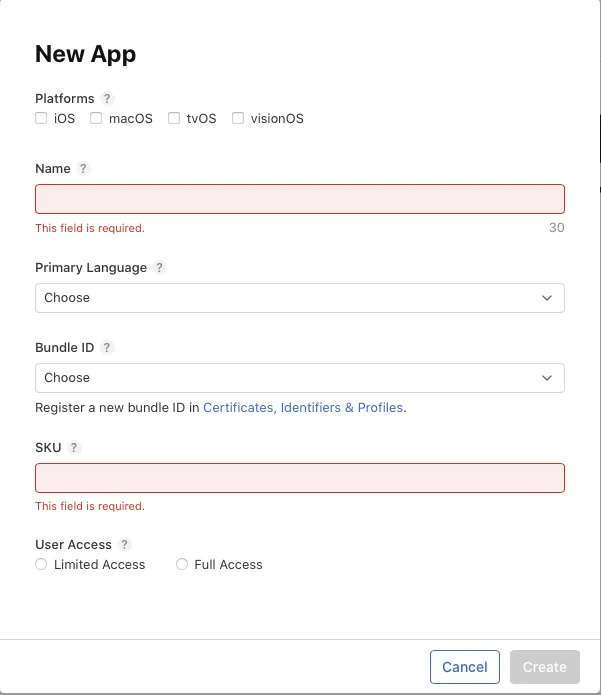
Here you’ll have to provide some very basic information about the app, primarily the name and the SKU. The SKU is less obvious, but don’t stress: it just needs to be a unique string for your identification. It’s mainly used to track payments.
A good rule is to use the same SKU tat you’ll use for your app’s bundle, since that’s already unique. Typically, it looks something like com.myCompanyOrMyName.MyAppName
And that’s it! Your app record has now been created on App Store Connect, and now you can submit your app.
5. App Store submission process
This is what you came for, right?
In this chapter, we’ll look at submitting your app to the record that you created in the previous chapter. First we’ll take a look at submitting, or uploading, to App Store Connect. After that we’ll see about preparing for the App Review process by following the App Store guidelines.
5.1 Upload your app
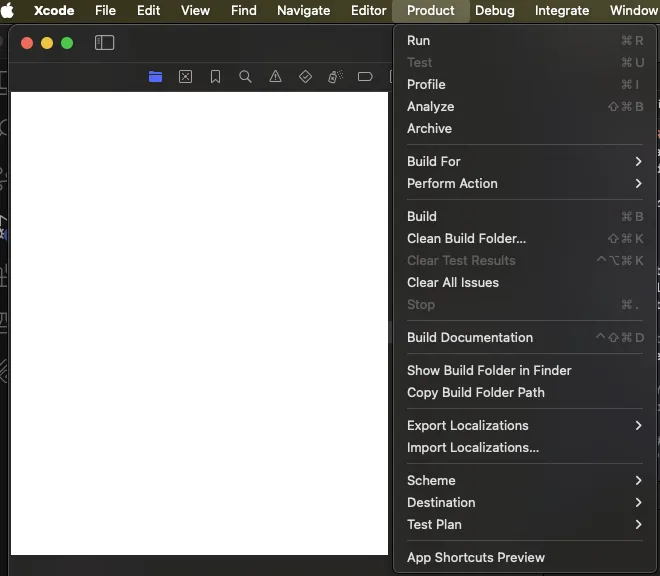
We can upload our app using Xcode. On the top menu, simply select Product, and then on the Product menu just click Archive. This will create the archive to be submitted to the App Store.
Once the archive process is done, we’ll have the Organizer automatically opened, with our archive showing:

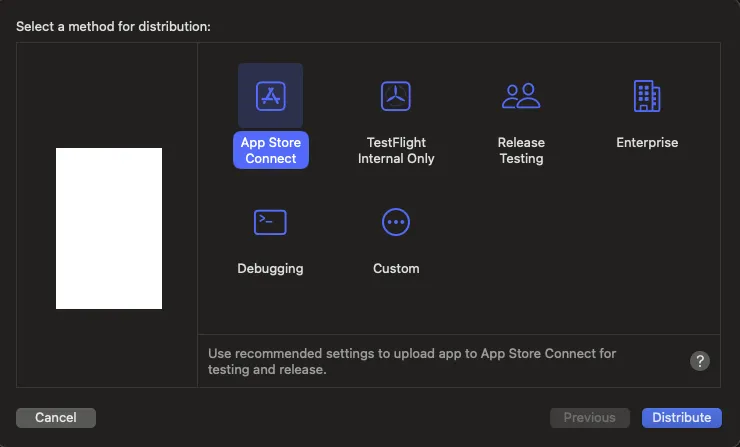
Here, it’s as simple as selecting the build, and pressing Distribute App:

You will be asked what your preferred method of distribution should be. Be default, you want to distribute to App Store Connect.
Note: This will fail if you have not created the app record. To see how to do it, check the previous section of this article.
Now, just wait for it to be uploaded to Apple:

5.1 Submitting to App Store via App Store Connect
Now that we have an app record created on App Store Connect, we can add all the necessary details to the initial build and publish it.
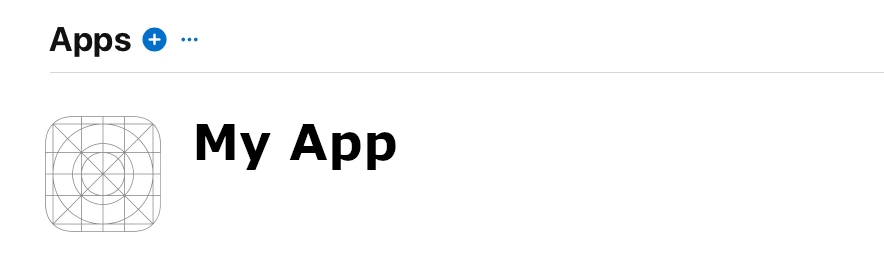
First, go to App Store Connect and choose Apps. Once in there, you’ll see the app you created previously. In this case, we’ve created an app called ‘My App.’ Just click on it, and you’ll be taken to the details screen.
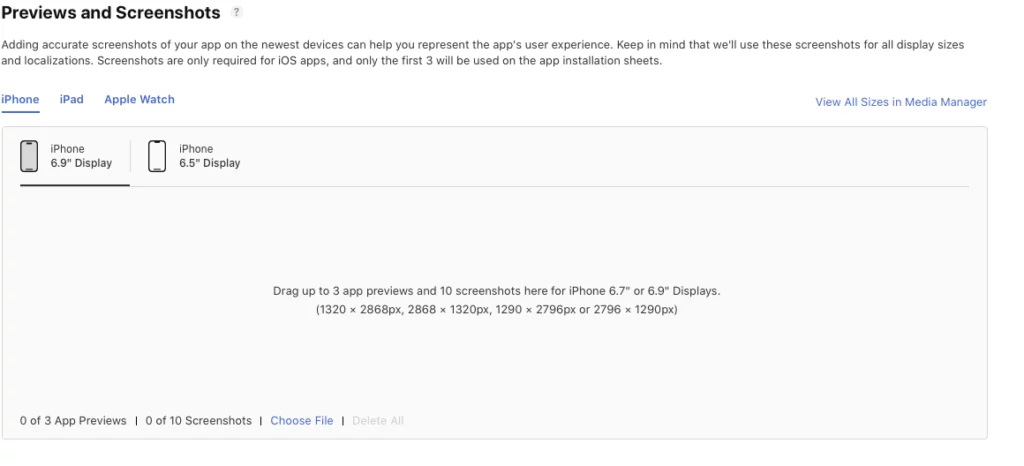
The App Store requires that we add screenshots for our app. In fact, this is one of the most important requirements of all. Again, it’s a really simple process: we just navigate to the Screenshots portion of the screen, then drag and drop:
Once we’ve passed this stage, we need to add a description to our app:
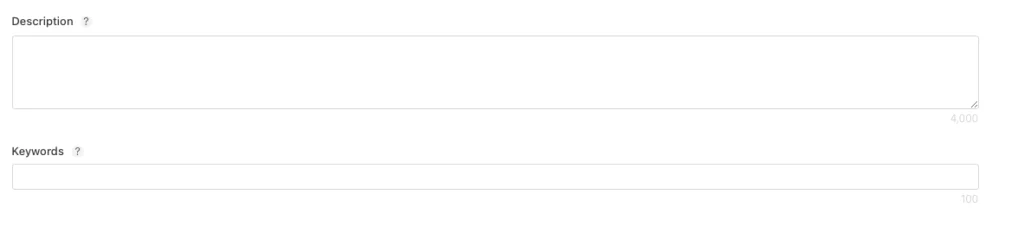
If we have more than one supported language, we’ll have to add the same description in the other supported languages. We can do so by selecting the language on the top right side.
Here, in this screenshot, we’re writing the details for the UK version of the app:

Now, we need to choose a build to send to the store with our listing. When we click Add Build, the previously uploaded build will pop up:

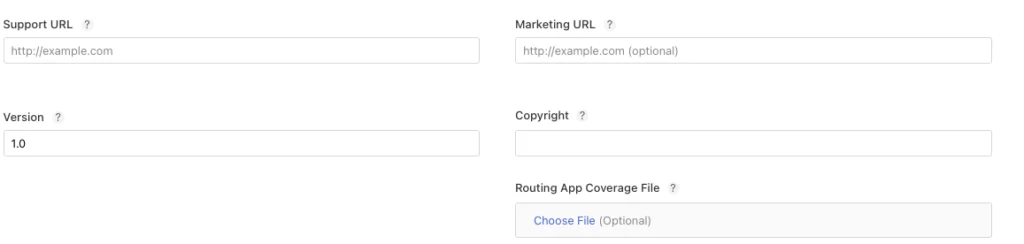
We also need to add some contact information so that It can be listed with our app, and we can do this like so:
5.2 Prepare for App Review
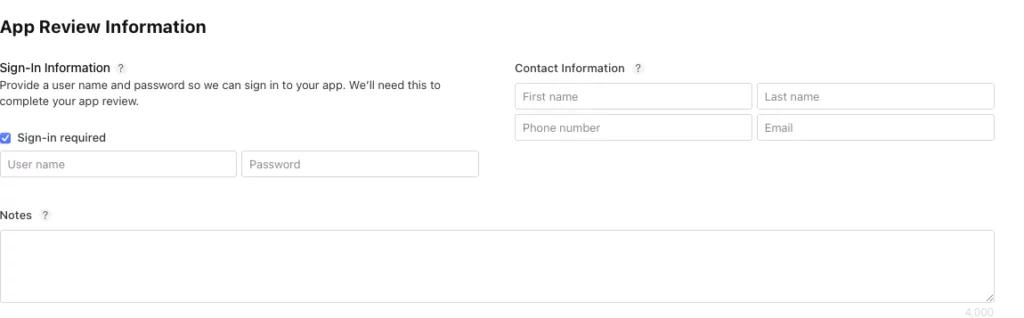
Before submitting for review, we should add extra App Review Information below the build choice. This can be basic information about the app, or a demo account if it helps the reviewer understand what the app is supposed to do. Here’s a screengrab.
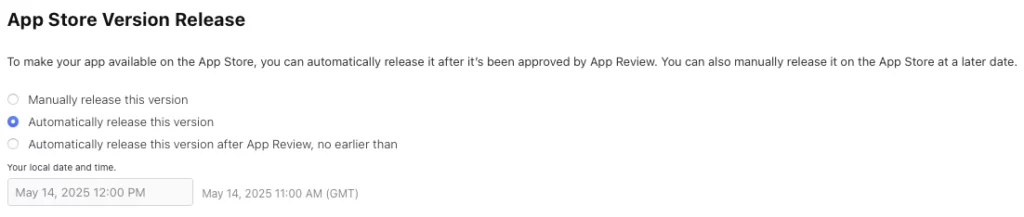
We can also select a date to make our app available to users, to manually make it available once approved, or simply to be pushed to the store as soon as it is reviewed:
Once all this is done, we’re ready to send! Click on the top right Add for Review button, and the app’s on its way to the reviewer.

5.3 Updating your app
We’ve been focusing primarily on new submissions up to now, but it’s important to touch on the update process too. It’s generally seen as good practice to update our apps on a semi-regular process to prevent bugs, keep up with wider UX trends and stay ahead of user expectations.
The process for updating apps is broadly the same as that for new submissions. The only mandatory rule we need to fulfil on an app update is the What’s new in This Version. We have to fill that box, and fill it out for any additional languages we support.

6. Post-Submission Considerations
6.1 Track the review process
After submitting our app, we can track the progress in the Apps tab on App Store Connect. There are a few different states that are named in a self-explanatory way, and here’s what they mean:
- Waiting for Review. This is pretty much what it suggests!.
- In Review. Someone is looking at our app now, which means that we will soon know whether it has passed or not.
- Pending Developer Release. Typically, we make apps available when we choose to. So this means that the app has cleared review, and we can push it live at any time!
- Ready for Distribution. The app is in the store and users can download it.
- Rejected. Oops! Something didn’t meet the criteria. There are a ton of reasons for app rejection (we covered some of them earlier), so we should look at the rejection message to check what went wrong and what we can change to resubmit it.
6.2 Resubmitting an app that was rejected
There’s no difference between submitting or resubmitting an iPhone app. So if you need to resubmit, you can just go back to section 5 of this article and follow the steps.
7. Summing up
We’re nearly done! Just a quick update and we’re ready to fly.
We’ve looked at all the steps necessary to submit an app to the store. In a nutshell, we need to:
- Make the app.
- Test the app in real devices.
- Create an App Store Connect record for the app.
- Upload the build.
- Fill in some key information and assets.
And boom! We can submit it to review and have it in user’s pockets in a day or so!
We hope this article has helped you on your mobile app development path and that you have the tools to create a productive (and popular) App Store listing. Happy coding!
Expect The Unexpected!
Debug Faster With Bugfender