
34 Minutes
How to Use GraphQL with Angular Using Apollo Client
Fix Bugs Faster! Log Collection Made Easy
You’ve probably heard of the concept of ‘Frontend decides, backend delivers’ in app development. On the off-chance that you haven’t, it means that the frontend defines the data it needs, and the backend acts on this instruction.
This makes the data-fetching process more efficient, simplifies the error handling process and frees us, the devs, from the need to constantly make backend changes. The GraphQL query language for APIs, developed by Facebook, is a vital tool in this regard.
- It solves the problem of both over-fetching (i.e. fetching an entire
Userobject when we simply need thenameandid) and under-fetching (in the case of complex UIs with multiple REST calls and endpoints like/users,/posts,/comments, which can lead to the issue of the waterfall requests). - It also addresses the issue of API Type Safety (as REST responses often lack strict typing, hence requiring manual validations) and API Versioning (since REST endpoints often need specific versions like
/v1/usersor/v2/users) as requirements evolve.
In a previous post, we discussed setting up and using GraphQL in a React application for efficient data-fetching. Now, we’re going to show you how to do the same with an Angular application.
This comprehensive and practical guide will walk you through
- Integrating a GraphQL API into a functional Angular app using the Apollo Angular Client.
- Demonstrating concepts like queries and mutations, and handling advanced features like subscriptions.
- Advanced topics like authorization, handling edge cases and avoiding common pitfalls with best practices.
Prerequisites
Before starting, it’s important to have:
- Basic knowledge of Angular and TypeScript.
- An IDE like Visual Studio Code.
- Node.js LTS installed.
- A package manager: NPM, YARN, or PNPM (this guide uses NPM).
- Angular CLI installed globally:
npm install -g @angular/cli(usesudoon Mac if needed). - A modern terminal like zsh, iTerm2 with oh-my-zsh (Mac), or Hyper (Windows).
- A browser like Chrome, Edge, Brave, or Firefox.
- A GraphQL API endpoint. In this article, we’ll use Hasura Cloud as our server of choice. Sign up and create an account (note that the free tier is sufficient). Alternatively, you can convert REST APIs to a single GraphQL endpoint using tools like StepZen.
Got all those? Ok, let’s get stuck in.
Setting up your Hasura Backend

To follow along, you can either use Hasura Cloud (which offers a free tier) or set up a local instance using Docker. For this guide, we’ll assume you’re using Hasura Cloud.
Sign up or log in to Hasura Cloud.
Click on ‘Create a project.’
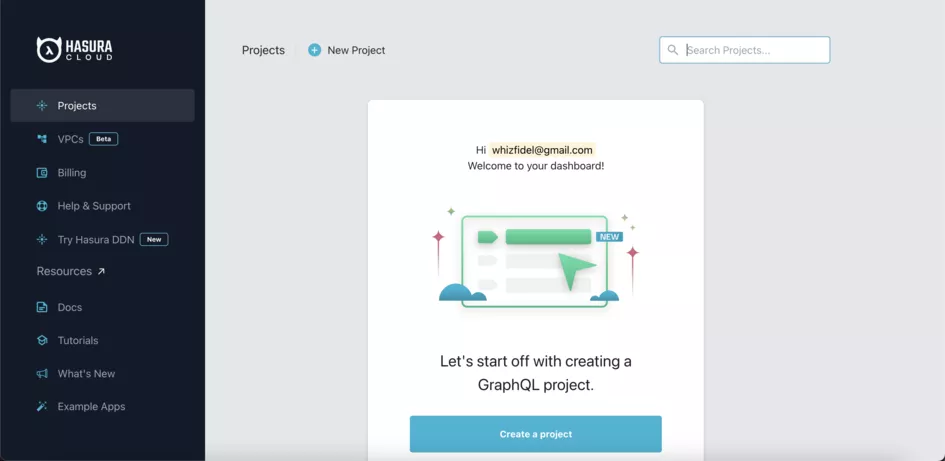
Select the ‘Free’ pricing plan.
Select your cloud provider of choice (I am choosing AWS).
Select a region (e.g US West (N. California)).
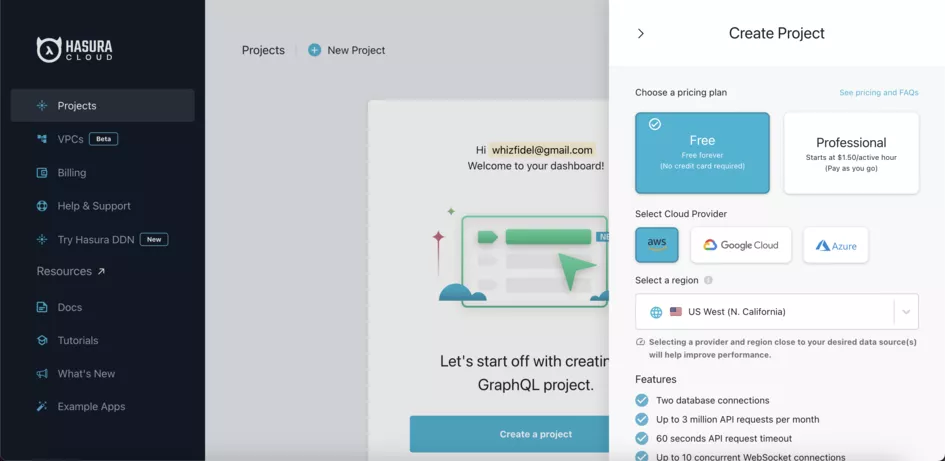
Then click on ‘Create Free Project.’
After all that, you should be redirected to a page like this:
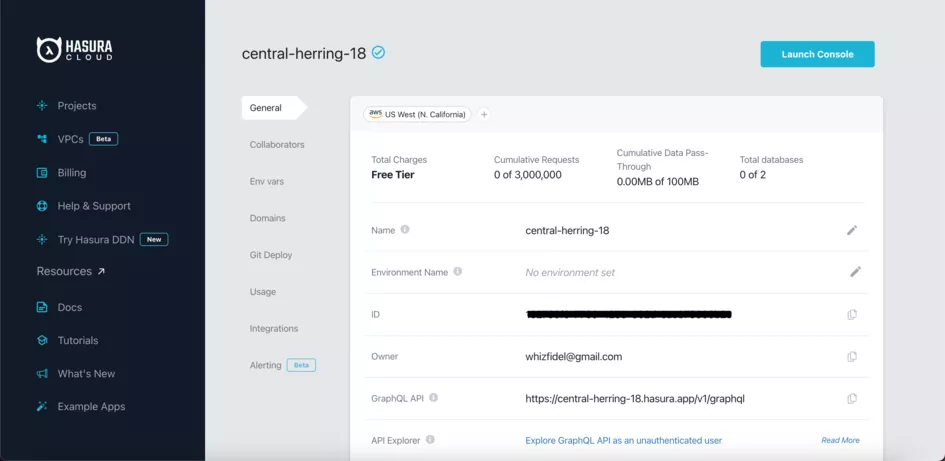
Now you can go ahead to rename the project to your preferred name.
Connect a Database:
Click on ‘Launch Console’, and you will be redirected to a separate tab.

Navigate to ‘DATA’
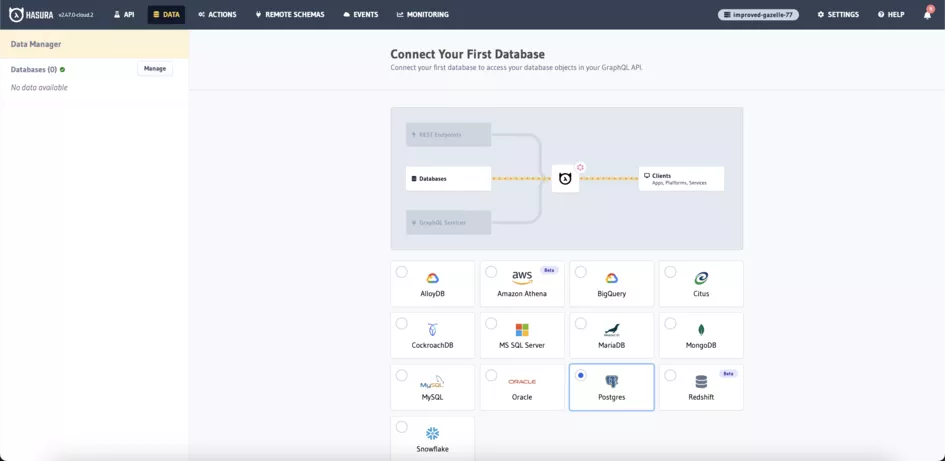
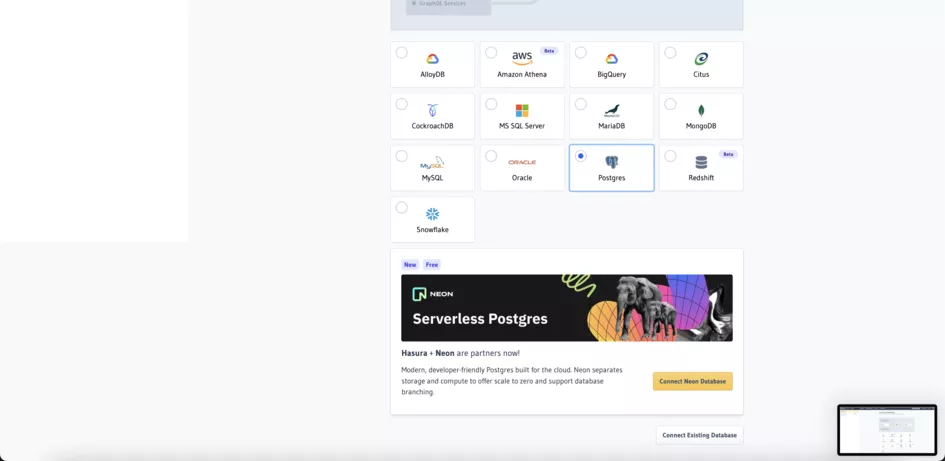
You’ll be prompted to connect to a database. You can either connect to an existing PostgreSQL database or use the free Hasura-managed PostgreSQL database. Click on your preferred option and follow the instructions.
For this tutorial, we’ll use the Neon Serverless Postgres database.
Click on ‘Connect Neon Database.’
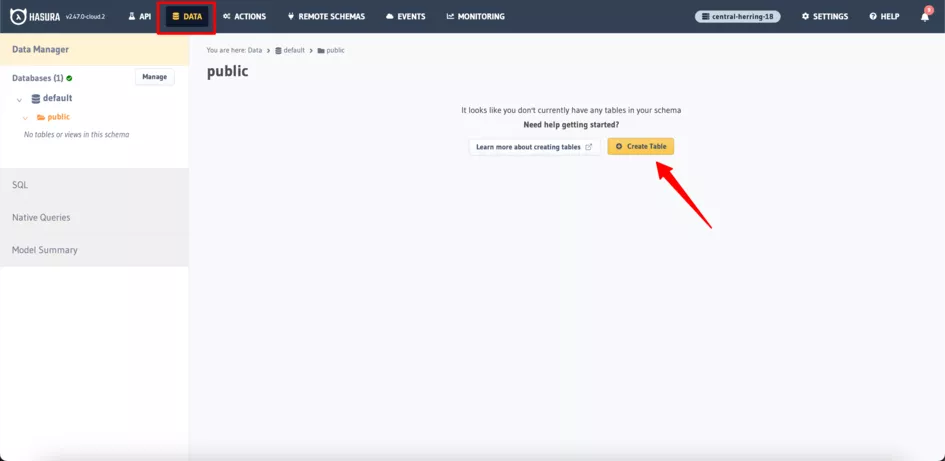
After the database has been loaded, navigate to the ‘DATA’ tab in the Hasura console.
Define the Member Table:
Click on ‘’Create Table.’.’
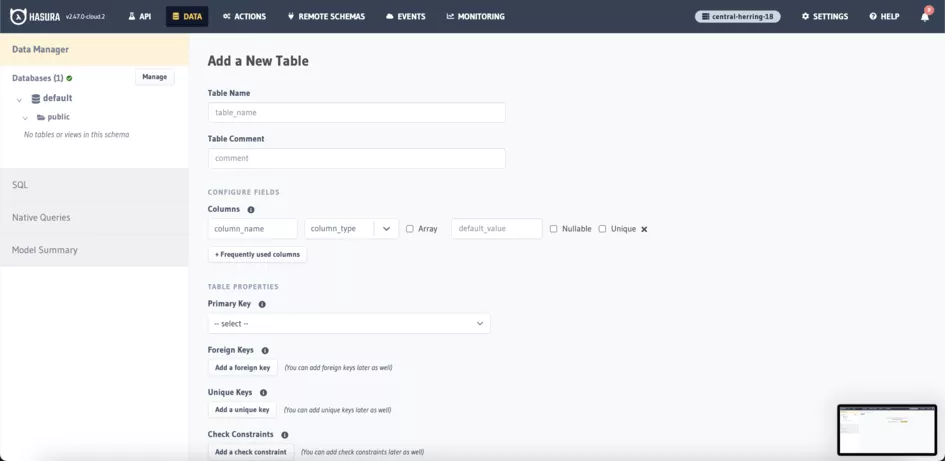
- Create a table named
memberswith the following columns:id(Integer, Primary Key, Auto-increment)name(Text, Not Null)username(Text, Unique, Not Null)email(Text, Not Null)created_at(Timestamp with time zone, Default:now())

Click ‘Add Table.’
Add Sample Data:
Go to the members table and click on the ‘Insert Row’ tab.
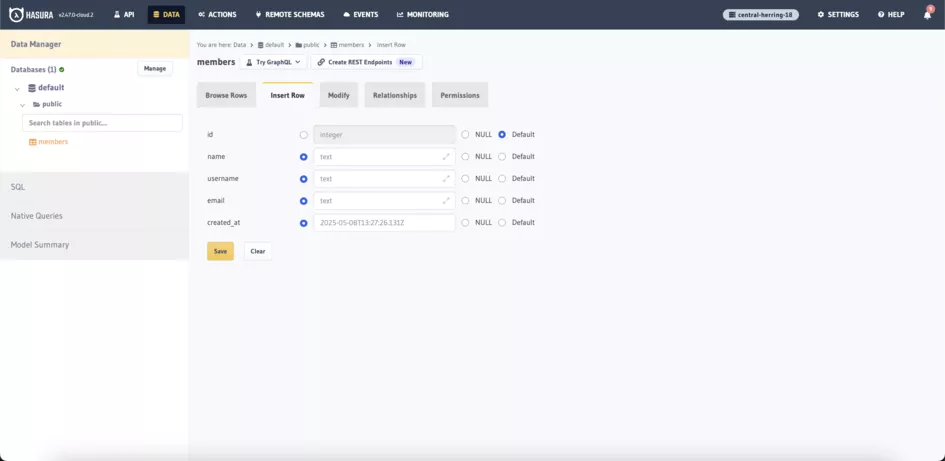
Add a few sample member entries (e.g., name: ‘John Doe’, username: ‘johndoe’, email: ‘[email protected]’).
Click on the ‘Browse Rows’ tab to view.
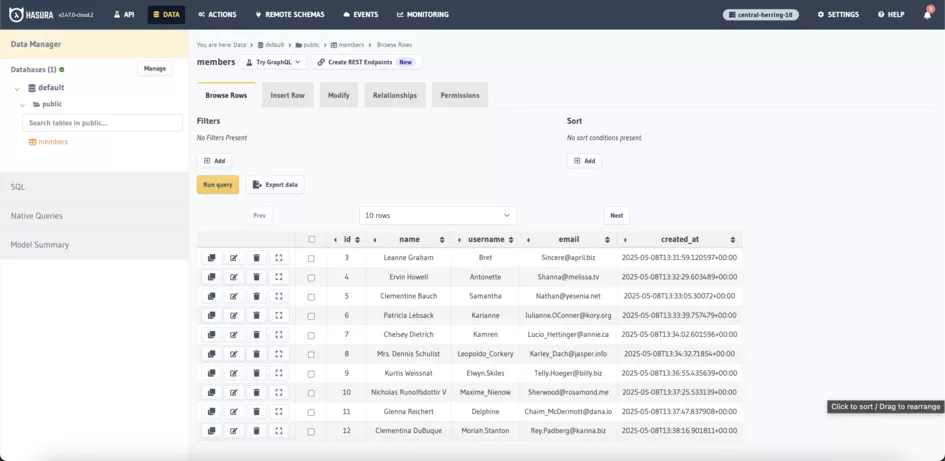
- Note your GraphQL API Endpoint:
- In the Hasura console, navigate to ‘API Explorer.’ The URL displayed here is your GraphQL API endpoint.
- Copy this URL, because you’ll need it in your Angular application. It will look something like
https://your-hasura-instance.hasura.app/v1/graphql.
Now that your Hasura backend is set up, let’s move on to the Angular project.
Setting up the Angular Project
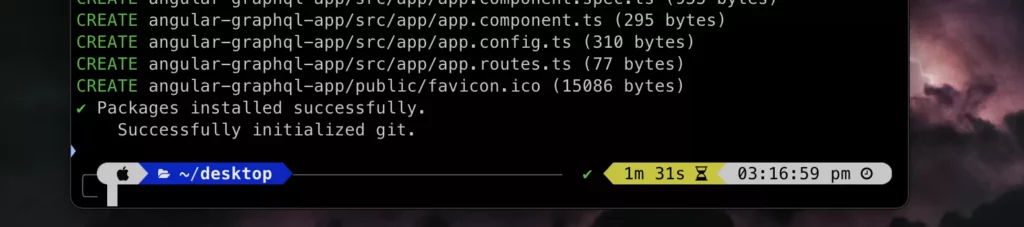
1. Create a new Angular project:
If you don’t have an existing Angular application to follow along with, you can quickly set one up using the Angular CLI.
To do this, run the ng new command with the desired project name. Here we can use angular-graphql-app :
ng new <project-name>
Now we’ve got some configuration options to choose from. If you don’t have any preference, then just hit the Enter key to go with the defaults (i.e. the use of CSS, no server-side rendering for simplicity).
Navigate to your project directory and run the app:
cd <project-name>
npm start
The application should be available locally on: http://localhost:4200/.
2. Install Apollo GraphQL Client and dependencies:
npm install @apollo/client graphql apollo-angular
For reference:
@apollo/clientis the core Apollo Client library for making GraphQL requests.graphqlprovides GraphQL parsing and utilities.apollo-angularis the Angular-specific GraphQL integration for Apollo Client, making it easy to use in an Angular application.
Configuring Apollo in Angular
Create a GraphQL provider function:
Create a new file named graphql.provider.ts inside the src/app directory:
import { Provider } from '@angular/core';
import { APOLLO_OPTIONS, Apollo } from 'apollo-angular';
import { HttpLink } from 'apollo-angular/http';
import { InMemoryCache } from '@apollo/client/cache';

export function provideApollo(): Provider[] {
  return [
    Apollo,
    {
      provide: APOLLO_OPTIONS,
      useFactory: (httpLink: HttpLink) => ({
        link: httpLink.create({ uri: 'YOUR_HASURA_GRAPHQL_ENDPOINT' }),
        cache: new InMemoryCache(),
      }),
      deps: [HttpLink],
    },
  ];
}
In this code:
- We import modules from
apollo-angularand@apollo/client. - Then we make use of the Angular
Providerfactory to create aprovideApollofunction. - Inside this factory,
HttpLinkcreates a network interface pointing to your GraphQL API endpoint. - The
InMemoryCacheadds client-side caching of GraphQL data, significantly improving performance.
Configure Apollo in app.config.ts:
Update app.config.ts to include the Apollo Client provider:
import { ApplicationConfig, provideZoneChangeDetection } from '@angular/core';
import { provideRouter } from '@angular/router';
import { provideHttpClient } from '@angular/common/http';
import { provideApollo } from './graphql.provider';
import { routes } from './app.routes';

export const appConfig: ApplicationConfig = {
  providers: [
    provideZoneChangeDetection({ eventCoalescing: true }),
    provideRouter(routes),
    provideHttpClient(), // Required for Apollo HTTP requests
    provideApollo(), // Apollo Client configuration
  ],
};
Here, provideHttpClient() enables Angular’s built-in HTTP client, which HttpLink uses, and provideApollo() registers our Apollo Client configuration.
Defining GraphQL queries and mutations
In GraphQL, queries and mutations define how an Angular application will interact with a GraphQL server. A simple query is used to fetch data, while a mutation modifies it.
We will use a gql tag to define these operations within our TypeScript code. This tag is already included in the @apollo/client library we installed earlier.
Create a GraphQL query:
To get started, create a new TypeScript file src/app/graphql/queries.ts and add the code below.
import { gql } from '@apollo/client/core';

export const GET_MEMBERS = gql`
  query GetMembers {
    members(order_by: { id: asc }) {
      id
      name
      username
      email
    }
  }
`;
This GET_MEMBERS query fetches a list of members, retrieving their id, name, username, and email from the GraphQL server. We also set an order_by: { id: asc } clause, which makes sure results are ordered by the id field in ascending order.
Create a GraphQL Mutation:
For the mutation, we would attempt to add a new member to our API. So let’s create another Typescript file src/app/graphql/mutations.ts, and add the code below:
import { gql } from '@apollo/client/core';

export const CREATE_MEMBER = gql`
  mutation CreateMember($name: String!, $username: String!, $email: String!) {
    insert_members_one(
      object: { name: $name, username: $username, email: $email }
    ) {
      id
      name
      username
      email
    }
  }
`;
This mutation accepts $name, $username, and $email as input variables, which we’ll pass when executing it.
Fetching Data with Queries
Now, let’s create an Angular component to display the fetched members.
- Generate an Angular component:
Use the Angular CLI to generate the member-list component, like this:
ng generate component components/member-list

- Fetch Data:
Next, proceed to fetch the data. Open src/app/components/member-list/member-list.component.ts and update it:
import { Component, OnInit } from '@angular/core';
import { CommonModule } from '@angular/common';
import { Apollo } from 'apollo-angular';
import { GET_MEMBERS } from '../../graphql/queries';

interface Member {
  id: string;
  name: string;
  email: string;
  username: string;
}

@Component({
  selector: 'app-member-list',
  standalone: true,
  imports: [CommonModule],
  template: `
    <div *ngIf="loading">Loading...</div>
    <div *ngIf="error">Error: {{ error.message }}</div>
    <table
      *ngIf="members && members.length > 0"
      style="border-collapse: collapse; width: 100%;"
    >
      <thead>
        <tr style="border-bottom: 1px solid #ddd; background-color: #f4f4f4;">
          <th style="padding: 8px; text-align: left;">Name</th>
          <th style="padding: 8px; text-align: left;">Username</th>
          <th style="padding: 8px; text-align: left;">Email</th>
        </tr>
      </thead>
      <tbody>
        <tr *ngFor="let member of members" style="border-bottom: 1px solid #ddd;">
          <td style="padding: 8px;">{{ member.name }}</td>
          <td style="padding: 8px;">{{ member.username }}</td>
          <td style="padding: 8px;">{{ member.email }}</td>
        </tr>
      </tbody>
    </table>
    <div *ngIf="members && members.length === 0">No users found.</div>
  `,
})

export class MemberListComponent implements OnInit {
  members: Member[] = [];
  loading = true;
  error: any;

  constructor(private apollo: Apollo) {}

  ngOnInit() {
    this.apollo
      .watchQuery<{ members: Member[] }>({
        query: GET_MEMBERS,
      })
      .valueChanges.subscribe(({ data, loading, error }) => {
        this.loading = loading;
        this.error = error;
        if (data) {
          this.members = data.members;
        }
      });
  }
}
In this component:
- We define the interface for the data and inject the
Apolloservice. - In
ngOnInit, we usewatchQueryto execute aGETusing theGET_MEMBERSquery. .valueChangesreturns an Observable that emits whenever the query result changes (either from the initial fetch or subsequent updates).- We then subscribe to this Observable to handle the
data,loading, anderrorstates.
- Update the App Component:
To display the MemberListComponent, update src/app/app.component.ts:
import { Component } from '@angular/core';
import { RouterOutlet } from '@angular/router';
import { MemberListComponent } from './components/member-list/member-list.component';

@Component({
  selector: 'app-root',
  imports: [RouterOutlet, MemberListComponent],
  templateUrl: './app.component.html',
  styleUrl: './app.component.css',
})
export class AppComponent {
  title = 'angular-graphql-app';
}
Then, include the MemberListComponent in our src/app/app.component.html file:
<main>
  <h1>Angular GraphQL Demo</h1>
  <app-member-list></app-member-list>
</main>
<router-outlet />
- Test the Query:
ng serve
Visit http://localhost:4200 in your browser to see the list of members.
Authorization
An important note here. When we go to the URL, the members we added will not be visible, due to this error:
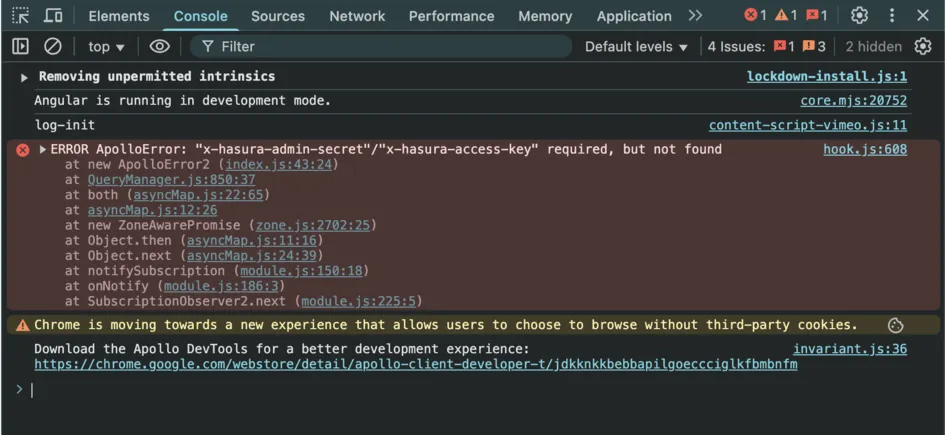
This is because our Hasura GraphQL API requires authorization before a request can be made.
At this stage, we need to update the src/app/graphql.provider.ts file with an authorisation header. But don’t worry, it’s easy: go back to your Hasura console and copy the x-hasura-admin-secret . This is your authorization token.
import { Provider } from '@angular/core';
import { APOLLO_OPTIONS, Apollo } from 'apollo-angular';
import { HttpLink } from 'apollo-angular/http';
import { InMemoryCache } from '@apollo/client/cache';
import { HttpHeaders } from '@angular/common/http';

const uri = 'YOUR_HASURA_GRAPHQL_ENDPOINT'; // Replace with your graphql endpoint
const adminSecret = 'YOUR_HASURA_ADMIN_SECRET'; // Replace with your admin secret

export function provideApollo(): Provider[] {
  return [
    Apollo,
    {
      provide: APOLLO_OPTIONS,
      useFactory: (httpLink: HttpLink) => ({
        link: httpLink.create({
          uri,
          headers: new HttpHeaders({
            'x-hasura-admin-secret': adminSecret,
          }),
        }),
        cache: new InMemoryCache(),
      }),
      deps: [HttpLink],
    },
  ];
}
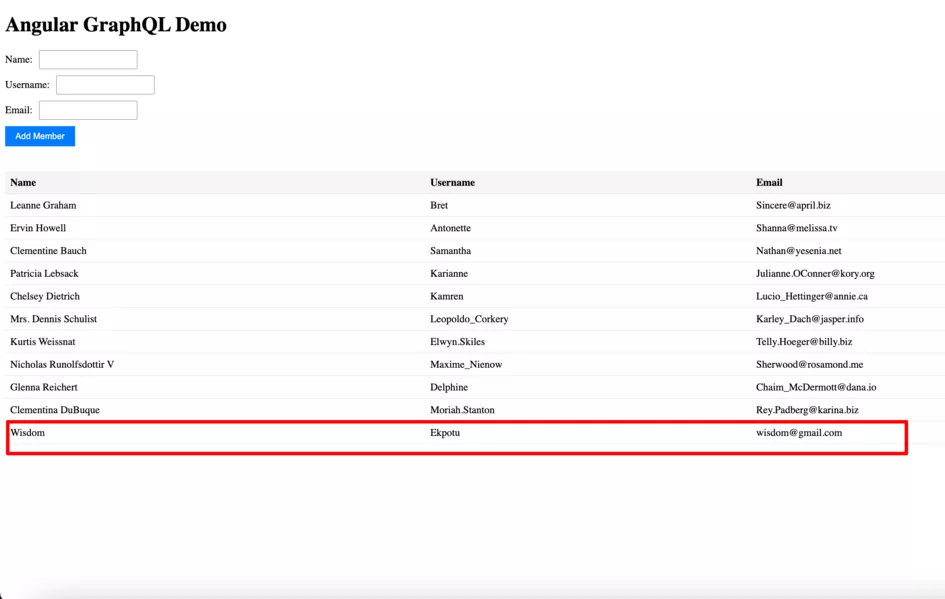
Here we make use of the HttpHeaders class from @angular/common/http to set up a custom HTTP immutable collection of HTTP headers.
The result should look like this:

Performing Mutations
As discussed above, mutations modify the data on the GraphQL server. Let’s demonstrate this point by creating a form for adding new members:
First, generate the component
ng generate component components/member-form
Then, create the form
Update src/app/components/member-form/member-form.component.ts:
import { Component } from '@angular/core';
import { FormsModule } from '@angular/forms';
import { CommonModule } from '@angular/common';
import { Apollo } from 'apollo-angular';
import { CREATE_MEMBER } from '../../graphql/mutations';
import { GET_MEMBERS } from '../../graphql/queries';

interface MemberInput {
  name: string;
  username: string;
  email: string;
}

interface CreateMemberResponse {
  insert_members_one: {
    id: number;
    name: string;
    username: string;
    email: string;
  };
}

@Component({
  selector: 'app-member-form',
  standalone: true,
  imports: [FormsModule, CommonModule],
  template: `
    <form (ngSubmit)="onSubmit()" style="margin: 20px 0;">
      <div style="margin-bottom: 10px;">
        <label for="name">Name:</label>
        <input
          id="name"
          [(ngModel)]="member.name"
          name="name"
          type="text"
          required
          style="margin-left: 10px; padding: 5px;"
        />
      </div>
      <div style="margin-bottom: 10px;">
        <label for="username">Username:</label>
        <input
          id="username"
          [(ngModel)]="member.username"
          name="username"
          type="text"
          required
          style="margin-left: 10px; padding: 5px;"
        />
      </div>
      <div style="margin-bottom: 10px;">
        <label for="email">Email:</label>
        <input
          id="email"
          [(ngModel)]="member.email"
          name="email"
          type="email"
          required
          style="margin-left: 10px; padding: 5px;"
        />
      </div>
      <button
        type="submit"
        [disabled]="
          !member.name || !member.username || !member.email || loading
        "
        style="padding: 8px 16px; background-color: #007bff; color: white; border: none; cursor: pointer;"
      >
        {{ loading ? 'Adding...' : 'Add Member' }}
      </button>
      <div *ngIf="error" style="color: red; margin-top: 10px;">
        Error: {{ error?.message }}
      </div>
      <div *ngIf="success" style="color: green; margin-top: 10px;">
        Member added successfully!
      </div>
    </form>
  `,
})
export class MemberFormComponent {
  member: MemberInput = { name: '', username: '', email: '' };
  error: any;
  success = false;
  loading = false;

  constructor(private apollo: Apollo) {}

  onSubmit() {
    this.loading = true;
    this.apollo
      .mutate<CreateMemberResponse>({
        mutation: CREATE_MEMBER,
        variables: this.member,
        update: (cache, { data }) => {
          if (data?.insert_members_one) {
            const existingMembers = cache.readQuery<{ members: any[] }>({
              query: GET_MEMBERS,
            });
            const newMember = data.insert_members_one;
            if (existingMembers) {
              cache.writeQuery({
                query: GET_MEMBERS,
                data: { members: [...existingMembers.members, newMember] },
              });
            }
          }
        },
      })
      .subscribe({
        next: () => {
          this.success = true;
          this.error = null;
          this.member = { name: '', username: '', email: '' };
          this.loading = false;
          setTimeout(() => (this.success = false), 3000);
        },
        error: (error) => {
          this.error = error;
          this.success = false;
          this.loading = false;
        },
      });
  }
}
In this component:
- We import
FormsModuleto handle the form inputs. - The template defines a simple form with input fields for name, username, and email, bound to the
memberobject usingngModel. - The
onSubmit()function is triggered when the form is submitted. - Inside
onSubmit(), we usethis.apollo.mutate()to execute theCREATE_MEMBERmutation, passing thememberdata as variables. - The
updatefunction is used to directly update the Apollo cache after a successful mutation. This ensures that theMemberListcomponent, which is also watching theGET_MEMBERSquery, will automatically re-render with the newly added member without needing a separate refetch. This is a form of optimistic UI (a design pattern that assumes an operation will be successful and cuts server response times). - The
subscribeblock handles the response from the mutation, setting thesuccessorerrorstates and clearing the form upon success.
Now, add to the app component
At this stage, we mustn’t forget to update src/app/app.component.ts to import member-form.component.ts:
import { Component } from '@angular/core';
import { RouterOutlet } from '@angular/router';
import { MemberListComponent } from './components/member-list/member-list.component';
import { MemberFormComponent } from './components/member-form/member-form.component';

@Component({
  selector: 'app-root',
  standalone: true,
  imports: [RouterOutlet, MemberListComponent, MemberFormComponent],
  templateUrl: './app.component.html',
  styleUrl: './app.component.css',
})
export class AppComponent {
  title = 'angular-graphql-app';
}
Update src/app/app.component.html to include the MemberFormComponent:
<main>
  <h1>Angular GraphQL Demo</h1>
  <app-member-form></app-member-form>
  <br>
  <app-member-list></app-member-list>
</main>
<router-outlet />
Now, when you run your application (ng serve), you should see the “Add Member” form above the member list. Proceed to fill out the form and submit it. This will add a new member to your Hasura backend, and due to the cache update in the mutation, the member list should update automatically.
Handling subscriptions
GraphQL subscriptions allow our app to listen and receive real-time updates from the server when specific events occur (e.g., a new member is added to the app). In our current setup, once a mutation occurs, the server gets updated and the page is modified immediately.
Unlike a mutation, subscriptions aren’t directly responsible for immediate UI updates after a mutation, but rather they keep our UI synchronised with the backend in real-time for changes that originate elsewhere. For example:
- If another user adds a new member through their application instance.
- If a backend process automatically adds a new member to the database.
Subscriptions are useful for real-time updates about changes made by other clients or processes that we didn’t initiate with our current mutation.
To get started, let’s create a new file, src/app/graphql/subscriptions.ts:
// src/app/graphql/subscriptions.ts
import { gql } from '@apollo/client/core';

export const MEMBER_ADDED = gql`
  subscription MemberAdded {
    members(order_by: { created_at: desc }, limit: 1) {
      id
      name
      username
      email
    }
  }
`;
Note that this MEMBER_ADDED subscription listens for new entries in the members table. It orders the results by created_at in descending order and limits the results to the latest one.
Configuring Apollo for HTTP and WebSocket links
To enable both standard GraphQL operations (queries and mutations) over HTTP and real-time subscriptions over WebSockets, we need to configure the Apollo client with the appropriate links.
Update your src/app/graphql.provider.ts to include the WebSocketLink configuration for subscriptions:
import { Provider } from '@angular/core';
import { APOLLO_OPTIONS, Apollo } from 'apollo-angular';
import { HttpLink } from 'apollo-angular/http';
import { InMemoryCache } from '@apollo/client/cache';
import { HttpHeaders } from '@angular/common/http';
import { WebSocketLink } from '@apollo/client/link/ws';
import { split, HttpLink as ApolloHttpLink } from '@apollo/client';
import { getMainDefinition } from '@apollo/client/utilities';

const httpUri = 'YOUR_HASURA_GRAPHQL_ENDPOINT'; // Replace with your graphql endpoint
const adminSecret = 'YOUR_HASURA_ADMIN_SECRET'; // Replace with your admin secret
const wsUri = 'wss://YOUR_HASURA_GRAPHQL_ENDPOINT';

export function provideApollo(): Provider[] {
  return [
    Apollo,
    {
      provide: APOLLO_OPTIONS,
      useFactory: (httpLink: HttpLink) => {
        const http = httpLink.create({
          uri: httpUri,
          headers: new HttpHeaders(
            adminSecret ? { 'x-hasura-admin-secret': adminSecret } : {}
          ),
        });

        const ws = new WebSocketLink({
          uri: wsUri,
          options: {
            reconnect: true,
            connectionParams: adminSecret
              ? { headers: { 'x-hasura-admin-secret': adminSecret } }
              : {},
          },
        });

        const link = split(
          ({ query }) => {
            const definition = getMainDefinition(query);
            return (
              definition.kind === 'OperationDefinition' &&
              definition.operation === 'subscription'
            );
          },
          ws,
          http
        );

        return {
          link,
          cache: new InMemoryCache(),
        };
      },
      deps: [HttpLink],
    },
  ];
}
A quick explanation of the changes:
With HttpLink initialisation already in place, we instantiate WebSocketLink, providing the WebSocket endpoint (wsUri). The options object configures the WebSocket connection:
reconnect: true, which ensures the client attempts to reconnect if the WebSocket connection is lost.connectionParams, which allows us to pass parameters during the initial WebSocket handshake.- We also include the authorisation header, just in case our GraphQL server requires it for subscriptions too.
The @apollo/client library provides a split function that allows us to conditionally route GraphQL operations to different links.
- The first argument to
splitis a predicate function that receives the GraphQL operation. We usegetMainDefinitionto determine the type of operation. If it’s asubscription, the function returnstrue. - The second argument is the
WebSocketLinkinstance (wsLinkInstance), which will be used for operations where the predicate returnstrue(i.e., subscriptions). - The third argument is the
HttpLinkinstance (httpLinkInstance), which will be used for operations where the predicate returnsfalse(i.e., queries and mutations).
By using split, we create a single link that Apollo Client can use. It intelligently routes each GraphQL operation to the appropriate transport layer (HTTP or WebSocket) based on its type. Finally, we return this combined link along with an InMemoryCache in the ApolloOptions.
After that, modify your member-list.component.ts as follows:
import { Component, OnInit, OnDestroy } from '@angular/core';
import { CommonModule } from '@angular/common';
import { Apollo } from 'apollo-angular';
import { GET_MEMBERS } from '../../graphql/queries';
import { MEMBER_ADDED } from '../../graphql/subscriptions';
import { Subscription } from 'rxjs';

interface Member {
  id: number;
  name: string;
  email: string;
  username: string;
}

@Component({
  selector: 'app-member-list',
  standalone: true,
  imports: [CommonModule],
  template: `
    <div *ngIf="loading">Loading...</div>
    <div *ngIf="error">Error: {{ error?.message }}</div>
    <table
      *ngIf="members && members.length > 0"
      style="border-collapse: collapse; width: 100%;"
    >
      <thead>
        <tr style="border-bottom: 1px solid #ddd; background-color: #f4f4f4;">
          <th style="padding: 8px; text-align: left;">Name</th>
          <th style="padding: 8px; text-align: left;">Username</th>
          <th style="padding: 8px; text-align: left;">Email</th>
        </tr>
      </thead>
      <tbody>
        <tr
          *ngFor="let member of members; trackBy: trackMember"
          style="border-bottom: 1px solid #ddd;"
        >
          <td style="padding: 8px;">{{ member.name }}</td>
          <td style="padding: 8px;">{{ member.username }}</td>
          <td style="padding: 8px;">{{ member.email }}</td>
        </tr>
      </tbody>
    </table>
    <div *ngIf="!loading && !error && (!members || members.length === 0)">
      No users found.
    </div>
  `,
})
export class MemberListComponent implements OnInit, OnDestroy {
  members: Member[] = [];
  loading = true;
  error: any;
  memberAddedSubscription: Subscription | undefined;

  constructor(private apollo: Apollo) {}

  ngOnInit() {
    this.apollo
      .watchQuery<{ members: Member[] }>({
        query: GET_MEMBERS,
      })
      .valueChanges.subscribe(({ data, loading, error }) => {
        this.loading = loading;
        this.error = error;
        if (data) {
          this.members = data.members;
        }
      });

    this.memberAddedSubscription = this.apollo
      .subscribe<{ members: Member[] }>({
        query: MEMBER_ADDED,
      })
      .subscribe(({ data }) => {
        if (data && data.members.length > 0) {
          const newMember = data.members[0];
          // Check if the new member already exists in the array
          if (!this.members.some((member) => member.id === newMember.id)) {
            this.members = [...this.members, newMember]; // Add to the end
            // If you want to add to the beginning:
            // this.members = [newMember, ...this.members];
          }
        }
      });
  }

  ngOnDestroy() {
    this.memberAddedSubscription?.unsubscribe();
  }

  trackMember(index: number, member: Member): number {
    return member.id;
  }
}
Changes to MemberListComponent:
- We import
MEMBER_ADDEDfrom oursubscriptions.tsfile. - We declare a
memberAddedSubscriptionof typeSubscription. - In
ngOnInit, after fetching the initial data withwatchQuery, we callthis.apollo.subscribe()with ourMEMBER_ADDEDsubscription. - The
.subscribe()on the subscription’s result will now emit whenever a new member is added to the backend. - Inside this subscription’s
subscribeblock, we take the new member, check if it already exists in our localmembersarray (to avoid duplicates), and if it’s new, we add it to the array and then re-sort the array byid. - Crucially, in
ngOnDestroy, we unsubscribe frommemberAddedSubscriptionto prevent memory leaks when the component is destroyed.
Testing the subscription
Let’s test out the subscriptions by interacting with the same app using multiple clients (two browsers in our case).
Open localhost:4200 in separate browser windows, side by side. In one browser, use the ‘Add Member’ form to add a new member and observe the member list in the other browser.
You should see the new member appear in real-time without needing to refresh the page. This demonstrates the power of GraphQL subscriptions in keeping multiple clients synchronized.
Handling Edge Cases
As with any development topic, we’re going to get edge cases – that’s just part of the game. But don’t stress – here’s some stuff that’ll help you.
- Data conflicts in collaborative environments.
If your application allows multiple users to modify the same data concurrently, you might encounter conflicts. In this case, implementing Optimistic Locking might be the way to go. By using a version number or a last_modified timestamp, when a mutation is sent, the server checks whether the version matches the current version in the database. If not, it rejects the mutation. The client can then refetch the latest data, and the user can reapply their changes.
- Real-time connection interruption and data loss.
WebSocket connections for subscriptions can be unstable, which means you might experience disconnections, and in some cases, you could miss events that occurred during the disconnection. To handle this, you can implement a robust reconnection strategy with Exponential backoff.
- Throttling and rate limiting.
GraphQL APIs might implement throttling or rate limiting to prevent abuse. This could lead to your application receiving errors if it makes too many requests in a short period. In this case, it’s worth implementing client-side logic to limit the frequency of API calls, especially for actions triggered by rapid user input. Also, for failed requests due to rate limiting (often indicated by specific HTTP status codes or error messages), try implementing retry mechanisms with exponential backoff to avoid overwhelming the server.
- Partial data and data inconsistencies.
Your GraphQL server might return partial data due to errors resolving certain fields. You might receive a data object with some fields populated and others as null or undefined. You also need to note that the data in your cache might become inconsistent with the server if updates aren’t handled carefully.
You can consider the following options:
- Design your UI to gracefully handle missing or
nulldata. Use safe navigation operators (?.) in your templates to avoid errors when accessing potentially null properties. - Cache invalidation: Understand Apollo Client’s cache behaviour. In some error scenarios or after certain mutations, you might need to manually invalidate parts of the cache using
cache.evict()orcache.reset()to ensure the next query fetches fresh data from the server. - Error boundaries: In more complex UIs, consider using error boundary patterns to catch errors within specific parts of your component tree, without crashing the entire application.
Type safety with GraphQL codegen
Now let’s go even further. We can enhance the robustness of our Angular application and catch potential errors at compile time by leveraging GraphQL Codegen. This tool will generate TypeScript types from our GraphQL schema and operations (queries, mutations, subscriptions).
Install dependencies.
Run the following command to install the necessary Codegen packages:
npm install --save-dev @graphql-codegen/cli @graphql-codegen/typescript @graphql-codegen/typescript-operations @graphql-codegen/typescript-apollo-angular
Configure codegen.
Create a codegen.yml file in the root of your project:
schema: YOUR_HASURA_GRAPHQL_ENDPOINT/v1/graphql # Replace with your endpoint
documents: 'src/app/graphql/**/*.ts'
generates:
  src/app/graphql/generated.ts:
    plugins:
      - typescript
      - typescript-operations
      - typescript-apollo-angular
Replace YOUR_HASURA_GRAPHQL_ENDPOINT/v1/graphql with your actual Hasura GraphQL endpoint.
Generate types.
Run the Codegen command:
npx graphql-codegen
This will generate the src/app/graphql/generated.ts file, containing strongly typed interfaces and GraphQL operation services.
Using generated types.
Let’s see how we can use these generated types in our MemberListComponent:
import { Component, OnInit, OnDestroy } from '@angular/core';
import { CommonModule } from '@angular/common';
import { Apollo } from 'apollo-angular';
import {
  GetMembersQuery, // Generated type for our GetMembers query result
  GetMembersGQL,   // Generated GraphQL service for GetMembers query
  MemberAddedSubscription, // Generated type for our MemberAdded subscription result
  MemberAddedGQL,  // Generated GraphQL service for MemberAdded subscription
} from '../../graphql/generated';
import { Subscription } from 'rxjs';

@Component({
  selector: 'app-member-list',
  standalone: true,
  imports: [CommonModule],
  templateUrl: './member-list.component.html',
  // Template remains the same
  template: `
    <div *ngIf="loading">Loading...</div>
    <div *ngIf="error">Error: {{ error?.message }}</div>
    <table
      *ngIf="members && members.length > 0"
      style="border-collapse: collapse; width: 100%;"
    >
      <thead>
        <tr style="border-bottom: 1px solid #ddd; background-color: #f4f4f4;">
          <th style="padding: 8px; text-align: left;">Name</th>
          <th style="padding: 8px; text-align: left;">Username</th>
          <th style="padding: 8px; text-align: left;">Email</th>
        </tr>
      </thead>
      <tbody>
        <tr
          *ngFor="let member of members; trackBy: trackMember"
          style="border-bottom: 1px solid #ddd;"
        >
          <td style="padding: 8px;">{{ member.name }}</td>
          <td style="padding: 8px;">{{ member.username }}</td>
          <td style="padding: 8px;">{{ member.email }}</td>
        </tr>
      </tbody>
    </table>
    <div *ngIf="!loading && !error && (!members || members.length === 0)">
      No users found.
    </div>
  `,
})
export class MemberListComponent implements OnInit, OnDestroy {
  members: GetMembersQuery['members'] = []; // Use the generated type
  loading = true;
  error: any;
  memberAddedSubscription: Subscription | undefined;

  constructor(
    private getMembersGQL: GetMembersGQL, // Inject the generated query service
    private memberAddedGQL: MemberAddedGQL // Inject the generated subscription service
  ) {}

  ngOnInit() {
    this.getMembersGQL
      .watch({} /* Add variables if needed */)
      .valueChanges.subscribe(({ data, loading, error }) => {
        this.loading = loading;
        this.error = error;
        if (data?.members) {
          this.members = [...data.members].sort((a, b) => a.id - b.id);
        }
      });

    this.memberAddedSubscription = this.memberAddedGQL
      .subscribe({})
      .subscribe(({ data }) => {
        if (data?.members?.length > 0 && data.members[0]) {
          const newMember = data.members[0];
          if (!this.members.some((member) => member.id === newMember.id)) {
            this.members = [...this.members, newMember].sort((a,b.id - b.id);
          }
        }
      });
  }

  ngOnDestroy() {
    if (this.memberAddedSubscription) {
      this.memberAddedSubscription.unsubscribe();
    }
  }

  trackMember(index: number, member: GetMembersQuery['members'][0]): number {
    return member.id;
  }
}
In this updated component:
- We import the generated types (
GetMembersQuery,GetMembersGQL,MemberAddedSubscription,MemberAddedGQL). - We inject the generated GraphQL services (
GetMembersGQL,MemberAddedGQL). - We use the generated
GetMembersQuery['members']type for ourmembersarray, providing compile-time type checking. - We use the
GetMembersGQLservice’swatch()method to execute the query and theMemberAddedGQLservice’ssubscribe()method for the subscription. - The
trackMemberfunction now also uses the generated type for themember.
Common Pitfalls When Working with GraphQL
Finally, let’s look at some of the sneaky traps we can encounter. While GraphQL offers a lot of advantages to frontend development, there are still some mistakes that developers often make when integrating with Angular. They include;
- Over-fetching.
You would think that most developers would stick to using GraphQL in the way it was intended, but sometimes they do not carefully select the fields they need in their queries. The issue is that even though GraphQL allows you to specify, you might still inadvertently fetch more data than your component uses. So be sure to regularly review your queries as your UI evolves, to ensure efficient data-fetching.
- Not unsubscribing from subscriptions.
Developers might often forget to unsubscribe from the Observables returned by apollo.subscribe(). This can lead to memory leaks as the subscription might continue to listen for events even after the component is destroyed. You should always implement the OnDestroy interface in your components and call the unsubscribe() method on your subscription objects within the ngOnDestroy() lifecycle hook.
- Not using GraphQL Codegen for type safety.
Choosing not to use GraphQL Codegen can lead to runtime errors due to type mismatches between your GraphQL operations and your TypeScript code. Integrating it into your development workflow will significantly improve code reliability.
Key takeaways
Ok, we’re done for the day! Pretty comprehensive, right? We hope you’ve enjoyed this guide and now feel confident adding GraphQL into your developer’s toolkit.
Before we go, however, we want to give you some specific stuff to take away. Here’s what we want to emphasise:
- Use Apollo Client’s Cache and leverage the
InMemoryCacheto reduce server load. - Make sure that you structure your queries to match the GraphQL schema.
- Always display a loading state to improve the user experience.
- Ensure type safety by using GraphQL Codegen.
- Ensure you store your GraphQL tokens securely.
- Only fetch the data you need at a time
And that’s it! You now know how to integrate GraphQL in Angular apps. If you want to learn more, head over to the official GraphQL documentation. And if you want to speak to us about any of this, be sure to hit us up.
Happy Coding team!
Expect The Unexpected!
Debug Faster With Bugfender