51 Minutes
Build Real-Time Android Apps with WebSockets and Kotlin
Fix Bugs Faster! Log Collection Made Easy
Before we get started on WebSocket integration, it’s worth quickly explaining how building real-time mobile apps used to work – and why issues with lag and latency led engineers to turn to WebSockets instead.
Engineers building real-time Android apps struggled to make sure updates were reflected immediately when a user sent them. To solve this, they tried polling, which meant firing off a GET request to the server, say every five seconds, to a /messages endpoint. But engineers quickly ran into problems.
This is because each request spins up a new:
- TCP handshake: When a client sends a SYN (synchronize) message to the server requesting to connect, the server responds with a SYN-ACK (synchronize-acknowledge), and the client replies with an ACK (acknowledge) confirming everything is synced up. That’s three round trips for a single request.
- TLS negotiation: This begins when the TCP handshake is complete, to make sure the connection is secure (think HTTPS). A key exchange occurs here between the client and server to protect the data. Depending on the TLS version, it can add another two to three round-trips.
- Payload: Only after the handshake and negotiation are done does the data get sent.
All of these round trips take a lot of time.
On the client side, the radio resource control (RRC) protocol wakes up for every request, from RRC_IDLE to RRC_CONNECTED, using up ~100- 200mA for one to two seconds (even on 4G networks). Latency becomes very laggy as messages sent at t=0 might sit until the next poll at t=3s, hence averaging a 1.5-second delay. As well as extra time, this back-and-forth uses more energy too. The device battery could drain 10-15% quicker under this load.
Introducing the solution: Android WebSockets
An Android WebSocket is a protocol that establishes a persistent bidirectional communication (full-duplex data exchange) between clients and servers without the overhead of traditional HTTP polling. This open connection makes WebSockets ideal for mobile apps like chat applications, live notifications, or collaborative tools requiring instant updates.
In this article, you will learn how to use the WebSocket API when building a simple chat app in Kotlin and how to connect to a simple WebSocket test server. At the end of this tutorial, you will understand advanced concepts like different edge cases, reconnection strategies, and working with binary data.
Prerequisites
Before we begin, ensure you have:
- Android Studio Installed – Visit the official website, download the latest version and follow the installation wizard for your OS (Windows, macOS, Linux).
- Working Knowledge of Kotlin: Familiarity with Jetpack Compose and Android development concepts.
- A Physical Device or Emulator: Running Android 7.0 (API level 24) or higher.
Setting Up Android Studio
At the time of this tutorial, we are making use of the Meerkat version. Now, after installing Android Studio, proceed to update some SDK components as recommended.
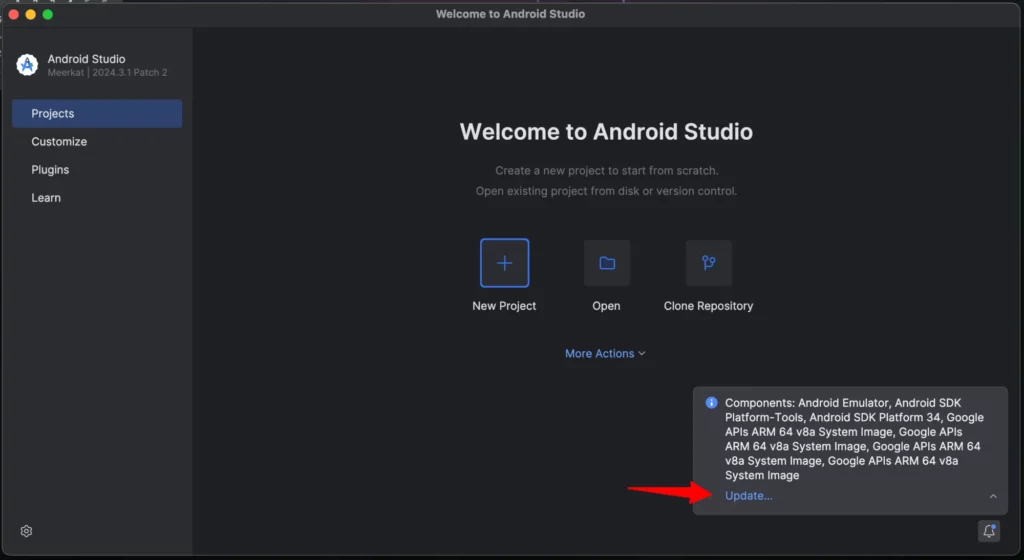
Click “Update Now”:
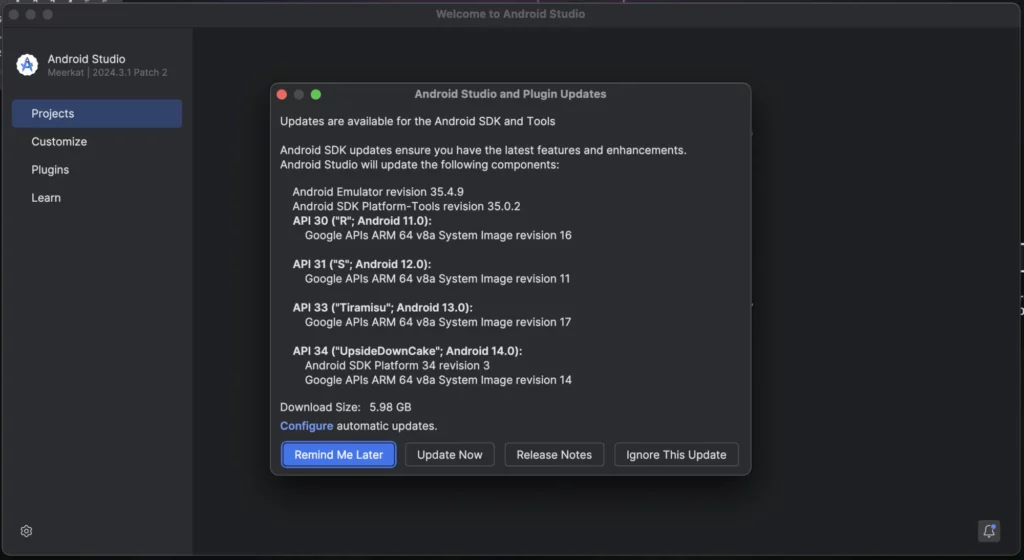
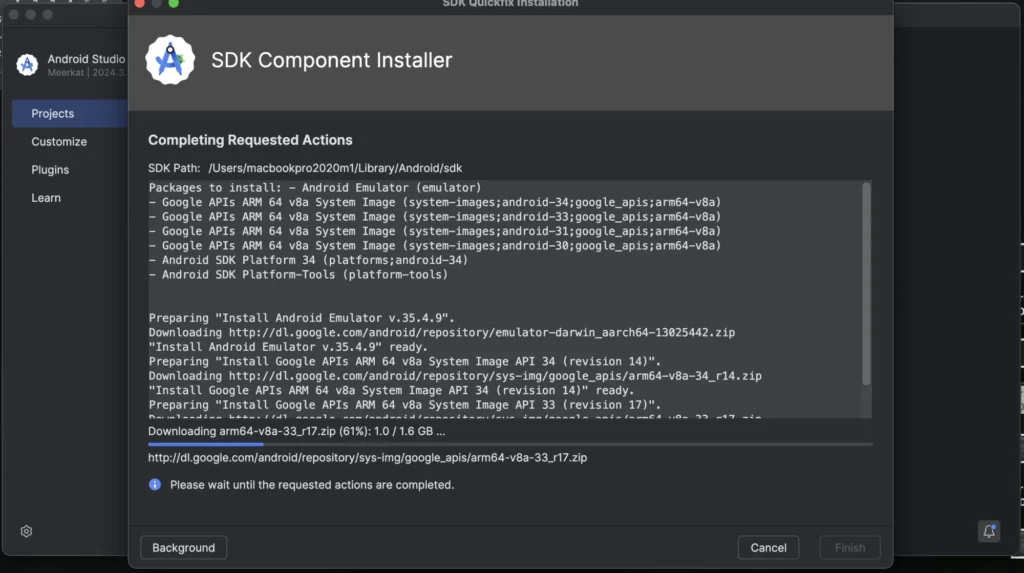
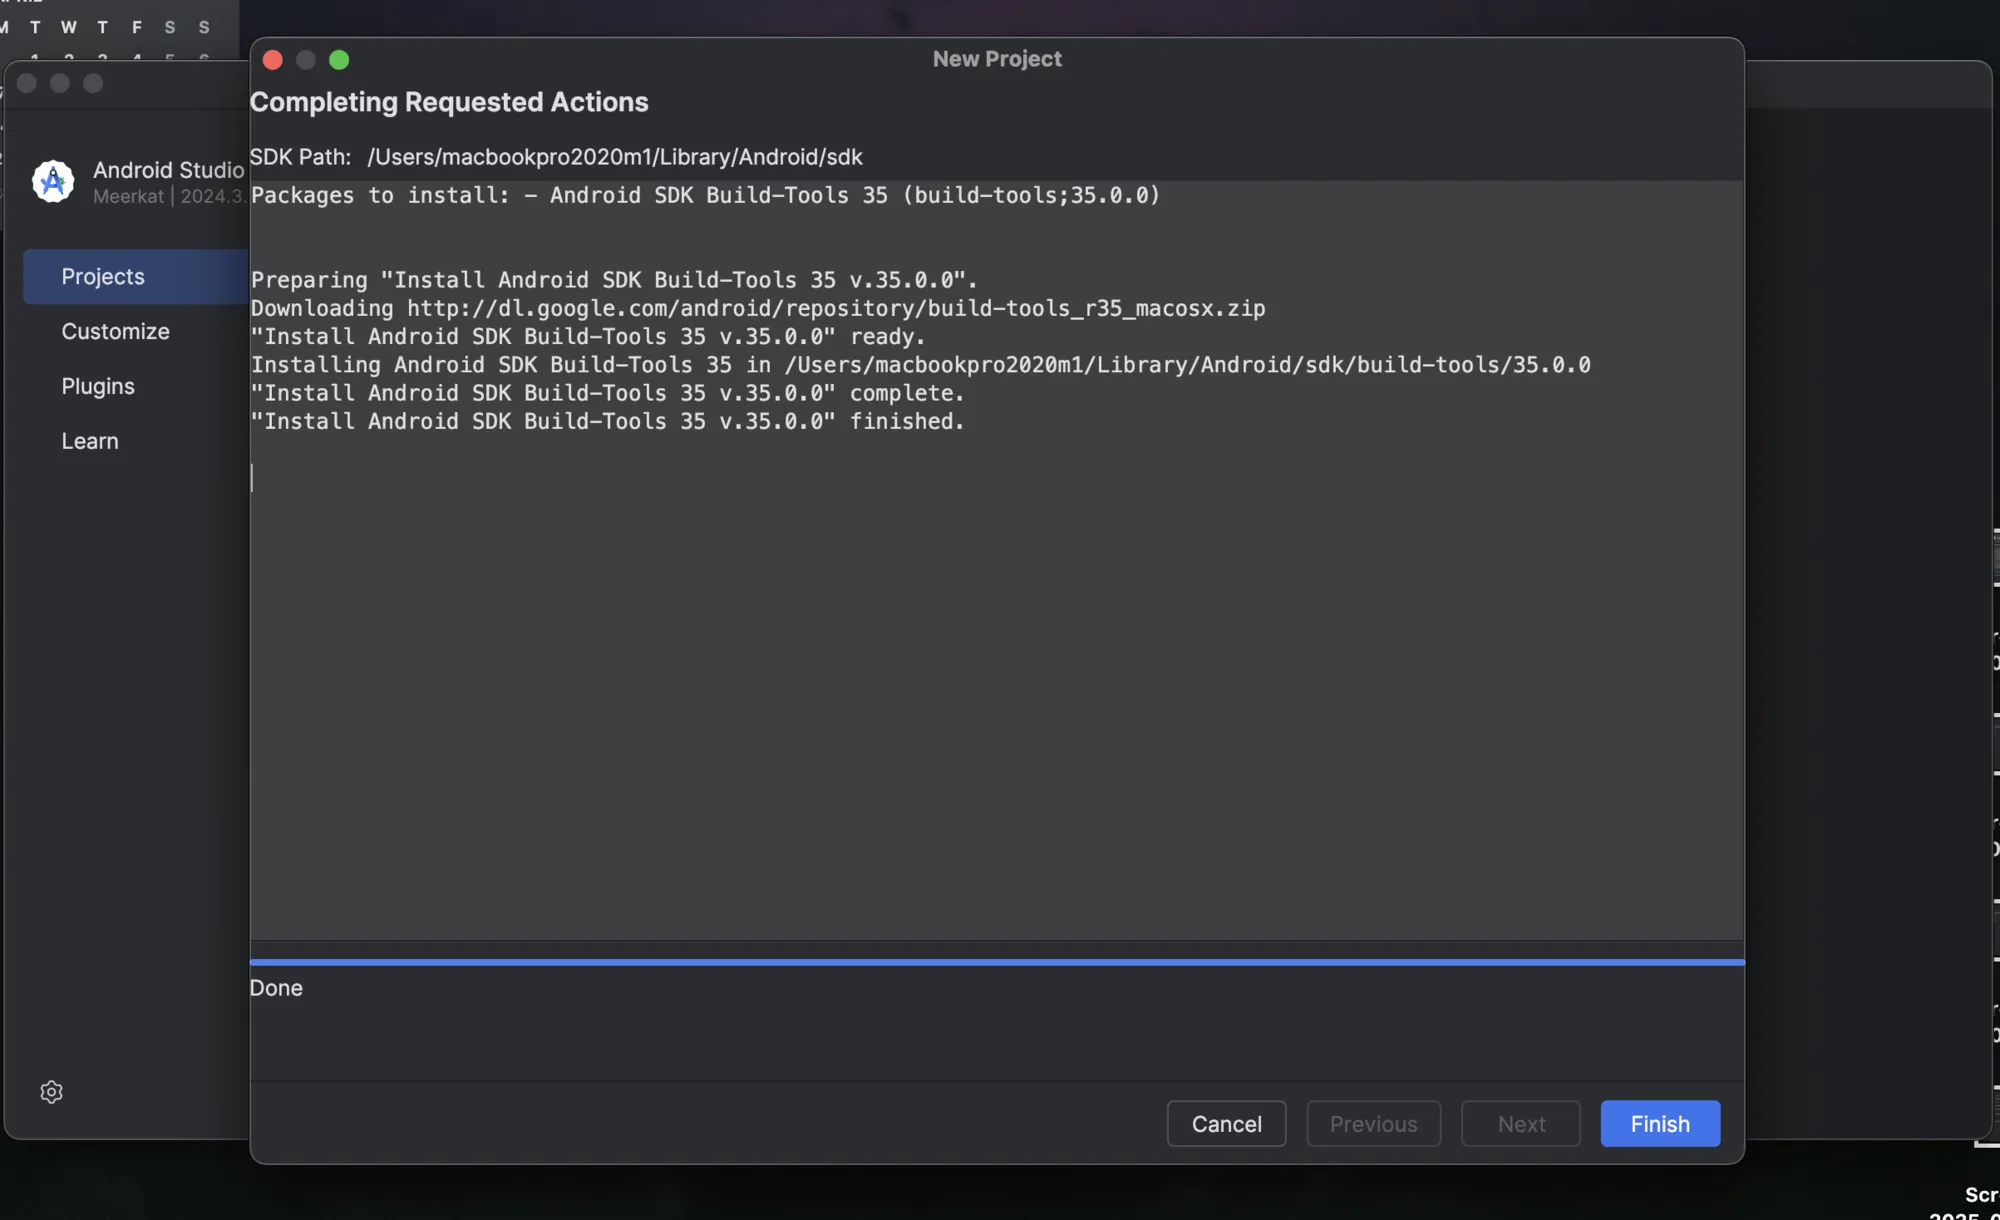
If you have an existing installation, go to File > Settings > Appearance & Behavior > System Settings > Android SDK, and update to the latest SDK tools and platforms (API 34+ recommended).
Create a new project
- Launch Android Studio and navigate to File > New > New Project.
- Select “Empty Activity” and click “Next”.

- Configure your project with the following details:
- Name:
WebSocketChatApp - Package name:
com.example.websocketchatapp - Build configuration language: Kotlin DSL
- Minimum SDK: API 24 (”Nougat”; Android 7.0). This is so that your application can run on 98.6% of Android devices.
- Name:
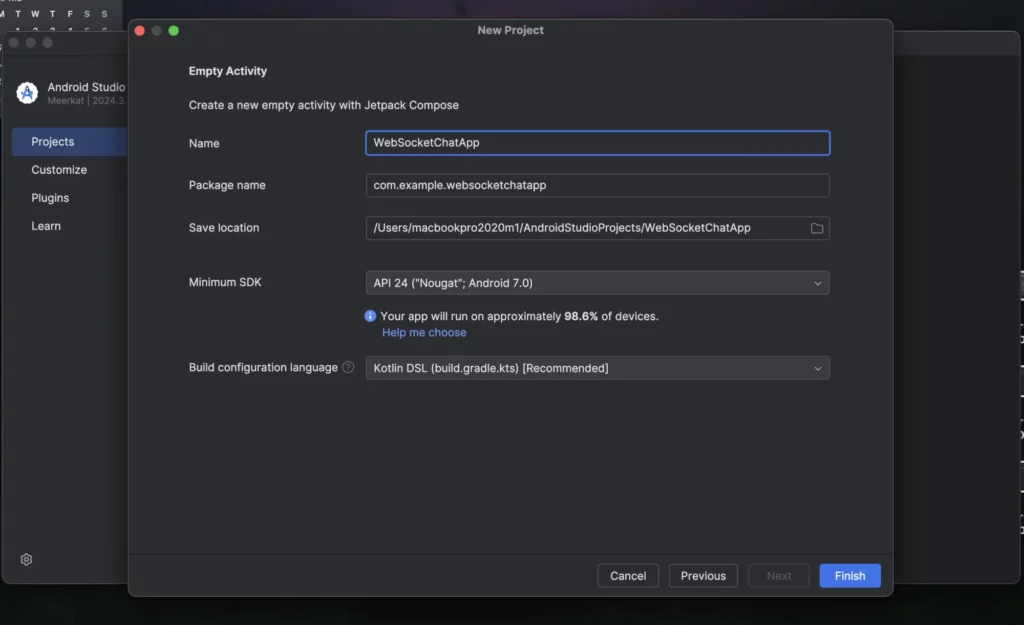
- Click “Finish” to create the project.
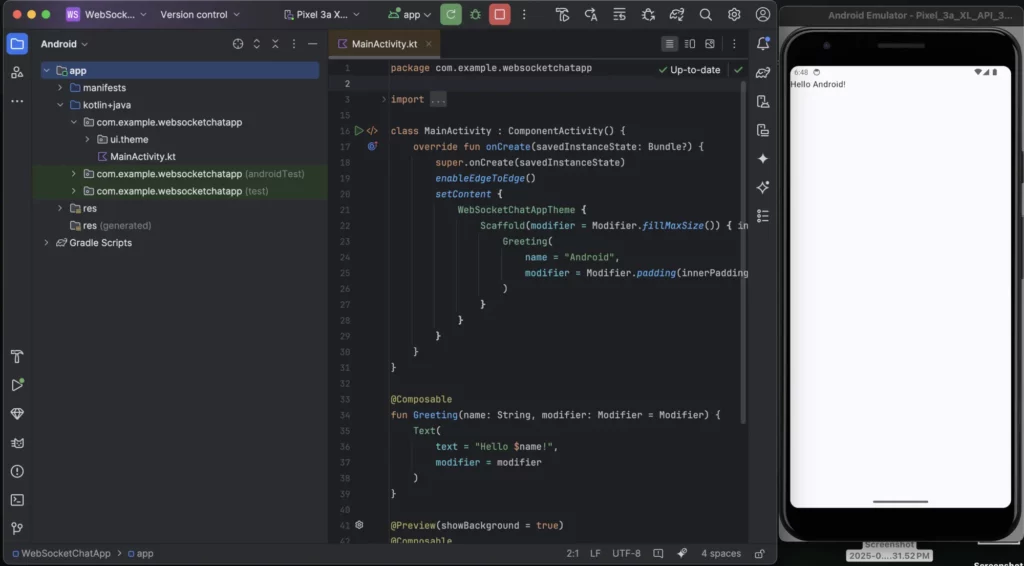
- Verify your setup:
Before you proceed, you should run the app to ensure that the project builds successfully without any errors. As you can see below, everything runs fine.
Enable Internet Permission
In AndroidManifest.xml, add this code above the <application> tag:
<uses-permission android:name="android.permission.INTERNET" />
<uses-permission android:name="android.permission.ACCESS_NETWORK_STATE" /> <!-- For network connectivity monitoring -->
Installing Required Dependencies
In Android, WebSocket functionality isn’t natively supported by the SDK. However, libraries such as OkHttp, Ktor, and Java-WebSocket make integration possible.
For this tutorial, we will be using a third-party WebSocket library called OKttps, due to its popularity and robust WebSocket support.
Update Gradle Version Catalog:
Since our project uses libs.versions.toml to manage dependencies, you will have to declare the lifecycle version in the catalog.
Open gradle/libs.versions.toml and append them:
[versions]
agp = "8.9.2"
kotlin = "2.0.21"
coreKtx = "1.10.1"
junit = "4.13.2"
junitVersion = "1.1.5"
espressoCore = "3.5.1"
lifecycleRuntimeKtx = "2.6.1"
activityCompose = "1.8.0"
composeBom = "2024.09.00"
okhttp = "4.12.0"
lifecycle = "2.8.7"
coroutines = "1.10.2"
Then add the libraries as so:
[libraries]
# Existing libraries...

okhttp = { module = "com.squareup.okhttp3:okhttp", version.ref = "okhttp" }
androidx-lifecycle-viewmodel-compose = { module = "androidx.lifecycle:lifecycle-viewmodel-compose", version.ref = "lifecycle" }
kotlinx-coroutines-android = { module = "org.jetbrains.kotlinx:kotlinx-coroutines-android", version.ref = "coroutines" }
Update build.gradle.kts:
Following the existing convention, ensure your build.gradle references it correctly:
dependencies {
    // Existing dependencies...
    implementation(libs.okhttp)
    implementation(libs.androidx.lifecycle.viewmodel.compose)
    implementation(libs.kotlinx.coroutines.android)
}
Then click “Sync Now” to download the dependencies.
File Structure
Go ahead and create these files and folders under app/src/main/java/com/example/websocketchatapp:
├── src/
│   ├── main/
│   │   ├── java/com/example/websocketchatapp/
│   │   │   ├── MainActivity.kt              # Entry point
│   │   │   ├── WebSocketViewModel.kt        # WebSocket logic
│   │   │   ├── model/
│   │   │   │   ├── Message.kt               # Message data model
│   │   │   ├── ui.theme/
│   │   │   │   ├── ChatScreen.kt            # Main chat UI
│   │   │   │   ├── components/
│   │   │   │   │   ├── MessageBubble.kt     # Message UI component
│   │   │   │   ├── theme/
│   │   │   │   │   ├── Color.kt
│   │   │   │   │   ├── Theme.kt
│   │   │   │   │   ├── Type.kt
Define the Message Model
Create Message.kt in the model package to represent chat messages:
package com.example.websocketchatapp.model

data class Message(
    val text: String,
    val isSentByUser: Boolean,
    val timestamp: Long = System.currentTimeMillis()
)
text: This is the message content.isSentByUser: Will be true for user messages (right-aligned, green), false for other (response) (left-aligned, white).timestamp: We will use this for ordering and displaying time.
Implementing the WebSocket ViewModel
Our WebSocketViewModel.kt file will manage WebSocket connections, message sending, and state. To keep the focus of this article on Android – and for you to follow along without the need to set up or connect to a live server – we’ll use a test server endpoint that emulates the behavior of a real WebSocket server.
We’ll use wss://echo.websocket.events, since echo.websocket.org has shut down and is no longer available. This address simply echos back any message you send to it, making it a useful tool for testing. Remember though, that when building a production Android app, you will have to replace this with your own WebSocket server URL.
package com.example.websocketchatapp

import androidx.compose.runtime.mutableStateListOf
import androidx.lifecycle.ViewModel
import androidx.lifecycle.viewModelScope
import com.example.websocketchatapp.model.Message
import kotlinx.coroutines.Dispatchers
import kotlinx.coroutines.flow.MutableStateFlow
import kotlinx.coroutines.flow.StateFlow
import kotlinx.coroutines.launch
import okhttp3.OkHttpClient
import okhttp3.Request
import okhttp3.Response
import okhttp3.WebSocket
import okhttp3.WebSocketListener

class WebSocketViewModel : ViewModel() {
    private val client = OkHttpClient()
    private var webSocket: WebSocket? = null
    private val _messages = mutableStateListOf<Message>()
    val messages: List<Message> get() = _messages
    private val _isConnected = MutableStateFlow(false)
    val isConnected: StateFlow<Boolean> = _isConnected

    fun connect() {
        val request = Request.Builder()
            .url("wss://echo.websocket.events")
            .build()
        webSocket = client.newWebSocket(request, object : WebSocketListener() {
            override fun onOpen(webSocket: WebSocket, response: Response) {
                _isConnected.value = true
                _messages.add(Message("Connected to server", false))
            }

            override fun onMessage(webSocket: WebSocket, text: String) {
                viewModelScope.launch {
                    _messages.add(Message(text, false))
                }
            }

            override fun onFailure(webSocket: WebSocket, t: Throwable, response: Response?) {
                viewModelScope.launch {
                    _isConnected.value = false
                    _messages.add(Message("Connection failed: ${t.message}", false))
                }
            }

            override fun onClosing(webSocket: WebSocket, code: Int, reason: String) {
                _isConnected.value = false
                _messages.add(Message("Connection closing: $reason", false))
            }
        })
    }

    fun sendMessage(text: String) {
        if (_isConnected.value) {
            webSocket?.send(text)
            _messages.add(Message(text, true))
        } else {
            _messages.add(Message("Not connected", false))
        }
    }

    fun disconnect() {
        webSocket?.close(1000, "User disconnected")
        client.dispatcher.executorService.shutdown()
    }

    override fun onCleared() {
        disconnect()
        super.onCleared()
    }
}
This code defines a WebSocketViewModel class that initializes the OkHttpClient instance and maintains a nullable WebSocket object to represent the WebSocket connection. The ViewModel keeps track of all messages in a mutableStateListOf, so the UI (built with Jetpack Compose) updates automatically when new messages arrive.
We then employ MutableStateFlow, which is a reactive data type from Kotlin Coroutines that stores a list of messages exchanged during the session and lets the UI know if the connection is active.
When a user initiates a connection through the connect() method, the client establishes communication with a WebSocket server (wss://echo.websocket.events). This WebSocket connection is monitored via a WebSocketListener, which reacts to various events such as a successful establishment (onOpen), message reception (onMessage), connection closing (onClosing), failure (onFailure), updating the message list and connection status as things happen.
Each event updates _messages, ensuring that the latest state of the conversation is captured and accessible through messages.
The sendMessage() function attempts to transmit user messages via the active WebSocket connection, appending the sent message to _messages if the operation succeeds, or recording an error if the connection is unavailable.
The disconnect() method gracefully closes the connection using WebSocket’s standard closing status code (1000) while notifying the server that the user has disconnected.
Finally, the ViewModel makes sure to tidy up when it’s no longer needed by closing the WebSocket in onCleared(). Also, don’t forget to sync Gradle.
Creating the message bubble component
Create MessageBubble.kt in ui.theme/components to render individual messages:
package com.example.websocketchatapp.ui.theme.components

import androidx.compose.foundation.background
import androidx.compose.foundation.layout.Box
import androidx.compose.foundation.layout.Column
import androidx.compose.foundation.layout.fillMaxWidth
import androidx.compose.foundation.layout.padding
import androidx.compose.foundation.shape.RoundedCornerShape
import androidx.compose.material3.MaterialTheme
import androidx.compose.material3.Text
import androidx.compose.runtime.Composable
import androidx.compose.ui.Alignment
import androidx.compose.ui.Modifier
import androidx.compose.ui.graphics.Color
import androidx.compose.ui.unit.dp
import com.example.websocketchatapp.model.Message
import java.text.SimpleDateFormat
import java.util.Date
import java.util.Locale

@Composable
fun MessageBubble(message: Message) {
    val alignment = if (message.isSentByUser) Alignment.TopEnd else Alignment.TopStart
    val backgroundColor = if (message.isSentByUser) Color(0xFFDCF8C6) else Color(0xFFFFFFFF)
    val shape = RoundedCornerShape(
        topStart = 8.dp,
        topEnd = 8.dp,
        bottomStart = if (message.isSentByUser) 8.dp else 0.dp,
        bottomEnd = if (message.isSentByUser) 0.dp else 8.dp
    )

    Box(
        modifier = Modifier
            .fillMaxWidth()
            .padding(horizontal = 16.dp, vertical = 4.dp),
        contentAlignment = alignment
    ) {
        Column(
            modifier = Modifier
                .background(backgroundColor, shape)
                .padding(12.dp)
        ) {
            Text(
                text = message.text,
                style = MaterialTheme.typography.bodyMedium
            )
            Text(
                text = SimpleDateFormat("HH:mm", Locale.getDefault()).format(Date(message.timestamp)),
                style = MaterialTheme.typography.labelSmall,
                color = Color.Gray,
                modifier = Modifier.align(Alignment.End)
            )
        }
    }
}
In this file, we define the Jetpack Compose component to render individual chat messages.
The MessageBubble composable takes the Message object and dynamically aligns the message bubble based on whether it was sent by the user (Alignment.End for right-aligned user messages) or someone else (Alignment.Start for left-aligned messages), just as in most chat apps like WhatsApp.
We also specified distinct colours, green (#DCF8C6) for the user messages and white (#FFFFFF) for others (i.e. the echo server response).
The component is structured using a Box for alignment and a Column to stack the message text and timestamp.
Create the Chat Screen (main UI)
In ChatScreen.kt , add the code below:
package com.example.websocketchatapp.ui.theme

import androidx.compose.foundation.background
import androidx.compose.foundation.layout.*
import androidx.compose.foundation.lazy.LazyColumn
import androidx.compose.foundation.lazy.items
import androidx.compose.foundation.lazy.rememberLazyListState
import androidx.compose.foundation.shape.RoundedCornerShape
import androidx.compose.material3.*
import androidx.compose.runtime.*
import androidx.compose.ui.Alignment
import androidx.compose.ui.Modifier
import androidx.compose.ui.graphics.Color
import androidx.compose.ui.unit.dp
import com.example.websocketchatapp.WebSocketViewModel
import com.example.websocketchatapp.ui.theme.components.MessageBubble

@Composable
fun ChatScreen(viewModel: WebSocketViewModel, modifier: Modifier = Modifier) {
    val messages by remember { derivedStateOf { viewModel.messages } }
    val isConnected by viewModel.isConnected.collectAsState()
    val listState = rememberLazyListState()

    LaunchedEffect(messages) {
        if (messages.isNotEmpty()) {
            listState.animateScrollToItem(messages.size - 1)
        }
    }

    Column(
        modifier = Modifier
            .fillMaxSize()
            .background(MaterialTheme.colorScheme.background)
    ) {
        TopAppBar(
            title = { Text("WebSocket Chat") },
            actions = {
                Button(
                    onClick = { if (isConnected) viewModel.disconnect() else viewModel.connect() },
                    colors = ButtonDefaults.buttonColors(
                        containerColor = if (isConnected) Color.Red else Color.Green
                    )
                ) {
                    Text(if (isConnected) "Disconnect" else "Connect")
                }
            }
        )

        LazyColumn(
            modifier = Modifier
                .weight(1f)
                .fillMaxWidth(),
            state = listState,
            contentPadding = PaddingValues(vertical = 8.dp)
        ) {
            items(messages) { message ->
                MessageBubble(message)
            }
        }

        Row(
            modifier = Modifier
                .fillMaxWidth()
                .padding(16.dp),
            verticalAlignment = Alignment.CenterVertically
        ) {
            var messageText by remember { mutableStateOf("") }
            OutlinedTextField(
                value = messageText,
                onValueChange = { messageText = it },
                modifier = Modifier
                    .weight(1f)
                    .padding(end = 8.dp),
                placeholder = { Text("Type a message") },
                shape = RoundedCornerShape(24.dp)
            )
            Button(
                onClick = {
                    if (messageText.isNotBlank()) {
                        viewModel.sendMessage(messageText)
                        messageText = ""
                    }
                },
                enabled = isConnected && messageText.isNotBlank()
            ) {
                Text("Send")
            }
        }
    }
}
TopAppBar: Shows the app title and a connect/disconnect button (green for connect, red for disconnect).LazyColumn: Displays messages and usesLaunchedEffectfor auto-scrolling to the latest message.Input Row: Includes a text field and a send button, which is disabled when the device is disconnected or the text field is empty.
Update MainActivity:
Modify MainActivity.kt to set up the Compose UI and ViewModel:
package com.example.websocketchatapp

import android.os.Bundle
import androidx.activity.ComponentActivity
import androidx.activity.compose.setContent
import androidx.activity.enableEdgeToEdge
import androidx.compose.foundation.layout.fillMaxSize
import androidx.compose.foundation.layout.padding
import androidx.compose.material3.Scaffold
import androidx.compose.ui.Modifier
import com.example.websocketchatapp.ui.theme.ChatScreen
import com.example.websocketchatapp.ui.theme.WebSocketChatAppTheme

class MainActivity : ComponentActivity() {
    override fun onCreate(savedInstanceState: Bundle?) {
        super.onCreate(savedInstanceState)
        enableEdgeToEdge()
        val viewModel = WebSocketViewModel()
        setContent {
            WebSocketChatAppTheme {
                Scaffold(modifier = Modifier.fillMaxSize()) { innerPadding ->
                    ChatScreen(
                        viewModel = viewModel,
                        modifier = Modifier
                            .fillMaxSize()
                            .padding(innerPadding)
                    )
                }
            }
        }
    }
}
Now, run your application on an emulator or physical device. Click Connect to establish a WebSocket connection to wss://echo.websocket.events. Then type a message and click Send.
It should appear on the right (green), and the echo server returns it on the left (white).
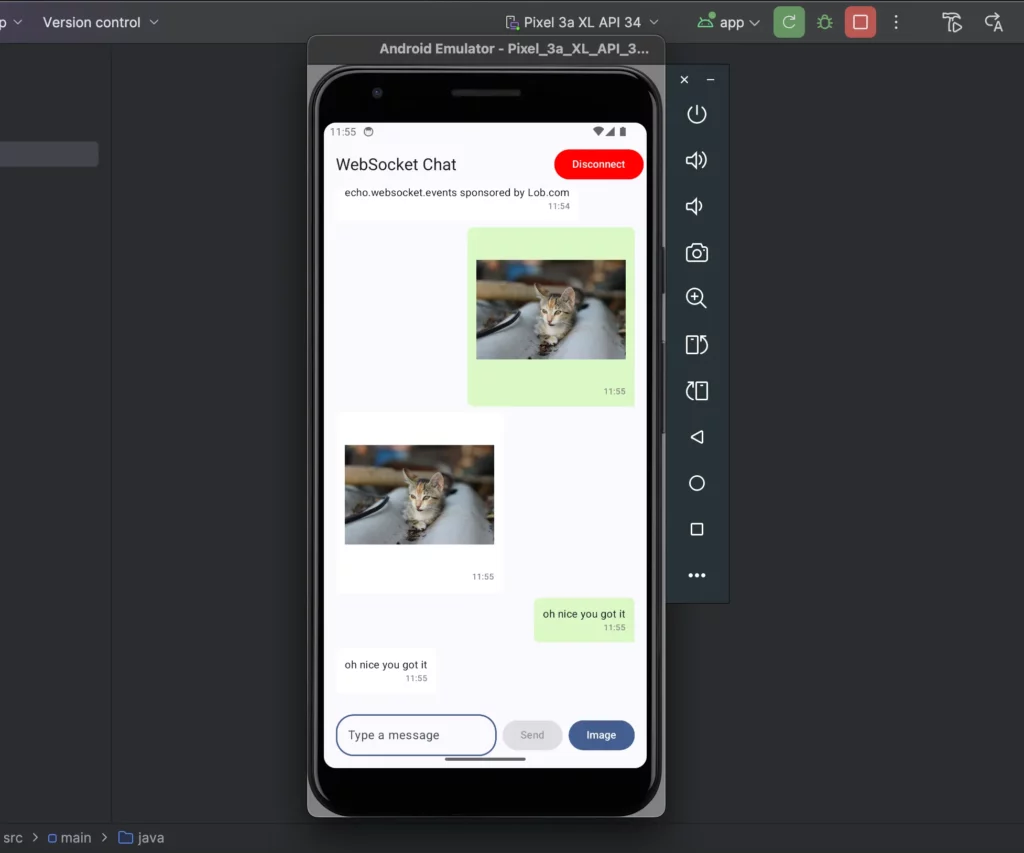
Working with Binary Data
WebSockets support both text and binary data, making them suitable for transmitting images, audio, or other non-text data efficiently. In this section, we’ll extend our chat app to allow users to attach images from their device gallery, send them as binary data over the WebSocket, and display them in the chat UI.
This will involve selecting an image, converting it to a ByteArray, sending it via OkHttp’s ByteString, and then rendering received images in the chat. This will be done in six steps:
Step 1: Update the Message Model
To support images, we need to modify the Message data class to differentiate between text and image messages. We’ll add a type field and an optional imageData field for binary image data.
Update Message.kt:
package com.example.websocketchatapp.model

enum class MessageType {
    TEXT, IMAGE
}

data class Message(
    val type: MessageType,
    val text: String? = null,
    val imageData: ByteArray? = null,
    val isSentByUser: Boolean,
    val timestamp: Long = System.currentTimeMillis()
)
Step 2: Update WebSocketViewModel for Binary Data
package com.example.websocketchatapp

import androidx.compose.runtime.mutableStateListOf
import androidx.lifecycle.ViewModel
import androidx.lifecycle.viewModelScope
import com.example.websocketchatapp.model.Message
import com.example.websocketchatapp.model.MessageType
import kotlinx.coroutines.Dispatchers
import kotlinx.coroutines.flow.MutableStateFlow
import kotlinx.coroutines.flow.StateFlow
import kotlinx.coroutines.launch
import okhttp3.OkHttpClient
import okhttp3.Request
import okhttp3.Response
import okhttp3.WebSocket
import okhttp3.WebSocketListener
import okio.ByteString

class WebSocketViewModel : ViewModel() {
    private val client = OkHttpClient()
    private var webSocket: WebSocket? = null
    private val _messages = mutableStateListOf<Message>()
    val messages: List<Message> get() = _messages
    private val _isConnected = MutableStateFlow(false)
    val isConnected: StateFlow<Boolean> = _isConnected

    fun connect() {
        val request = Request.Builder()
            .url("wss://echo.websocket.events")
            .build()
        webSocket = client.newWebSocket(request, object : WebSocketListener() {
            override fun onOpen(webSocket: WebSocket, response: Response) {
                _isConnected.value = true
                _messages.add(Message(MessageType.TEXT, "Connected to server", null, false))
            }

            override fun onMessage(webSocket: WebSocket, text: String) {
                viewModelScope.launch {
                    _messages.add(Message(MessageType.TEXT, text, null, false))
                }
            }

            override fun onMessage(webSocket: WebSocket, bytes: ByteString) {
                viewModelScope.launch {
                    _messages.add(Message(MessageType.IMAGE, null, bytes.toByteArray(), false))
                }
            }

            override fun onFailure(webSocket: WebSocket, t: Throwable, response: Response?) {
                viewModelScope.launch {
                    _isConnected.value = false
                    _messages.add(Message(MessageType.TEXT, "Connection failed: ${t.message}", null, false))
                }
            }

            override fun onClosing(webSocket: WebSocket, code: Int, reason: String) {
                _isConnected.value = false
                _messages.add(Message(MessageType.TEXT, "Connection closing: $reason", null, false))
            }
        })
    }

    fun sendMessage(text: String) {
        if (_isConnected.value) {
            webSocket?.send(text)
            _messages.add(Message(MessageType.TEXT, text, null, true))
        } else {
            _messages.add(Message(MessageType.TEXT, "Not connected", null, false))
        }
    }

    fun sendImage(imageData: ByteArray) {
        if (_isConnected.value) {
            webSocket?.send(ByteString.of(*imageData))
            _messages.add(Message(MessageType.IMAGE, null, imageData, true))
        } else {
            _messages.add(Message(MessageType.TEXT, "Not connected", null, false))
        }
    }

    fun disconnect() {
        webSocket?.close(1000, "User disconnected")
        client.dispatcher.executorService.shutdown()
    }

    override fun onCleared() {
        disconnect()
        super.onCleared()
    }
}
Step 3: Add Permissions for Image Access
To access the phone’s gallery, we need storage permissions.
- For devices running on Android 13+ (API 33+), add these permissions to
AndroidManifest.xmlabove the<application>tag:
<uses-permission android:name="android.permission.READ_MEDIA_IMAGES" />
- For devices running on Android 12 and below, you might need
READ_EXTERNAL_STORAGEinstead.
Step 4: Update ChatScreen for Image Picking
Go ahead and modify your ChatScreen.kt file to add an image picker button next to the text input. We’ll use ActivityResultContracts.GetContent() to launch the gallery and handle the selected image’s URI, converting it to a ByteArray for sending.
package com.example.websocketchatapp.ui.theme

import android.content.Context
import android.net.Uri
import androidx.activity.compose.rememberLauncherForActivityResult
import androidx.activity.result.contract.ActivityResultContracts
import androidx.compose.foundation.background
import androidx.compose.foundation.layout.*
import androidx.compose.foundation.lazy.LazyColumn
import androidx.compose.foundation.lazy.items
import androidx.compose.foundation.lazy.rememberLazyListState
import androidx.compose.foundation.shape.RoundedCornerShape
import androidx.compose.material3.*
import androidx.compose.runtime.*
import androidx.compose.ui.Alignment
import androidx.compose.ui.Modifier
import androidx.compose.ui.graphics.Color
import androidx.compose.ui.platform.LocalContext
import androidx.compose.ui.unit.dp
import com.example.websocketchatapp.WebSocketViewModel
import com.example.websocketchatapp.ui.theme.components.MessageBubble
import java.io.ByteArrayOutputStream

@Composable
fun ChatScreen(viewModel: WebSocketViewModel, modifier: Modifier = Modifier) {
    val messages by remember { derivedStateOf { viewModel.messages } }
    val isConnected by viewModel.isConnected.collectAsState()
    val listState = rememberLazyListState()
    val context = LocalContext.current

    // Image picker launcher
    val imagePickerLauncher = rememberLauncherForActivityResult(
        contract = ActivityResultContracts.GetContent()
    ) { uri: Uri? ->
        uri?.let {
            val imageData = uriToByteArray(context, it)
            imageData?.let { data ->
                viewModel.sendImage(data)
            } ?: run {
                viewModel.sendMessage("Failed to load image")
            }
        }
    }

    LaunchedEffect(messages) {
        if (messages.isNotEmpty()) {
            listState.animateScrollToItem(messages.size - 1)
        }
    }

    Column(
        modifier = Modifier
            .fillMaxSize()
            .background(MaterialTheme.colorScheme.background)
    ) {
        TopAppBar(
            title = { Text("WebSocket Chat") },
            actions = {
                Button(
                    onClick = { if (isConnected) viewModel.disconnect() else viewModel.connect() },
                    colors = ButtonDefaults.buttonColors(
                        containerColor = if (isConnected) Color.Red else Color.Green
                    )
                ) {
                    Text(if (isConnected) "Disconnect" else "Connect")
                }
            }
        )

        LazyColumn(
            modifier = Modifier
                .weight(1f)
                .fillMaxWidth(),
            state = listState,
            contentPadding = PaddingValues(vertical = 8.dp)
        ) {
            items(messages) { message ->
                MessageBubble(message)
            }
        }

        Row(
            modifier = Modifier
                .fillMaxWidth()
                .padding(16.dp),
            verticalAlignment = Alignment.CenterVertically
        ) {
            var messageText by remember { mutableStateOf("") }
            OutlinedTextField(
                value = messageText,
                onValueChange = { messageText = it },
                modifier = Modifier
                    .weight(1f)
                    .padding(end = 8.dp),
                placeholder = { Text("Type a message") },
                shape = RoundedCornerShape(24.dp)
            )
            Button(
                onClick = {
                    if (messageText.isNotBlank()) {
                        viewModel.sendMessage(messageText)
                        messageText = ""
                    }
                },
                enabled = isConnected && messageText.isNotBlank(),
                modifier = Modifier.padding(end = 8.dp)
            ) {
                Text("Send")
            }
            Button(
                onClick = { imagePickerLauncher.launch("image/*") },
                enabled = isConnected
            ) {
                Text("Image")
            }
        }
    }
}

// Helper function to convert URI to ByteArray
fun uriToByteArray(context: Context, uri: Uri): ByteArray? {
    return try {
        context.contentResolver.openInputStream(uri)?.use { inputStream ->
            val byteArrayOutputStream = ByteArrayOutputStream()
            val buffer = ByteArray(1024)
            var bytesRead: Int
            while (inputStream.read(buffer).also { bytesRead = it } != -1) {
                byteArrayOutputStream.write(buffer, 0, bytesRead)
            }
            byteArrayOutputStream.toByteArray()
        }
    } catch (e: Exception) {
        null
    }
}
Step 5: Update MessageBubble to Display Images
We’ll update the MessageBubble.kt file to render images for MessageType.IMAGE messages using Compose’s Image composable and convert the ByteArray to a Bitmap for display.
package com.example.websocketchatapp.ui.theme.components

import android.graphics.BitmapFactory
import androidx.compose.foundation.Image
import androidx.compose.foundation.background
import androidx.compose.foundation.layout.Box
import androidx.compose.foundation.layout.Column
import androidx.compose.foundation.layout.fillMaxWidth
import androidx.compose.foundation.layout.padding
import androidx.compose.foundation.layout.size
import androidx.compose.foundation.shape.RoundedCornerShape
import androidx.compose.material3.MaterialTheme
import androidx.compose.material3.Text
import androidx.compose.runtime.Composable
import androidx.compose.ui.Alignment
import androidx.compose.ui.Modifier
import androidx.compose.ui.graphics.Color
import androidx.compose.ui.graphics.asImageBitmap
import androidx.compose.ui.unit.dp
import com.example.websocketchatapp.model.Message
import com.example.websocketchatapp.model.MessageType
import java.text.SimpleDateFormat
import java.util.Date
import java.util.Locale

@Composable
fun MessageBubble(message: Message) {
    val alignment = if (message.isSentByUser) Alignment.TopEnd else Alignment.TopStart
    val backgroundColor = if (message.isSentByUser) Color(0xFFDCF8C6) else Color(0xFFFFFFFF)
    val shape = RoundedCornerShape(
        topStart = 8.dp,
        topEnd = 8.dp,
        bottomStart = if (message.isSentByUser) 8.dp else 0.dp,
        bottomEnd = if (message.isSentByUser) 0.dp else 8.dp
    )

    Box(
        modifier = Modifier
            .fillMaxWidth()
            .padding(horizontal = 16.dp, vertical = 4.dp),
        contentAlignment = alignment
    ) {
        Column(
            modifier = Modifier
                .background(backgroundColor, shape)
                .padding(12.dp)
        ) {
            when (message.type) {
                MessageType.TEXT -> {
                    message.text?.let {
                        Text(
                            text = it,
                            style = MaterialTheme.typography.bodyMedium
                        )
                    }
                }
                MessageType.IMAGE -> {
                    message.imageData?.let { data ->
                        val bitmap = BitmapFactory.decodeByteArray(data, 0, data.size)
                        bitmap?.let {
                            Image(
                                bitmap = it.asImageBitmap(),
                                contentDescription = "Chat image",
                                modifier = Modifier
                                    .size(200.dp)
                                    .padding(bottom = 4.dp)
                            )
                        } ?: Text(
                            text = "[Invalid Image]",
                            style = MaterialTheme.typography.bodyMedium
                        )
                    }
                }
            }
            Text(
                text = SimpleDateFormat("HH:mm", Locale.getDefault()).format(Date(message.timestamp)),
                style = MaterialTheme.typography.labelSmall,
                color = Color.Gray,
                modifier = Modifier.align(Alignment.End)
            )
        }
    }
}
Step 6: Request Runtime Permissions
Now, for Android 13+, READ_MEDIA_IMAGES requires runtime permission. You can add a permission request in MainActivity.kt before launching the ChatScreen.
package com.example.websocketchatapp

import android.Manifest
import android.os.Build
import android.os.Bundle
import androidx.activity.ComponentActivity
import androidx.activity.compose.setContent
import androidx.activity.enableEdgeToEdge
import androidx.activity.result.contract.ActivityResultContracts
import androidx.compose.foundation.layout.fillMaxSize
import androidx.compose.foundation.layout.padding
import androidx.compose.material3.Scaffold
import androidx.compose.ui.Modifier
import com.example.websocketchatapp.ui.theme.ChatScreen
import com.example.websocketchatapp.ui.theme.WebSocketChatAppTheme

class MainActivity : ComponentActivity() {
    override fun onCreate(savedInstanceState: Bundle?) {
        super.onCreate(savedInstanceState)
        enableEdgeToEdge()
        val viewModel = WebSocketViewModel()

        // Request permission
        val requestPermissionLauncher = registerForActivityResult(
            ActivityResultContracts.RequestPermission()
        ) { isGranted ->
            if (!isGranted) {
                // Handle permission denial (e.g., show a message)
                viewModel.sendMessage("Image access permission denied")
            }
        }

        setContent {
            WebSocketChatAppTheme {
                Scaffold(modifier = Modifier.fillMaxSize()) { innerPadding ->
                    ChatScreen(
                        viewModel = viewModel,
                        modifier = Modifier
                            .fillMaxSize()
                            .padding(innerPadding)
                    )
                }
            }
        }

        // Request READ_MEDIA_IMAGES permission
        if (Build.VERSION.SDK_INT >= Build.VERSION_CODES.TIRAMISU) {
            requestPermissionLauncher.launch(Manifest.permission.READ_MEDIA_IMAGES)
        }
    }
}
Run the App (Outcome):
Edge Cases to Consider
1. Network Failures:
Network instability is common when developing mobile applications and can affect the user experience. Users may move between Wi-Fi and cellular networks, enter elevators, or travel through areas with poor connectivity. Therefore, a robust reconnection strategy is essential for a seamless experience.
Handling Reconnections:
To handle reconnections, we’ll implement an exponential backoff strategy in WebSocketViewModel.kt. This approach will retry connections with increasing delays (e.g., 1s, 2s, 4s) to avoid overwhelming the server while maximising the chance of successful reconnection.
We would also use Android’s ConnectivityManager to monitor the network availability and provide user feedback through the chat UI.
For example, update WebSocketViewModel.kt to include reconnection logic:
package com.example.websocketchatapp

import android.content.Context
import android.net.ConnectivityManager
import android.net.Network
import android.net.NetworkCapabilities
import android.net.NetworkRequest
import androidx.compose.runtime.mutableStateListOf
import androidx.lifecycle.ViewModel
import androidx.lifecycle.viewModelScope
import com.example.websocketchatapp.model.Message
import com.example.websocketchatapp.model.MessageType
import kotlinx.coroutines.Dispatchers
import kotlinx.coroutines.delay
import kotlinx.coroutines.flow.MutableStateFlow
import kotlinx.coroutines.flow.StateFlow
import kotlinx.coroutines.launch
import okhttp3.OkHttpClient
import okhttp3.Request
import okhttp3.Response
import okhttp3.WebSocket
import okhttp3.WebSocketListener
import okio.ByteString

class WebSocketViewModel(private val context: Context) : ViewModel() {
    private val client = OkHttpClient()
    private var webSocket: WebSocket? = null
    private val _messages = mutableStateListOf<Message>()
    val messages: List<Message> get() = _messages
    private val _isConnected = MutableStateFlow(false)
    val isConnected: StateFlow<Boolean> = _isConnected
    private var retryCount = 0
    private val maxDelay = 30_000L // 30 seconds
    private var isReconnecting = false

    private val connectivityManager = context.getSystemService(Context.CONNECTIVITY_SERVICE) as ConnectivityManager
    private val networkCallback = object : ConnectivityManager.NetworkCallback() {
        override fun onAvailable(network: Network) {
            if (!_isConnected.value && !isReconnecting) {
                viewModelScope.launch {
                    reconnect()
                }
            }
        }
    }

    init {
        val networkRequest = NetworkRequest.Builder()
            .addCapability(NetworkCapabilities.NET_CAPABILITY_INTERNET)
            .build()
        connectivityManager.registerNetworkCallback(networkRequest, networkCallback)
    }

    fun connect() {
        if (isNetworkAvailable()) {
            val request = Request.Builder()
                .url("wss://echo.websocket.events")
                .build()
            webSocket = client.newWebSocket(request, object : WebSocketListener() {
                override fun onOpen(webSocket: WebSocket, response: Response) {
                    _isConnected.value = true
                    retryCount = 0 // Reset retry count on successful connection
                    isReconnecting = false
                    _messages.add(Message(MessageType.TEXT, "Connected to server", null, false))
                }

                override fun onMessage(webSocket: WebSocket, text: String) {
                    viewModelScope.launch {
                        _messages.add(Message(MessageType.TEXT, text, null, false))
                    }
                }

                override fun onMessage(webSocket: WebSocket, bytes: ByteString Hughlights: ByteString) {
                    viewModelScope.launch {
                        _messages.add(Message(MessageType.IMAGE, null, bytes.toByteArray(), false))
                    }
                }

                override fun onFailure(webSocket: WebSocket, t: Throwable, response: Response?) {
                    viewModelScope.launch {
                        _isConnected.value = false
                        _messages.add(Message(MessageType.TEXT, "Connection failed: ${t.message}", null, false))
                        if (!isReconnecting) {
                            reconnect()
                        }
                    }
                }

                override fun onClosing(webSocket: WebSocket, code: Int, reason: String) {
                    _isConnected.value = false
                    _messages.add(Message(MessageType.TEXT, "Connection closing: $reason", null, false))
                    if (!isReconnecting) {
                        viewModelScope.launch {
                            reconnect()
                        }
                    }
                }
            })
        } else {
            _messages.add(Message(MessageType.TEXT, "No network available", null, false))
        }
    }

    private suspend fun reconnect() {
        isReconnecting = true
        while (retryCount < 5 && !_isConnected.value && isNetworkAvailable()) {
            val delayTime = minOf(1000L shl retryCount, maxDelay)
            _messages.add(Message(MessageType.TEXT, "Reconnecting in ${delayTime / 1000}s...", null, false))
            delay(delayTime)
            connect()
            retryCount++
        }
        if (!_isConnected.value) {
            _messages.add(Message(MessageType.TEXT, "Reconnection failed after $retryCount attempts", null, false))
            isReconnecting = false
        }
    }

    private fun isNetworkAvailable(): Boolean {
        val network = connectivityManager.activeNetwork
        val capabilities = connectivityManager.getNetworkCapabilities(network)
        return capabilities?.hasCapability(NetworkCapabilities.NET_CAPABILITY_INTERNET) == true
    }

    fun sendMessage(text: String) {
        if (_isConnected.value) {
            webSocket?.send(text)
            _messages.add(Message(MessageType.TEXT, text, null, true))
        } else {
            _messages.add(Message(MessageType.TEXT, "Not connected", null, false))
        }
    }

    fun sendImage(imageData: ByteArray) {
        if (_isConnected.value && imageData.size <= 5 * 1024 * 1024) {
            webSocket?.send(ByteString.of(*imageData))
            _messages.add(Message(MessageType.IMAGE, null, imageData, true))
        } else {
            _messages.add(Message(MessageType.TEXT, "Image too large or not connected", null, false))
        }
    }

    fun disconnect() {
        webSocket?.close(1000, "User disconnected")
        client.dispatcher.executorService.shutdown()
        _isConnected.value = false
    }

    override fun onCleared() {
        disconnect()
        connectivityManager.unregisterNetworkCallback(networkCallback)
        super.onCleared()
    }
}
The ViewModel now takes a Context parameter to access ConnectivityManager. Hence, update MainActivity.kt to pass the context:
val viewModel = WebSocketViewModel(applicationContext)
2. Rapid Message Sending:
When users send messages too quickly, it can overwhelm the server or cause UI lag. To solve this, you can queue messages in a Channel in WebSocketViewModel . This is to ensure that there is sequential sending of messages and UI freezes are prevented.
For Example:
private val messageQueue = Channel<String>(Channel.BUFFERED)
init {
    viewModelScope.launch {
        for (msg in messageQueue) {
            if (_isConnected.value) webSocket?.send(msg)
        }
    }
}
fun sendMessage(text: String) {
    viewModelScope.launch { messageQueue.send(text) }
    _messages.add(Message(MessageType.TEXT, text, null, true))
}
Security Considerations
WebSockets in production require security measures:
- Use WSS (WebSocket Secure):
Use wss:// URLs to encrypt data with TLS, preventing eavesdropping.
Example: Replace ws://echo.websocket.events with wss://your-secure-server.com
- Data Validation:
You need to sanitise incoming messages to prevent injection attacks and crashing of the app. Add message size limits to enforce a maximum length and prevent buffer overflows.
Hence, in onMessage , add a condition to limit the text to printable characters and 1KB, and images to 5MB.
For example:
override fun onMessage(webSocket: WebSocket, text: aláString) {
    if (text.length <= 1024 && text.matches(Regex("[\\p{Print}]*"))) {
        viewModelScope.launch {
            _messages.add(Message(MessageType.TEXT, text, null, false))
        }
    }
}
override fun onMessage(webSocket: WebSocket, bytes: ByteString) {
    if (bytes.size <= 5 * 1024 * 1024) {
        viewModelScope.launch {
            _messages.add(Message(MessageType.IMAGE, null, bytes.toByteArray(), false))
        }
    }
}
Key takeaways:
- WebSockets maintain a persistent connection for real-time data exchange
- OkHttp provides an excellent WebSocket client for Android applications
- Jetpack Compose makes it easy to build reactive UIs that respond to WebSocket events
- Kotlin Flows are a great way to handle asynchronous WebSocket data streams
Whether you are a beginner or a more experienced Android developer, you should now have learnt how to use WebSockets to build a real-time Android application, and how to mitigate advanced scenarios. With this foundation, you can extend WebSockets to more complex use cases, such as live collaboration, gaming, or IoT integrations. Experiment, optimize, and build something amazing!
Expect The Unexpected!
Debug Faster With Bugfender