
32 Minutes
Build an AI Voice Chatbot with GPT, DALL·E and React Native
Fix Bugs Faster! Log Collection Made Easy
The relentless rise of ChatGPT and other Large Language Models has brought a major breakthrough in the world of artificial intelligence. With key industry players like Meta, Google, Nvidia and Microsoft competing fiercely to dominate this space, it’s likely we’ve only seen the start of the innovation.
Several big companies have made their AI Models and platforms available for the public to use and build on. These include Open AI’s GPT4 and DALL-E 3, which can be used to create highly intelligent applications that perform a wide range of tasks, as well as chatbots that can engage in human-like conversations.
In this article, you will combine these two AI models to build a voice-enabled chatbot mobile application using React Native. This chatbot will not only engage in natural conversations with users, but also be able to generate images based on users’ prompts. By the end of this tutorial, you will have a deeper understanding of how to integrate AI into mobile applications and create engaging user experiences.
Table of Contents
- Prerequisites
- An Overview of Chatbots
- AI vs Rules-Based Chatbots
- Introducing Large Language Models (GPT-4 & DALL-E)
- Obtaining OpenAI Secret Keys
- Scaffolding a React Native project
- Setting up Navigation
- Building the Home and Welcome screens
- Integrating voice recognition (speech-to-text)
- Connecting to the OpenAPI
- Implementing a smooth scroll-to-bottom
- Implementing text-to-voice functionality
- Including stop-speaking functionality
- Summary
Prerequisites
To get the most from this tutorial, you must have:
- A working knowledge of JavaScript and React.
- Familiarity with TailwindCSS and Nativewind.
- Any IDE. I recommend Visual Studio Code.
- The latest versions of Android Studio and Xcode properly installed.
- Node 18 or newer installed on your local machine – visit NodeJS official page for instructions.
- A modern shell such as zsh, iTerm2 with oh-my-zsh for Mac or Hyper for Windows.
- An OpenAPI account.
- Previous experience developing mobile applications using React Native would help but isn’t necessary.
You can check out the full code for our demo application on GitHub.
Now let’s dive in!
An Overview of Chatbots
It feels like Chatbots (or chatterbots) are a recent innovation, but in fact they’ve been around for nearly 30 years – as long as most people have had the internet, in fact.
In 1996, German-American computer scientist Joseph Weizenbaum introduced ELIZA at MIT’s AI Lab, considered to be the first-ever chatbot. He originally intended ELIZA to impersonate a Rogerian psychotherapist. At the time the bot was able to trick naive users into thinking it was an actual therapist using “pattern matching” but still lacked an understanding of the user’s problems.
These early chatbots were fairly rudimentary, and fell a long way short of the benchmark set by the famous Turing Test, which determines whether or not a machine can demonstrate human intelligence. However, advances in AI, machine learning and natural language processing have led to the development of more modern conversational chatbots; this seemingly began in 2011 with the release of Apple’s Siri in iPhones, followed by IBM’s Watson, Microsoft’s Cortana, Amazon’s Alexa, Facebook’s Messenger platform and the Google Assistant. In 2014, the chatbot Eugene Goostman became the first to pass the Turing test, by convincing 33% of judges that it was human.
The recent explosion of ChatGPT and other bots powered by Large Language Models (or LLMs, which we’ll examine in more detail shortly) has marked a further stride forward, taking us closer than ever towards Chatbots that can look, sound and think like humans.
AI vs Rules-Based Chatbots
In general, chatbots fall into two distinct categories: AI chatbots and Rule-based chatbots.
AI chatbots
AI chatbots (aka conversational AI) are bots that can analyze different languages and understand intent through the combination of advanced machine learning, natural language processing and lots of data. These bots can initiate human conversations and become more intelligent as they learn using conversation data. But contrary to popular belief, not all chatbots should be considered AI chatbots.
Rule-based
Traditional rule-based chatbots are trained to respond with pre-programmed responses without having a true understanding of the context and intent of the user. They utilize a sequence of if/then statements under the hood to verify the presence of specific, pre-defined keywords in a user’s prompt. In most cases, users are given a set of prompts at the launch of these bots: they should ask these questions so that the question doesn’t deviate from the available topic.
Introducing Large Language Models (GPT-4 & DALL-E)
Large Language Models (LLMs) are AI systems that use deep learning techniques to analyse, process and generate human-like responses based on huge amounts of training data. These systems are heavily trained on a vast dataset from the internet which allows them to build extremely broad knowledge and capabilities.
GPT-4 and DALL-E 3 are the two most advanced language and image models developed by OpenAI. As you may know, GPT-4 is a successor to the popular GPT-3 model which has been trained on a more diverse dataset, thus enabling it to perform a wider range of tasks.
DAELL-E, on the other hand, is OpenAI’s groundbreaking image generation model. It is a neural network, which has been trained on millions of image data sets and their corresponding text description. While also built on the transformers architecture, it uses a technique called diffusion to generate images.
Obtaining OpenAI Secret Keys
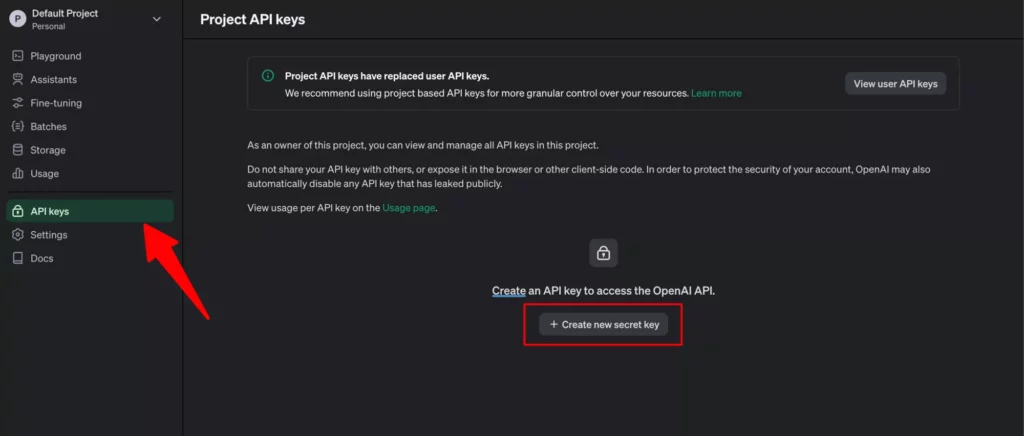
Before you proceed with the integration of ChatGPT and DALL-E, you’ll need to obtain API keys from OpenAI’s platform. To do so, simply follow these steps:
- Go to the OpenAI website and create an account if you haven’t already.
- Once logged in, navigate to the “API Keys” section in your account settings.
- Click on the “Create new secret key” button to generate a new API key.
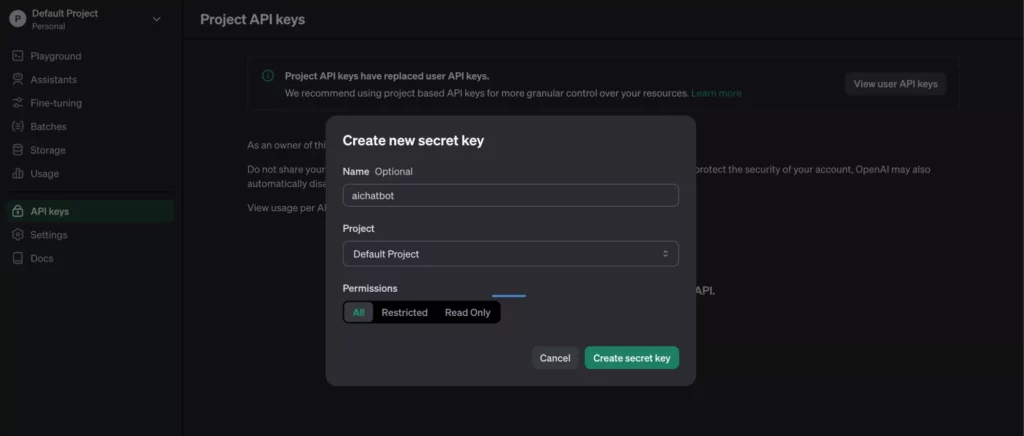
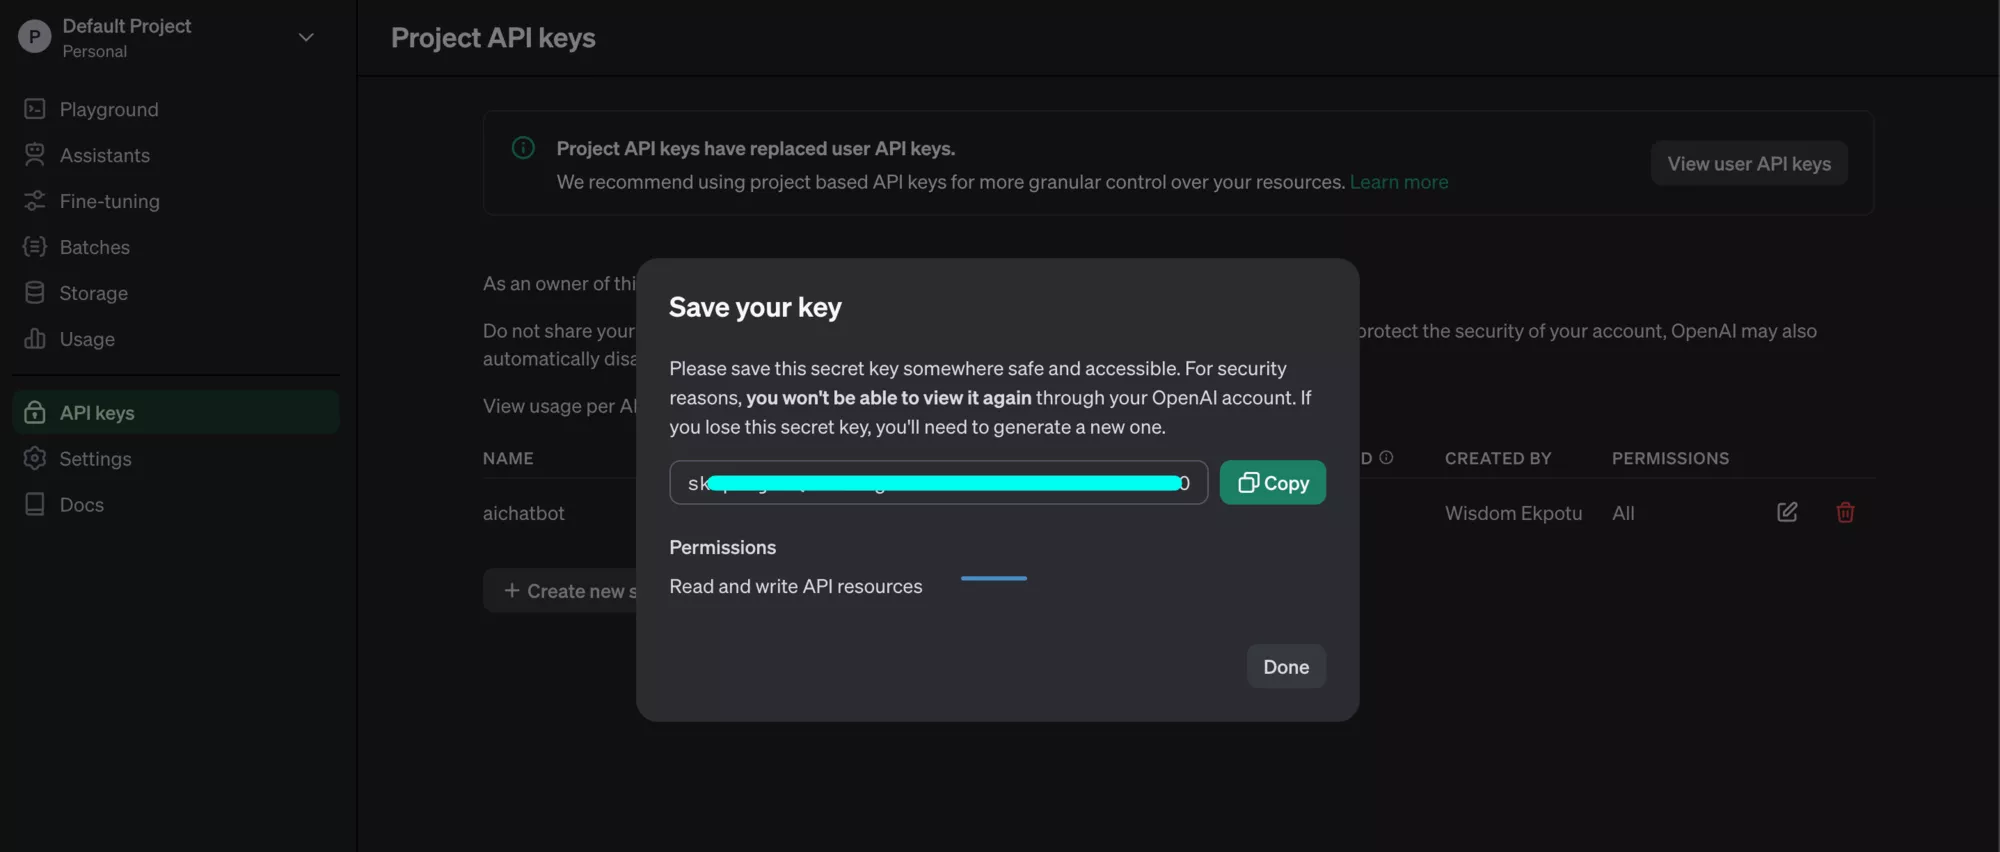
- Now, copy the generated API key and store it securely, as you’ll need it later in the tutorial.
Be cautious with your API keys; exposing them can lead you to make a mistake that compromises security.
Scaffolding a React Native project
To get started, create a new React Native project using the React Native CLI.
Open your terminal, navigate to your desired directory, and run the command below:
npx react-native@latest init <your preferred project name>Navigate to your ios folder and run the command below:
bundle install
bundle exec pod install
After this, run the commands below to start your application:
yarn install && yarn start
Note: If you run into any setup errors while setting up React Native, do not hesitate to diagnose the issue using the following command:
npx react-native doctor
Setup Nativewind CSS
To configure Nativewind CSS in our React Native project, follow these steps:
- Install Nativewind with tailwind:
yarn add nativewind
yarn add --dev [email protected]
At the time of writing this article, NativewindCSS does not support TailwindCSS versions >3.3.2.
Configure TailwindCSS
Since Nativewind is more like a wrapper around TailwindCSS, you will also have to set up TailwindCSS.
Create a tailwind.config.js file in the root directory of your project, then add the code below:
// tailwind.config.js
/** @type {import('tailwindcss').Config} */
module.exports = {
  content: [
    './App.{js,jsx,ts,tsx}',
    './src/screens/**/*.{js,jsx,ts,tsx}',
    './src/components/**/*.{js,jsx,ts,tsx}',
  ],
  theme: {
    extend: {},
  },
  plugins: [],
};
Modify Babel Configuration:
Just one more thing before you proceed: go ahead and install the module below as dev dependencies:
yarn add --dev metro-react-native-babel-preset @babel/plugin-transform-private-methods
Update your babel.config.js with the Nativewind babel plugin as follows:
// babel.config.js
module.exports = {
  presets: ['module:metro-react-native-babel-preset'],
  plugins: [
    ['nativewind/babel'],
    ['@babel/plugin-transform-private-methods', {loose: true}],
  ],
};
Great! With these steps, you’ve successfully set up Nativewind CSS in your React Native project.
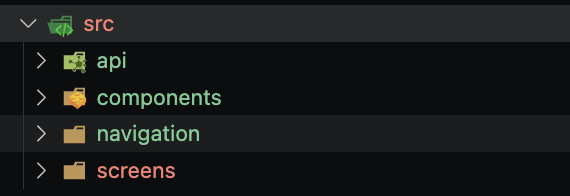
Now, in the root directory of your project folder, create a src folder to structure your files. In there, you can create a few folders by running the code below:
mkdir api components navigation screens
To get navigation up and running in your app, you can make use of the React Navigation library.
- Installing the dependencies:
yarn add @react-navigation/native @react-navigation/native-stack react-native-screens react-native-safe-area-context
According to the official documentation:
From React Native 0.60 and higher, linking is automatic. So you don’t need to run
react-native link. If you’re on a Mac and developing for iOS, you need to install the pods (via Cocoapods) to complete the linking.
npx pod-install ios
However, for the react-native-screens package to work properly on Android devices, you have to make one little modification to the MainActivity.kt file, which is located under android/app/src/main/java/<your package name>/.
Add the code to the body of MainActivity class:
class MainActivity: ReactActivity() {
// ...
  override fun onCreate(savedInstanceState: Bundle?) {
    super.onCreate(null)
  }
// ...
Also, make sure you add this import statement at the top of this file, below your package statement:
import android.os.Bundle
What you just did will help to avoid crashes related to the View state not being persisted across Activity restarts.
- Setting up the navigation file:
Create a src/navigation directory and add an index.js file with the following code:
import * as React from 'react';
import {NavigationContainer} from '@react-navigation/native';
import {createNativeStackNavigator} from '@react-navigation/native-stack';
import WelcomeScreen from '../screens/WelcomeScreen';
import HomeScreen from '../screens/HomeScreen';

const Stack = createNativeStackNavigator();

function AppNavigation() {
  return (
    <NavigationContainer>
      <Stack.Navigator
        screenOptions={{headerShown: false}}
        initialRouteName="Welcome">
        <Stack.Screen name="Welcome" component={WelcomeScreen} />
        <Stack.Screen name="Home" component={HomeScreen} />
      </Stack.Navigator>
    </NavigationContainer>
  );
}

export default AppNavigation;
This code sets up a stack navigator with two screens: WelcomeScreen and HomeScreen. Here the initialRouteName is set to ‘Welcome’, which means that the ‘Welcome’ screen will be the first screen to be shown when the application is launched.
Also headerShown: false ensures that the default header is removed for all screens present in the stack navigator.
In your App.tsx file, import the Navigation component and render it:
import React from 'react';
import AppNavigation from './src/navigation';

export default function App() {
  return <AppNavigation />;
}
Building the Home and Welcome screens
Before you proceed, in the root directory, create an assets folder that will contain all the images and animation you’ll need.
Creating the UI components
In the src/screens directory, create the WelcomeScreen.js and HomeScreen.js files.
Welcome Screen:
- In your
WelcomeScreen.jsfile, add the following code:
import {View, Text, SafeAreaView, Image, TouchableOpacity} from 'react-native';
import React from 'react';
import {useNavigation} from '@react-navigation/native';
import {
widthPercentageToDP as wp,
heightPercentageToDP as hp,
} from 'react-native-responsive-screen';
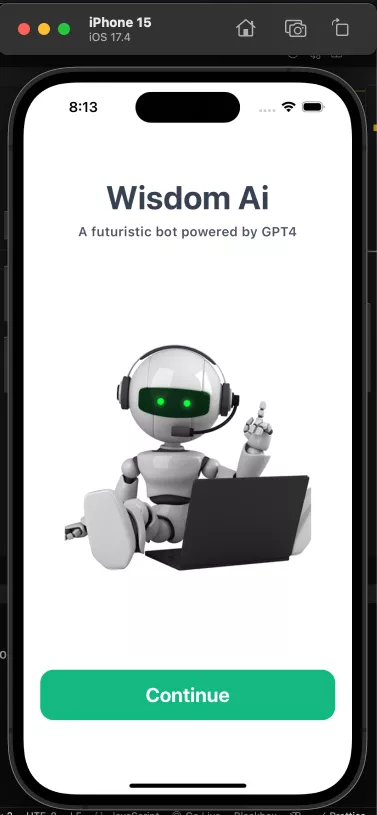
export default function WelcomeScreen() {
const navigation = useNavigation();
return (
<SafeAreaView className="flex-1 flex justify-around bg-white">
{/* title */}
<View className="space-y-2">
<Text
style={{fontSize: wp(10)}}
className="text-center font-bold text-gray-700">
Wisdom Ai
</Text>
<Text
style={{fontSize: wp(4)}}
className="text-center tracking-wider font-semibold text-gray-600">
A futuristic bot powered by GPT4
</Text>
</View>
<View className="flex-row justify-center">
<Image
source={require('../../assets/images/bot.png')}
style={{height: wp(75), width: wp(75)}}
/>
</View>
<TouchableOpacity
onPress={() => navigation.navigate('Home')}
className="bg-emerald-500 mx-5 p-4 rounded-2xl">
<Text
style={{fontSize: wp(6)}}
className="text-center font-bold text-white">
Continue
</Text>
</TouchableOpacity>
</SafeAreaView>
);
}
In the code above, we invoked the useNavigator hook from the @react-navigation/native library, so we can make use of navigation. Then we returned a SafeAreaView component to ensure that the content on the screen is not blocked by any system UI, like a notch.
Finally, there is a TouchableOpacity component, with an onPress function that navigates to the ‘Home’ screen when pressed.
Here is the result on an iPhone emulator:
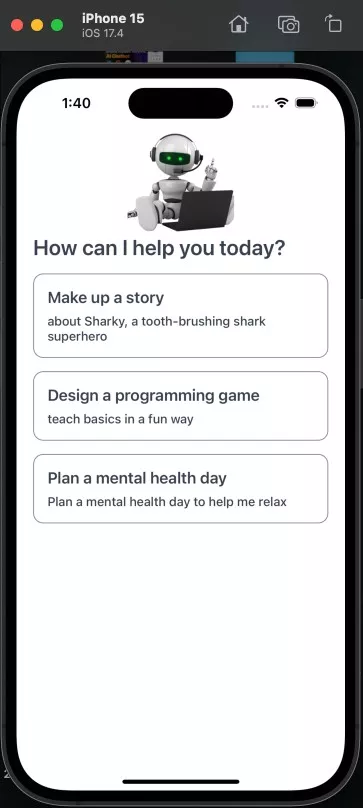
Placeholder Component
Moving on to the ‘Home’ screen, we need to create a placeholder component that will be shown when no request has been made to the bot by a user. So head over to your components directory and create a PlaceHolder.js file with the code below:
import {View, Text, ScrollView, Image} from 'react-native';
import React from 'react';

import {
  widthPercentageToDP as wp,
  heightPercentageToDP as hp,
} from 'react-native-responsive-screen';

export default function Placeholder() {
  return (
    <ScrollView
      style={{height: hp(60)}}
      bounces={false}
      showsVerticalScrollIndicator={false}
      className="space-y-4">
      <Text style={{fontSize: wp(6.5)}} className="font-semibold text-gray-700">
        How can I help you today?
      </Text>
      <View
        style={{borderWidth: 1, borderColor: 'gray', borderRadius: 10}}
        className=" p-4 rounded-xl space-y-2">
        <View className="flex-row items-center space-x-1">
          <Text
            style={{fontSize: wp(4.8)}}
            className="font-semibold text-gray-700">
            Make up a story
          </Text>
        </View>

        <Text style={{fontSize: wp(3.8)}} className="text-gray-700 font-medium">
          about Sharky, a tooth-brushing shark superhero
        </Text>
      </View>
      <View
        style={{borderWidth: 1, borderColor: 'gray', borderRadius: 10}}
        className=" p-4 rounded-xl space-y-2">
        <View className="flex-row items-center space-x-1">
          <Text
            style={{fontSize: wp(4.8)}}
            className="font-semibold text-gray-700">
            Design a programming game
          </Text>
        </View>

        <Text style={{fontSize: wp(3.8)}} className="text-gray-700 font-medium">
          teach basics in a fun way
        </Text>
      </View>
      <View
        style={{borderWidth: 1, borderColor: 'gray', borderRadius: 10}}
        className=" p-4 rounded-xl space-y-2">
        <View className="flex-row items-center space-x-1">
          <Text
            style={{fontSize: wp(4.8)}}
            className="font-semibold text-gray-700">
            Plan a mental health day
          </Text>
        </View>

        <Text style={{fontSize: wp(3.8)}} className="text-gray-700 font-medium">
          Plan a mental health day to help me relax
        </Text>
      </View>
    </ScrollView>
  );
}
Home Screen:
- In your
HomeScreen.jsfile, add the following code:
import React, {useEffect, useRef, useState} from 'react';
import {
View,
Text,
SafeAreaView,
TouchableOpacity,
Image,
ScrollView,
Alert,
} from 'react-native';
import Placeholder from '../components/PlaceHolder';
import {
widthPercentageToDP as wp,
heightPercentageToDP as hp,
} from 'react-native-responsive-screen';

const App = () => {
const [messages, setMessages] = useState([]);

return (
  <View className="flex-1 bg-white">
    <SafeAreaView className="flex-1 flex mx-5">
      {/* bot icon */}
      <View className="flex-row justify-center p-4">
        <Image
          source={require('../../assets/images/bot.png')}
          style={{height: hp(15), width: hp(15)}}
        />
      </View>

      {/* PlaceHolder || message history */}
      {messages.length > 0 ? (
        <View className="space-y-2 flex-1">

          <View
            style={{height: hp(58)}}
            className="bg-neutral-200 rounded-3xl p-4">
            <ScrollView
              bounces={false}
              className="space-y-4"
             >
              {messages.map((message, index) => {
                if (message.role == 'assistant') {
                  if (message.content.includes('https')) {
                    // result is an ai image
                    return (
                      <View key={index} className="flex-row justify-start">
                        <View className="p-2 flex rounded-2xl bg-emerald-100 rounded-tl-none">
                          <Image
                            source={{uri: message.content}}
                            className="rounded-2xl"
                            resizeMode="contain"
                            style={{height: wp(60), width: wp(60)}}
                          />
                        </View>
                      </View>
                    );
                  } else {
                    // chat gpt response
                    return (
                      <View
                        key={index}
                        style={{width: wp(70)}}
                        className="bg-emerald-100 p-2 rounded-xl rounded-tl-none">
                        <Text
                          className="text-neutral-800"
                          style={{fontSize: wp(4)}}>
                          {message.content}
                        </Text>
                      </View>
                    );
                  }
                } else {
                  // user input text
                  return (
                    <View key={index} className="flex-row justify-end">
                      <View
                        style={{width: wp(70)}}
                        className="bg-white p-2 rounded-xl rounded-tr-none">
                        <Text style={{fontSize: wp(4)}}>
                          {message.content}
                        </Text>
                      </View>
                    </View>
                  );
                }
              })}
            </ScrollView>
          </View>
        </View>
      ) : (
        <Placeholder />
      )}
    </SafeAreaView>
  </View>
  ...
);
};

export default App;
In the preceding code, we define a messages state which is of an array value. We map through the messages array returned from the API and render it based on the role properties. If the role is 'assistant', we need to check whether the message content also includes an image URL. If this is the case, then we render it using the URL, Otherwise, we render the text in a green text bubble.
But if the role is not 'assistant' (the user’s input), we render the text content in a white text bubble aligned to the right. If no message is available we render the PlaceHolder component.
Also, we are making use of a ScrollView component, which will allow for vertical scrolling especially when the content exceeds the available height of the screen.
Adding Recording, Clear and Stop buttons
Modify the HomeScreen.js file with the code below. Add this just below the preceding View component (shown above).
Before you proceed, we will define the state we will need.
...
const [result, setResult] = useState('');
const [recording, setRecording] = useState(false);
const [loading, setLoading] = useState(false);
const [messages, setMessages] = useState([]);
const [speaking, setSpeaking] = useState(false);
...
Then add this code:
...
{/* recording, clear and stop buttons */}
<View className="flex justify-center items-center">
  {loading ? (
    <Image
      source={require('../../assets/images/loading.gif')}
      style={{width: hp(10), height: hp(10)}}
    />
  ) : recording ? (
    <TouchableOpacity className="space-y-2">
      {/* recording stop button */}
      <Image
        className="rounded-full"
        source={require('../../assets/images/voiceRecording.gif')}
        style={{width: hp(10), height: hp(10)}}
      />
    </TouchableOpacity>
  ) : (
    <TouchableOpacity>
      {/* recording start button */}
      <Image
        className="rounded-full"
        source={require('../../assets/images/recordingIcon.png')}
        style={{width: hp(10), height: hp(10)}}
      />
    </TouchableOpacity>
  )}
  {messages.length > 0 && (
    <TouchableOpacity
      onPress={clear}
      className="bg-neutral-400 rounded-3xl p-2 absolute right-10">
      <Text className="text-white font-semibold">Clear</Text>
    </TouchableOpacity>
  )}
  {speaking && (
    <TouchableOpacity
      onPress={stopSpeaking}
      className="bg-red-400 rounded-3xl p-2 absolute left-10">
      <Text className="text-white font-semibold">Stop</Text>
    </TouchableOpacity>
  )}
</View>
...
In the code above, we make use of conditional rendering to display the different buttons based on the states: loading, recording, and speaking. If the loading state is true, we display an image component with a loading GIF. If loading is false, we proceed to check the value of the recording state.
If the recording state is true, we display a voice-recorded GIF image wrapped in a TouchableOpacity component. But If both loading and recording states are false, we then render a TouchableOpacity component with a recording icon image.
Next, we check whether the messages array has any elements returned. If so we render a ‘Clear’ button. Finally, we check the value of the speaking state. If speaking is true, we render a ‘Stop’ button.
Integrating voice recognition (speech-to-text)
First off, let’s install the necessary dependency:
yarn add @react-native-community/voice
This package will help convert users’ speech to text in real-time. Also, don’t forget to import it at the top of your HomeScreen.js file.
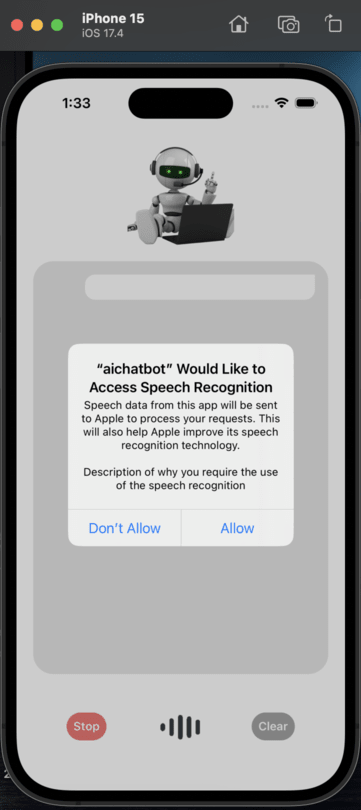
Granting Microphone Permissions:
To gain access to the microphone of iOS devices, you need to update your info.plist configuration.
This file can be found in your ios folder.
...
<key>NSMicrophoneUsageDescription</key>
<string>Description of why you require the use of the microphone</string>
<key>NSSpeechRecognitionUsageDescription</key>
<string>Description of why you require the use of the speech recognition</string>
...
As always, we link the iOS package to React Native. We do this by running the following command:
npx pod-install
Restarting your app, you should see this prompt:
Handling Speech:
To handle the speech, you need to set up speech handlers. Modify your HomeScreen.js file as follows:
...
const speechStartHandler = e => {
    console.log('speech start event', e);
  };

const speechEndHandler = e => {
  setRecording(false);
  console.log('speech stop event', e);
};

const speechResultsHandler = e => {
  console.log('speech event: ', e);
  const text = e.value[0];
  setResult(text);
};

const speechErrorHandler = e => {
  console.log('speech error: ', e);
};

const startRecording = async () => {
  setRecording(true);
  try {
    await Voice.start('en-GB');
  } catch (error) {
    console.log('error', error);
  }
};

const stopRecording = async () => {
  try {
    await Voice.stop();
    setRecording(false);
  } catch (error) {
    console.log('error', error);
  }
};

useEffect(() => {
  console.log('here: ', Voice.isAvailable());
  // voice handler events
  Voice.onSpeechStart = speechStartHandler;
  Voice.onSpeechEnd = speechEndHandler;
  Voice.onSpeechResults = speechResultsHandler;
  Voice.onSpeechError = speechErrorHandler;

  return () => {
    // destroy the voice instance after component unmounts
    Voice.destroy().then(Voice.removeAllListeners);
  };
  }, []);
  ...
Connecting to the OpenAPI
Add the secret key you created in your OpenAPI dashboard to a .env file in the root directory of your application.
API_KEY = <your-secret-api-key>
Also, install this package below:
yarn add -D react-native-dotenv
Update the babel.config.js file with its module:
['module:react-native-dotenv'],
Before you proceed, install axios for making request to the API. Run the command below:
yarn add axios
In your api folder, create a openAI.js file. This file will contain all our configurations for OpenAI will be done.
import axios from 'axios';
const client = axios.create({
  headers: {
    Authorization: `Bearer ${process.env.API_KEY}`,
    'Content-Type': 'application/json',
  },
});

const chatgptUrl = '<https://api.openai.com/v1/chat/completions>';
const dalleUrl = '<https://api.openai.com/v1/images/generations>';
Adding Image Generation with DALL-E API
Add this code to your openAI.js file:
...
const dalleApiCall = async (prompt, messages) => {
  try {
    const res = await client.post(dalleUrl, {
      prompt,
      n: 1,
      size: '512x512',
    });

    let url = res?.data?.data[0]?.url;
    // console.log('got image url: ',url);
    messages.push({role: 'assistant', content: url});
    return Promise.resolve({success: true, data: messages});
  } catch (err) {
    console.log('error: ', err);
    return Promise.resolve({success: false, msg: err.message});
  }
};
In the preceding code, we start off by defining an asynchronous function called dalleApiCall that makes use of the client.post method from Axios and sends a POST request to the dalle endpoint with prompt and size specifications as parameters.
When we get a response, we proceed to extract the generated image’s URL and add it to an array named messages along with a role indicator. We then return a promise resolving to an object indicating the success or failure of the API call.
Adding Text Generation with GPT
...
const chatgptApiCall = async (prompt, messages) => {
  try {
    const res = await client.post(chatgptUrl, {
      model: 'gpt-3.5-turbo',
      messages,
    });

    let answer = res.data?.choices[0]?.message?.content;
    messages.push({role: 'assistant', content: answer.trim()});
    // console.log('got chat response', answer);
    return Promise.resolve({success: true, data: messages});
  } catch (err) {
    console.log('error: ', err);
    return Promise.resolve({success: false, msg: err.message});
  }
};
Here, we do something similar to the Dall-E function.
Using ChatGPT & DALL-E together
...
export const apiCall = async (prompt, messages) => {
  // this will check the prompt from chatgpt if user wants to create an image
  try {
    const res = await client.post(chatgptUrl, {
      model: 'gpt-3.5-turbo',
      messages: [
        {
          role: 'user',
          content: `Does this message want to generate an AI picture, image, art or anything similar? ${prompt} . Simply answer with a yes or no.`,
        },
      ],
    });
    isArt = res.data?.choices[0]?.message?.content;
    isArt = isArt.trim();
    if (isArt.toLowerCase().includes('yes')) {
      console.log('dalle api call');
      return dalleApiCall(prompt, messages);
    } else {
      console.log('chatgpt api call');
      return chatgptApiCall(prompt, messages);
    }
  } catch (err) {
    console.log('error: ', err);
    return Promise.resolve({success: false, msg: err.message});
  }
In this code block, we check if the request of the user contains generating an image. If yes we return the dalleApiCall function else we return chatgptApiCall function.
Everything is set, let’s move back to the Home screen and make use of it.
First up, import the apiCall function into your HomeScreen.js file:
import {apiCall} from '../api/openAI';
Update your fetchResponse function as follows:
...
const fetchResponse = async () => {
  if (result.trim().length > 0) {
    setLoading(true);
    let newMessages = [...messages];
    newMessages.push({role: 'user', content: result.trim()});
    setMessages([...newMessages]);

    // fetching response from chatGPT with our prompt and old messages
    apiCall(result.trim(), newMessages).then(res => {
      console.log('got api data');
      setLoading(false);
      if (res.success) {
        setMessages([...res.data]);
        setResult('');
      } else {
        Alert.alert('Error', res.msg);
      }
    });
  }
};
...
Then, update the stopRecording function with it:
const stopRecording = async () => {
  try {
    await Voice.stop();
    setRecording(false);
    //fetch responce
    fetchResponse();
  } catch (error) {
    console.log('error', error);
  }
};
Implementing a smooth scroll-to-bottom
When the API returns a response we would like to implement an automatic scroll to the bottom of the chat.
To do this, we would use the useRef() hook:
  ...
  const scrollViewRef = useRef();
  ...
Provide this to the ScrollView component and add a scroll indicator.
  ...
  <ScrollView
   ref={scrollViewRef}
   showsVerticalScrollIndicator={false}
  ...
Then we update it using a updateScrollView function:
...
const updateScrollView = () => {
  setTimeout(() => {
    scrollViewRef?.current?.scrollToEnd({animated: true});
  }, 200);
};
...
Add this to your fetchResponse function:
const fetchResponse = async () => {
  if (result.trim().length > 0) {
    setLoading(true);
    let newMessages = [...messages];
    newMessages.push({role: 'user', content: result.trim()});
    setMessages([...newMessages]);

    // scroll to the bottom of the view
    updateScrollView();

    // fetching response from chatGPT with our prompt and old messages
    apiCall(result.trim(), newMessages).then(res => {
      console.log('got api data');
      setLoading(false);
      if (res.success) {
        setMessages([...res.data]);
        setResult('');
        updateScrollView();
      } else {
        Alert.alert('Error', res.msg);
      }
    });
  }
};
Implementing text-to-voice functionality
For this, we would be using a package called React Native tts.
Install it using the command below:
yarn add react-native-tts
Do not forget to link this package using the pod -install command.
Add Event listeners
Go ahead and import the library at the top of your HomeScreen.js file.
import Tts from 'react-native-tts';
Then add these listeners in the useEffect hook.
    // text to speech events
    Tts.setDefaultLanguage('en-GB');
    Tts.addEventListener('tts-start', event => console.log('start', event));
    Tts.addEventListener('tts-finish', event => {
      console.log('finish', event);
      setSpeaking(false);
    });
    Tts.addEventListener('tts-cancel', event => console.log('cancel', event));
To work with this, create a function that will handle :
  ...
  const startTextToSpeach = message => {
    if (!message.content.includes('https')) {
      setSpeaking(true);
      // playing response with the voice id and voice speed
      Tts.speak(message.content, {
        iosVoiceId: 'com.apple.ttsbundle.Samantha-compact',
        rate: 0.5,
      });
    }
  };
  ...
Go back to the fetchResponse function and modify it like this:
const fetchResponse = async () => {
					...
          updateScrollView();

          // now play the response to user
          startTextToSpeach(res.data[res.data.length - 1]);
        } else {
          Alert.alert('Error', res.msg);
        }
      });
    }
  };
Go ahead and try this out.
Including stop-speaking functionality
Now we need to be able to stop the speaking functionality when we want to. This is pretty simple to handle.
Still in your HomeScreen.js , create a stopSpeaking function like so:
  ...
  const stopSpeaking = () => {
    Tts.stop();
    setSpeaking(false);
  };
  ...
Modify the stopRecording function with Tts.stop() method;
 const startRecording = async () => {
    setRecording(true);
    Tts.stop();
    try {
      await Voice.start('en-GB');
    } catch (error) {
      console.log('error', error);
    }
  };
Stop speaking when messages are cleared
Create a clear function with the code below:
 const clear = () => {
    Tts.stop();
    setSpeaking(false);
    setLoading(false);
    setMessages([]);
  };
With this, our application is complete!
Summary
We have explored the two AI models by OpenAI and integrated them with React Native. Now you have a baseline idea of how to build AI apps. You can take it a step further to learn about AI tools like Langchain which can help you train our AI with your own data. Happy Building.
Expect The Unexpected!
Debug Faster With Bugfender