13 Minutes
End-to-End Testing on a JS App
Fix Bugs Faster! Log Collection Made Easy
There’s no doubt which programming language is winning the battle for global supremacy right now. JavaScript has powered past the 12 million developers mark, and 5 million of its loyal fans (some 40%) have come aboard within the last three years. Initially thought of as merely a Java spin-out, it is now used to power everything from machine learning libraries to space exploration robots.
But to truly maximize the potential of JavaScript, developers have to implement an effective testing regime. That means testing their applications thoroughly and precisely in units, at integration points and end-to-end.
The manual way of achieving all these types of testing is time-consuming and can be prone to error. So we really need a test tool/framework that can automate much of the legwork for us.
In this article, we will learn about setting up the automation tests with a JavaScript application and performing those tests automatically. We will also learn how to obtain the report when something doesn’t work as expected, so that we can track and perform proper bug analysis.
We’re going to use Cypress.io, which is a complete test automation framework, along with our very own tool, Bugfender, for log collections, debugging and such.
Why Cypress.io?
Cypress.io is a complete automation test framework for modern web applications. Even though it is best-known for supporting end-to-end testing, it enables developers to perform unit and integration tests as well. With Cypress, users can set up, write, run, and debug a test both easily and effectively.
Some of its stand-out features include:
- Ability to take snapshots when the test runs.
- Capture a screenshot of the failed tests or a video of the entire test execution.
- Debugging tests from any of the debugger tools.
- Automatic addition of waits in tests.
If this snapshot hasn’t captured your interest, you can read more about Cypress and its manifold advantages here.
End-to-End Test Setup on a JavaScript Application
Now we will perform a test setup for a JavaScript application using Cypress. But wait, we need an application first, right? OK, let’s build a simple one so that we can focus more on the tests than the application itself.
The JavaScript Application
We will create a simple application where we can type the username of any GitHub user to fetch some basic details.
Let’s start by creating a project folder, which we can call github-user. Make sure you have Node.js (version 12 or higher is preferred) installed.
Open a command prompt at the root of your project folder, and type this command to initialize a JavaScript project using npm.
npm init -yThis will create a special file called package.json, which we will use later to install Cypress. Now, create a file named index.html with the following content:
<!DOCTYPE html>
<html lang="en">
  <head>
    <meta charset="UTF-8" />
    <title>GitHub User</title>
    <link rel="stylesheet" href="main.css" />
  </head>
  <body>
    <main>
      <form>
        <div>
          <label for="uname">User Name</label>
          <input type="text" required name="uname" id="uname" />
        </div>
        <div>
          <button type="submit" id="submitBtn">Get Details</button>
        </div>
      </form>
    </main>
  </body>
  <script defer src="github.js"></script>
</html>
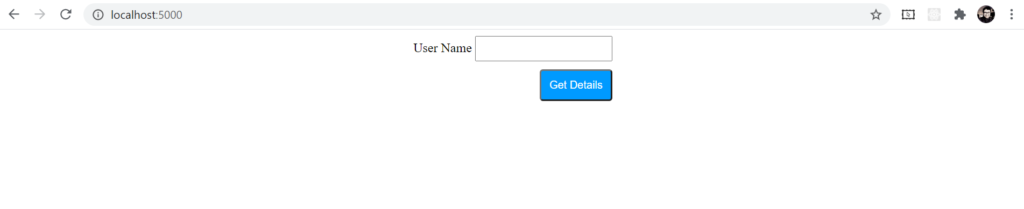
This is a simple HTML form with a single text box and a button. To check all is going well so far, all you need to do is run it. You can run this application in several ways: if you are using the Visual Studio Code editor, you can use the extension called Live Server, and you can use the npx serve command to serve static sites or single-page applications (we will come back to this later).
Now, run the app using this command from the command prompt:
npx serveThe app will be running on http://localhost:5000 by default. Open a browser and try the URL to access the app. You should find it like this:

As you can see, it’s a little drab right now, so let’s trying add a dash of CSS flair. Create a file named main.css at the root of the project folder with the following content:
body {
    display: flex;
    flex-direction: column;
    justify-content: center;
    align-items: center;
}

button {
    margin: 10px 0px auto 0px;
    float: right;
    padding: 10px;
    background-color: #009aff;
    color: #FFF;
    border-radius: 4px;
    cursor: pointer;
}

input[type="text"] {
    height: 25px;
}

span {
    margin: 10px;
    background-color: #000;
    color: #FFF;
    padding: 20px;
    font-size: 20px;
}
Now refresh the tab of the browser in which the app is running. This will give us a much better look and feel:
Now let’s do our first end-to-end test
To run the test, we need to install cypress. Use this command from the root of your test folder to install it.
npm install cypressGive it some time to install. Once the installation is done, open the package.json file and replace the existing scripts section with the following content:
"scripts": {
    "e2e": "cypress open"
 }
Use this command to run Cypress (make sure the app is still running in another command prompt):
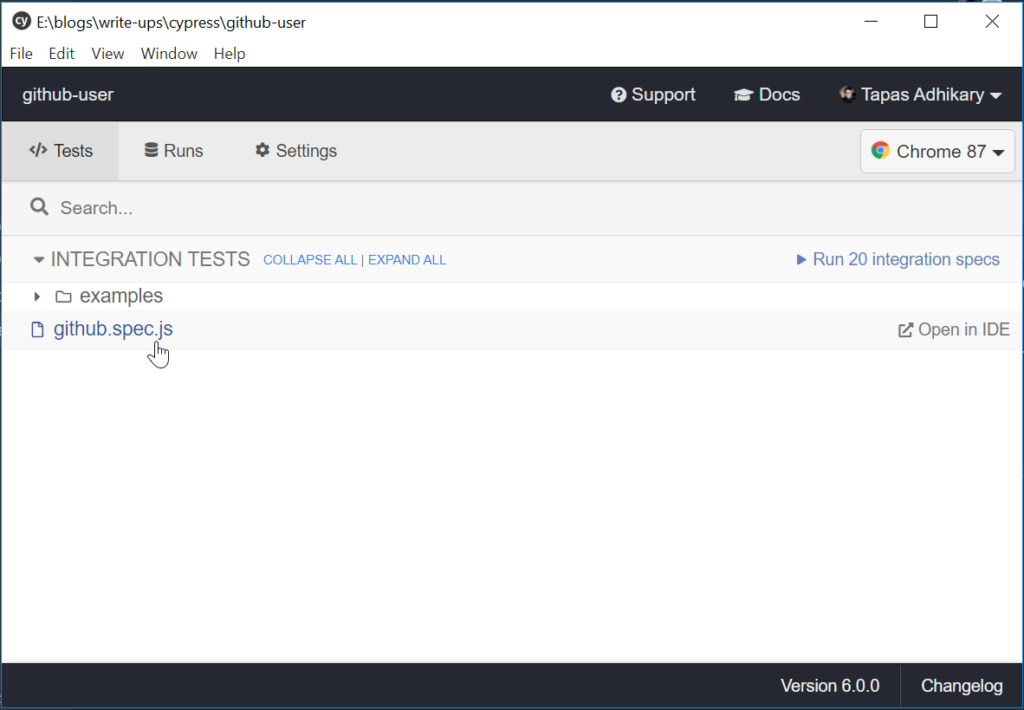
npm run e2eThe first time you run the test, the above command may take a bit longer. It will open up the Cypress app, which may look like this:

The Cypress app comes up with many pre-built examples of tests, which can be found in the folder cypress\\integration\\examples. You can choose to delete this folder or keep it – whichever works for you. In addition, Cypress creates an empty configuration file called cypress.json. Open that file and add the following content:
{
    "baseUrl": "<http://localhost:5000>"
}
With this, we’re telling Cypress about our application. Now, it’s time to add our first test.
Create a file named github.spec.js under the folder cypress\\integration. This is our test spec file, and we will add all our tests to this file.
Add the following content to the spec file:
describe("GitHub test", () => {
    it("Get a GitHub user details", () => {
      cy.visit("/");

      cy.get("form");

      cy.get('input[name="uname"]')
        .type("atapas")
        .should("have.value", "atapas");
    });
  });
A few things are going on here. The describe keyword allows you to write multiple tests in a test suite. It takes two arguments: the first is a string to describe the test suite and a callback for the actual test, which is written within the it block.
The it block takes two arguments. The first is the test name and the second is the callback where we write the test scenario. We have defined the test scenario as:
- Visit the URL
/. This is where the application page will be served. - Get a DOM element using the
getmethod. First, we get theformelement and then theinputelement that matches a name attribute value,uname. - Then the test is to type a value as
atapasand check if it has the same value.
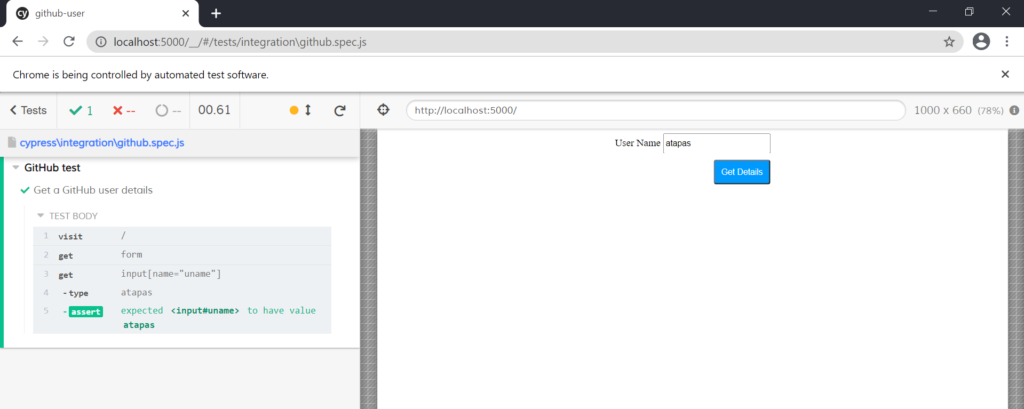
You can find the newly created test in the Cypress app. Click on that to start the test.
This will open up a browser which will show the output of the test run. In our case, we will see the test is passed. The test will execute as if someone is accessing this application.
You can observe the application execution flow on the right-hand side, whereas the left-hand side shows the test results.
End-to-End Test with Asynchronous Calls
Great, so we have just carried out our first test run using Cypress. Now let’s make the app a little more complex. We will make an asynchronous call to send the username over an API and fetch some data from GitHub.
Create the filenames github.js at the root of the project folder with the following content:
const form = document.forms[0];

form.addEventListener("submit", event => {
  event.preventDefault();
  new FormData(form);
});

document.addEventListener("formdata", event => {
  const body = Object.fromEntries(event.formData.entries());
  const jsonBody = JSON.stringify(body);
  const request = new XMLHttpRequest();

  request.open("GET", `https://api.github.com/users/${body.uname}`);
  request.send(jsonBody);

  request.onload = function() {
    const json = JSON.parse(this.response);
    console.log(json);
    if (json.message && json.message === 'Not Found') {
        console.log('user name not found');
    } else {
        document.body.innerHTML += `<span>Response from the server: ${json.name}</span>`;
    }
  };
});
Here we are grabbing the username provided in the text box and making an XMLHttpRequest to the GitHub API. Upon a successful completion, we are showing the name returned in the response. All this takes place when a user clicks on the ‘submit’ button.
Now go to the browser where the app is running (http://localhost:5000) and refresh it. Provide a valid GitHub username and click on the button. In my case, I am trying my GitHub username, atapas, to get the full name back from the server.

Now, we will write tests for it. The recent release of Cypress(v6.0) added cy.intercept() to stub any type of HTTP request. This is an excellent feature addition as previously we had to follow multiple steps along with configuration changes to achieve the same end.
Open the spec file and add the following code to the test:
cy.intercept({
  url: "/github/**",
  method: "GET"
});

cy.get("form").submit();

cy.contains("Tapas Adhikary");
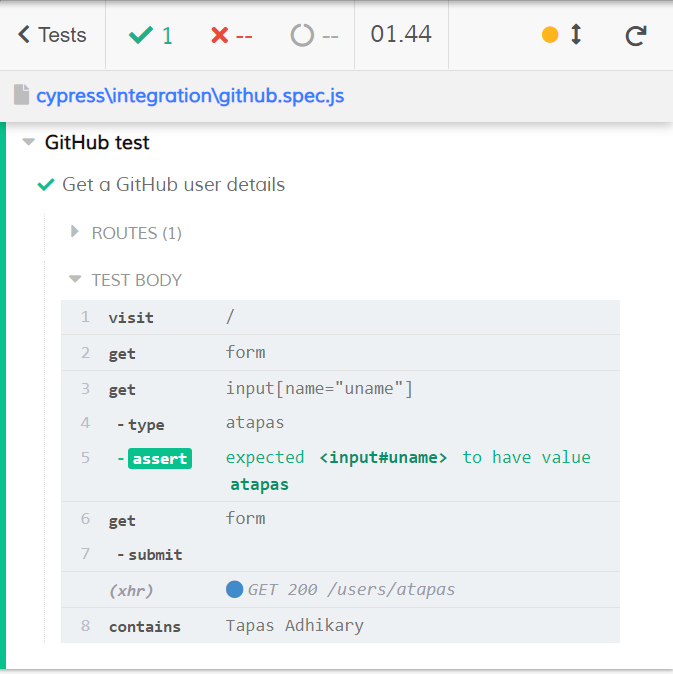
We are intercepting an HTTP call with the GET method that matches a pattern /github/** in the URL. Then we submit the form. Finally we test the response with cy.contains(). Here is the entire spec file:
describe("GitHub test", () => {
  it("Get a GitHub user details", () => {
    cy.visit("/");
    cy.get("form");
    cy.get('input[name="uname"]').type("atapas").should("have.value", "atapas");

    cy.intercept({
      url: "/github/**",
      method: "GET"
    });
    cy.get("form").submit();
    cy.contains("Tapas Adhikary");
  });
});
The test will run automatically and we will see a successful test run result.
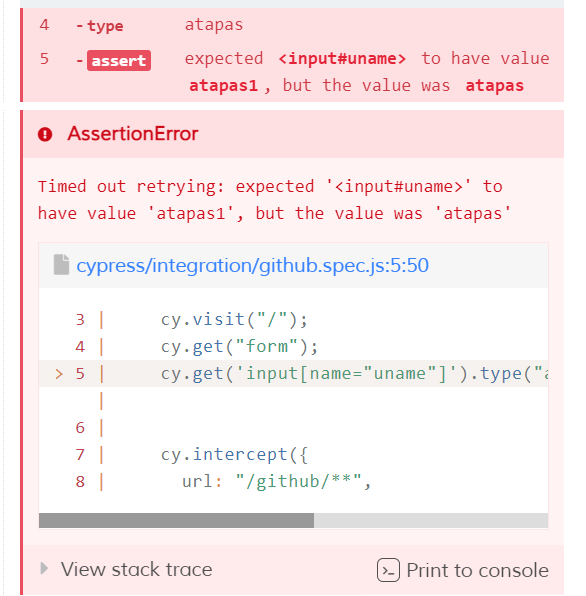
Lets experience a failed test. There are several ways we can fail a test here. We can pass an invalid GitHub username or validate that we have typed whatever was expected in the test box. Change the ‘should have’ value to something random in this line. I have changed to atapas1.
cy.get('input[name="uname"]').type("atapas").should("have.value", "atapas1");
The test will fail here as it produces atapas but the value is not matching the expectation. You will see the failed test output as well:
That’s all for now on the Cypress test. Really, this is just the tip of an iceberg. You can find more details about the other capabilities from here.
Now, we will look at an integration with Bugfender and see what happens when a test passes and fails.
Set up Bugfender to Inspect Further
Bugfender is a remote logging service which allows users to collect logs for everything that happens in the application. It is very easy to integrate Bugfender with a JavaScript application and get started (we have made a video to ease things up). There are SDKs available to integrate in mobile applications as well.
To kick things off, simply create an account with Bugfender. Once logged in, you will find an API key ready for you. Keep it safe.
Open the index.html file and add this script under the head section of the HTML file:
<script defer src="<https://js.bugfender.com/bugfender.js>"></script>Go to github.js file and add the following code at the top of the file:
Bugfender.init({
    appKey: 'VocUSy3tli1e9Hf8Z5wwQ6oO6qcbXfRR',
});
Please remember to add your API key that you received previously. Now let us add a few log commands so that we can track it in the Bugfender app. Go to our event handler code and let us add them as shown below:
document.addEventListener("formdata", event => {
const body = Object.fromEntries(event.formData.entries());
const jsonBody = JSON.stringify(body);
const request = new XMLHttpRequest();
Bugfender.log(`Sending request to fetch info about ${jsonBody}`);
request.open("GET", `https://api.github.com/users/${body.uname}`);
request.send(jsonBody);
request.onload = function() {
const json = JSON.parse(this.response);
console.log(json);
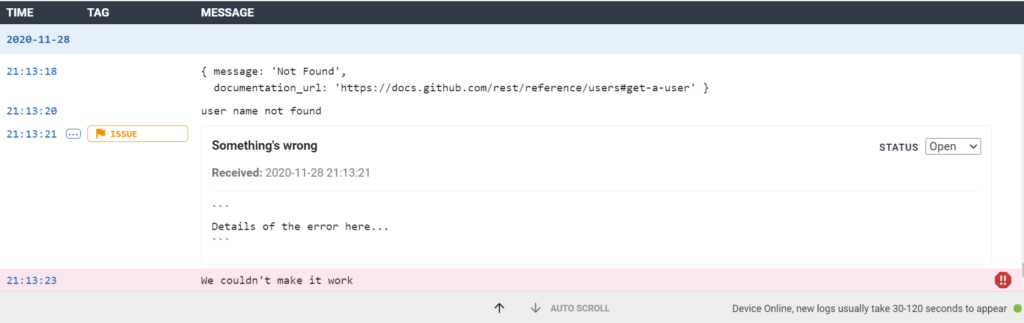
if (json.message && json.message === 'Not Found') {
console.log('user name not found');
Bugfender.sendIssue("Something's wrong", "Details of the error here...");
Bugfender.fatal(`We couldn't make it work`);
} else {
document.body.innerHTML += `<span>Response from the server: ${json.name}</span>`;
Bugfender.log(`Got information successfully about ${json.name}`);
}
};
});We have added a normal log before making the asynchronous call. When the call fails, we create an issue using the sendIssue method. If the call is successful, we log that too. Let us now go to our app in the browser and try it with two GitHub ids: one valid, the other invalid.
Move over to the Bugfender dashboard. It may look like this:
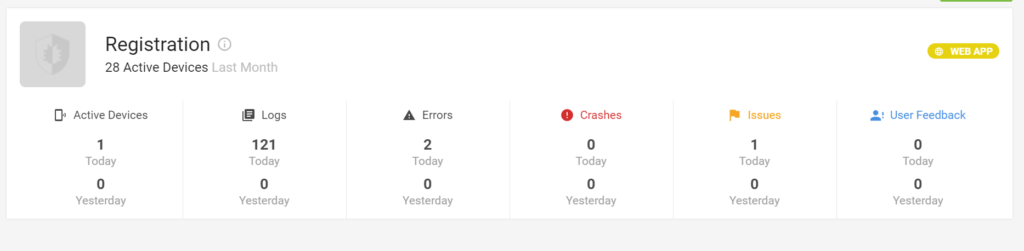
You can drill-down to the logs, error, issues, crashes, etc from here. We see an issue was created, so let’s click on that and drill down. We will find an issue created:

You can drill down further by clicking on an issue name to find the associated log that helps you to find the root cause:
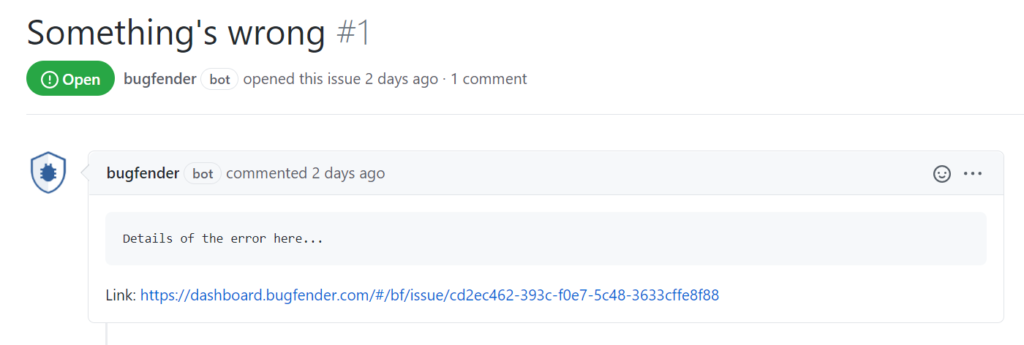
We can choose to close the issue from the list box on the right-hand side or send it to GitHub with this option:

Here is how the issue may appear in GitHub:
This is cool, isn’t it? One more interesting feature is, if the application faces an exception or runtime error, Bugfender creates a crash report for you automatically. You can find the crash report and the associated logs the same way from the Bugfender dashboard. Give it a try!
Read more about the web app SDK options from here.
Before we go…
Hope you find this article insightful. We have touched the surfaces of both Cypress and Bugfender with a JavaScript app. These two tools open up lots of possibilities to test and find issues upfront. I hope you get a good start here to explore further.
If you have found this article of your interest, you might also be interested in some of the following articless:
Discover the Hidden Potential: Advanced JavaScript Console Log for Developers
Robust JavaScript Error Handling. Learn About JavaScript Errors
To help from here, you can find the JavaScript app, Cypress test code and the Bugfender setup from this project in GitHub. Feel free to clone and use it.
It would be great to connect. You can @ me on Twitter (@tapasadhikary) with comments, or feel free to follow. I write about my learnings and side projects, mostly on JavaScript, Web Development, and Jamstack. Feel free to check out my personal blog.
Expect The Unexpected!
Debug Faster With Bugfender

Tapas Adhikary
Tapas Adhikary is a Full Stack Developer. He loves building web apps, mobile apps, and JAMstack solutions. He is a technology blogger who publishes articles for freeCodeCamp, daily.dev, dev.to, his blog.greenroots.info and also in his YouTube Channel. Follow him on Twitter(@tapasadhikary) to stay connected.