
9 Minutes
How to Use MapKit in iOS with SwiftUI
Fix Bugs Faster! Log Collection Made Easy
In this article we’ll learn about Apple’s MapKit framework. MapKit is the native way to include map views in our iOS application to display map or satellite imagery. It is quite useful for any map-centric view and to show coordinates, annotate on them with a custom annotation, or just generally view world locations or specific map features.
This article will be very hands-on and will include several examples on how things are done using MapKit and the mapkit api.
Table of Contents
MapView
Showing a Map
Let’s start with the simplest possible thing, showing a map on our app. The simplest way of doing so is just adding a Map view to our SwiftUI view. A simple SwiftUI view with a map can look like:
port SwiftUI
import MapKit

struct ContentView: View {
    var body: some View {
        VStack {
            Map()
        }
        .padding()
    }
}

#Preview {
    ContentView()
}
That’s as simple as it gets, and when we run our application we’ll get a full screen MapKit view with our location service defaulted to our current country.
Changing the location of the map
Just showing a map centered in our country is cool, but what if we wanted to change the location that is being shown to us?
While this could seem trivial, the only way to change a Map’s location programmatically is by injecting that location into the Map’s initialization, using the MapKit library. So if we wanted to start our map centered in London, this is what we would need to have:
Map(initialPosition: MapCameraPosition.region(
    MKCoordinateRegion(
        center: CLLocationCoordinate2D(latitude: 51.5072, longitude: 0.1276),
        span: MKCoordinateSpan(latitudeDelta: 1, longitudeDelta: 1)
    )))
What if we wanted to have several different positions and change the map between them? Maybe based on specific locations such as Tokyo or Washington DC?
For that to happen, we would need to make the initial position a @State property, and we could change its state for it to be reflected in the interactive map.
As an example, let’s have 3 buttons at the bottom of our map view, and each one linked to real-world location data for three major cities.
By default, we’ll be opening the Map centered in London.
Here’s the code example:
import SwiftUI
import MapKit

struct ContentView: View {

    @State private var position = MapCameraPosition.region(
        MKCoordinateRegion(
            center: CLLocationCoordinate2D(latitude: 51.5072, longitude: 0.1276),
            span: MKCoordinateSpan(latitudeDelta: 1, longitudeDelta: 1)
        )
    )

    var body: some View {
        VStack {
            Map(position: $position)
            HStack(spacing: 50) {
                Button("Washington") {
                    position = MapCameraPosition.region(
                        MKCoordinateRegion(
                            center: CLLocationCoordinate2D(latitude: 47.7511, longitude: -120.7401),
                            span: MKCoordinateSpan(latitudeDelta: 1, longitudeDelta: 1)
                        )
                    )
                }

                HStack(spacing: 50) {
                    Button("London") {
                        position = MapCameraPosition.region(
                            MKCoordinateRegion(
                                center: CLLocationCoordinate2D(latitude: 51.5072, longitude: 0.1276),
                                span: MKCoordinateSpan(latitudeDelta: 1, longitudeDelta: 1)
                            ))
                    }

                    Button("Tokyo") {
                        position = MapCameraPosition.region(
                            MKCoordinateRegion(
                                center: CLLocationCoordinate2D(latitude: 35.6897, longitude: 139.6922),
                                span: MKCoordinateSpan(latitudeDelta: 1, longitudeDelta: 1)
                            )
                        )
                    }
                }
            }
        }}
}

#Preview {
    ContentView()
}
Now we can just press any of the bottom buttons and see our map view taking us there in real time, just like a web app would with a live interactive map.
Placing Annotations on our Map
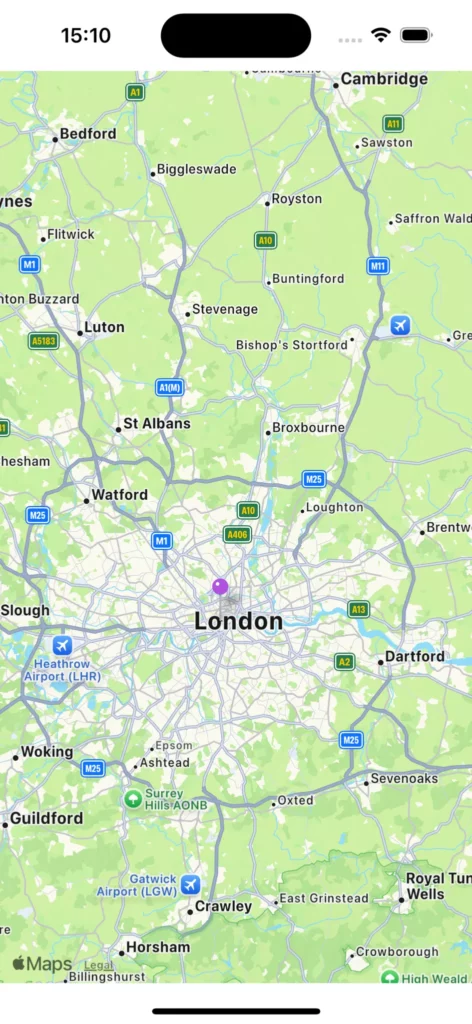
Now that we know how to make the map move to our bidding, the next logical step is to learn how to place annotations on it. Let’s say we really like the London Eye, and we’d like to add a custom annotation at its specific coordinate.
First, we would need the London Eye’s location, which is lat: 51.503399, long: -0.119519, and we would add it using a marker. A Marker for London Eye could look like:
Marker("London eye", coordinate: CLLocationCoordinate2D(latitude: 51.503399, longitude: -0.119519))
Now let’s update our content to include this:
import SwiftUI
import MapKit

struct ContentView: View {

    var annotations: [IdentifiableLocation] = [
        IdentifiableLocation(id: ObjectIdentifier(MyClass(name: "London eye")), location: CLLocationCoordinate2D(latitude: 51.503399, longitude: -0.119519))
    ]

    @State private var region = MKCoordinateRegion(
        center: CLLocationCoordinate2D(latitude: 51.5072, longitude: 0.1276),
        span: MKCoordinateSpan(latitudeDelta: 1, longitudeDelta: 1)
    )

    var body: some View {
        Map(coordinateRegion: $region,
            annotationItems: annotations)
        { place in
            MapPin(coordinate: place.location,
                   tint: Color.purple)
        }
    }
}

#Preview {
    ContentView()
}

struct IdentifiableLocation: Identifiable {
    var id: ObjectIdentifier
    var location: CLLocationCoordinate2D
}

class MyClass {
    var name: String
    init(name: String) {
        self.name = name
    }
}
Our map view now displays the map item pointing at London Eye with a simple pin:
Other basic types of annotations that MapKit supports include:
- MapMarker, a simpler alternative to the Pin
- MapAnnotation, for designing fully custom annotations
Getting tap coordinates
An important feature of interactive maps is getting the location data where users tap.
We can use a onTapGesture on a Map view like so:
Map().onTapGesture() { position in
    print(position)
}
But to get longitude and latitude coordinates instead of simple X,Y screen positions, we should use a MapReader:
import SwiftUI
import MapKit

struct ContentView: View {

    var body: some View {
        MapReader { proxy in
            Map().onTapGesture() { position in
                if let coordinate = proxy.convert(position, from: .local) {
                    print(coordinate)
                }
           }
        }
    }
}

#Preview {
    ContentView()
}
You will now receive output like:
CLLocationCoordinate2D(latitude: 38.1225410362762, longitude: -8.471839602579648)
This can be very useful in developer apps when saving specific locations or building offline maps.
Map Styles
MapKit allows us to switch between different styles:
- Standard (default street maps)
- Imagery (satellite view)
- Hybrid (satellite + roads)
Switching map styles is simple:
Map()
    .mapStyle(.hybrid(elevation: .realistic, showsTraffic: true))
    .mapStyle(.standard)
    .mapStyle(.imagery)
The imagery map is particularly beautiful when you want to showcase satellite imagery in your ios application.
Map interaction modes
Another important aspect of building with MapKit is setting interaction modes. These define how users can interact with the map content.
Example setting:
Map(interactionModes: [.all, .pan, .pitch, .rotate, .zoom])
Interaction modes can heavily impact your app’s functionality when designing with mapkit library and offline maps use cases in mind.
Summing up
MapKit is a wonderful tool for building powerful, intuitive maps in your ios applications or web apps. We have seen how to use MapKit framework, how to manipulate the user’s map view, how to add annotations, how to use routes and directions, and even how to change between different map features like satellite imagery and hybrid styles.
Hopefully this article gives you the inspiration and technical skill to incorporate MapKit into your own projects, build new features, and make your content rich and interactive!
Expect The Unexpected!
Debug Faster With Bugfender