5 Minutes
How to Add Your First iOS Job to Jenkins
Fix Bugs Faster! Log Collection Made Easy
New: We’ve just released a new ebook: the Jenkins Starter Guide, which contains all of the information in this series of four posts and more. Head on over to our Resources page to download.
In case you missed our first couple of posts in this series, or if you aren’t sure just what Jenkins or CI is, head back and read: What Is Jenkins and Why Should You Be Using It?
In order to build iOS applications you will need to run the server on a macOS machine. You could install Jenkins directly on a Mac computer, but our preferred way is to have a small Mac mini machine* in our office devoted to these tasks.
Curious how to add an Android build to Jenkins? Check out this article.
Even though there are some server hosting options for macOS, they are not as commonly used as Android hosting options. Our solution is to run Jenkins in a Linux machine and have a macOS worker machine for the iOS builds.
(*We mention a Mac mini because it’s the cheapest macOS machine you can get. In 2017, new models started at around $499. But if you have any other Macs laying around, such as an old MacBook with 1GB of RAM or more, that will work great as well.)
[sign-up-banner]
How to Add a Mac Node for iOS Builds
Follow these steps to add a Mac node as a worker node to a running Jenkins server. If you’ve already done this step, skip to “Configuring iOS jobs” below to start adding a iOS build to Jenkins.
Please note before we begin: you do not need a public IP address or open ports on the Mac node side, so it’s a perfectly suitable setup to have the Mac machine in your home or office, sitting behind a NATed network.
Step 1: Open https://your-ci-server-name.com on Your Browser
You will need to open a port for JNLP. JNLP is a Java protocol to serve applications to be executed elsewhere. Your worker node will download the Jenkins worker application using this protocol.
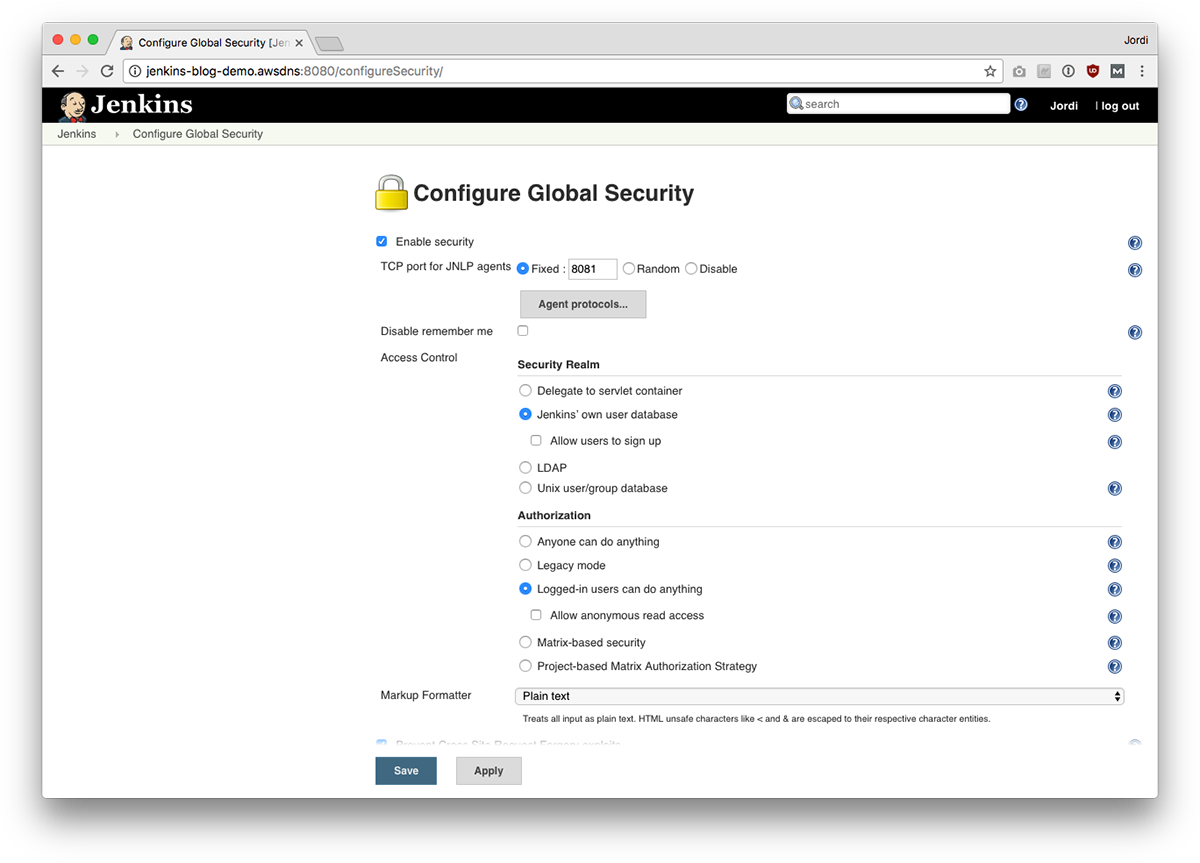
Step 2: From the Dashboard Go to Configure Jenkins > Configure Global Security
Specify a Fixed port. In the example below we chose 8081, but you can choose any port between 1024 and 65535. Make sure this port is open in your firewall.
Step 3: Create a New Node In Jenkins > Manage Nodes
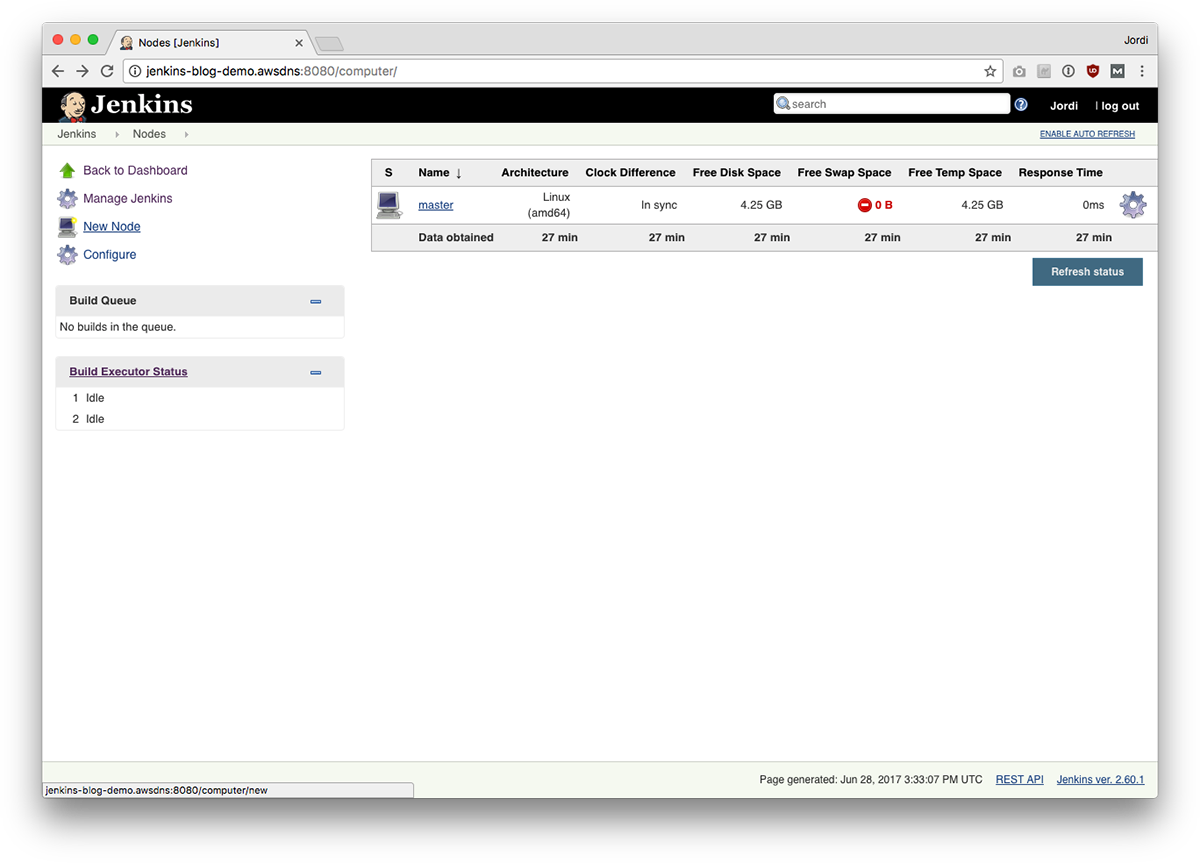
Select New Node.
- Give it a name, for example macmini. It can be anything.
- Enter a Remote root directory:
/tmp - Choose Launch method: Java web start
- Add a Label: mac. (This label will be important when you need to specify where jobs should be executed each time you configure them. Using this label, you can make sure Mac projects exclusively run on your mac machine. More on this below.)
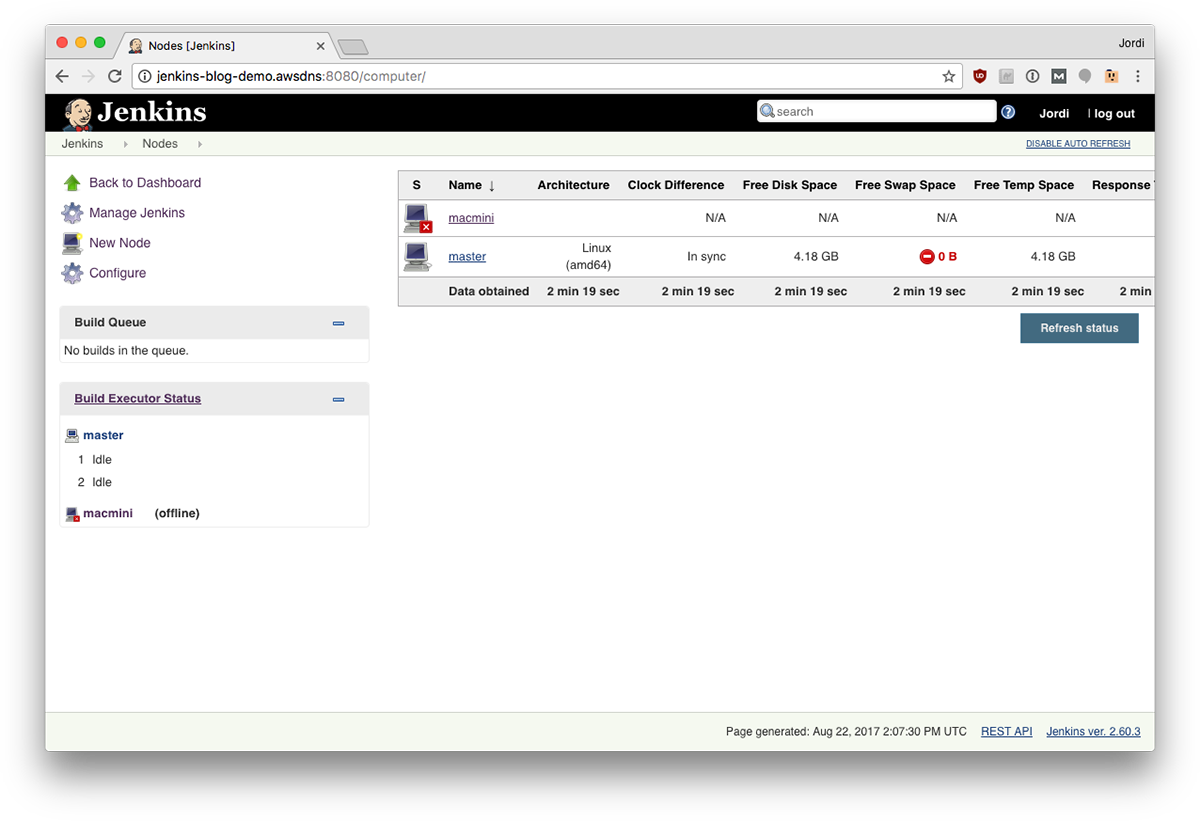
After saving you’ll see the newly added node in the node list.
[random-ad]
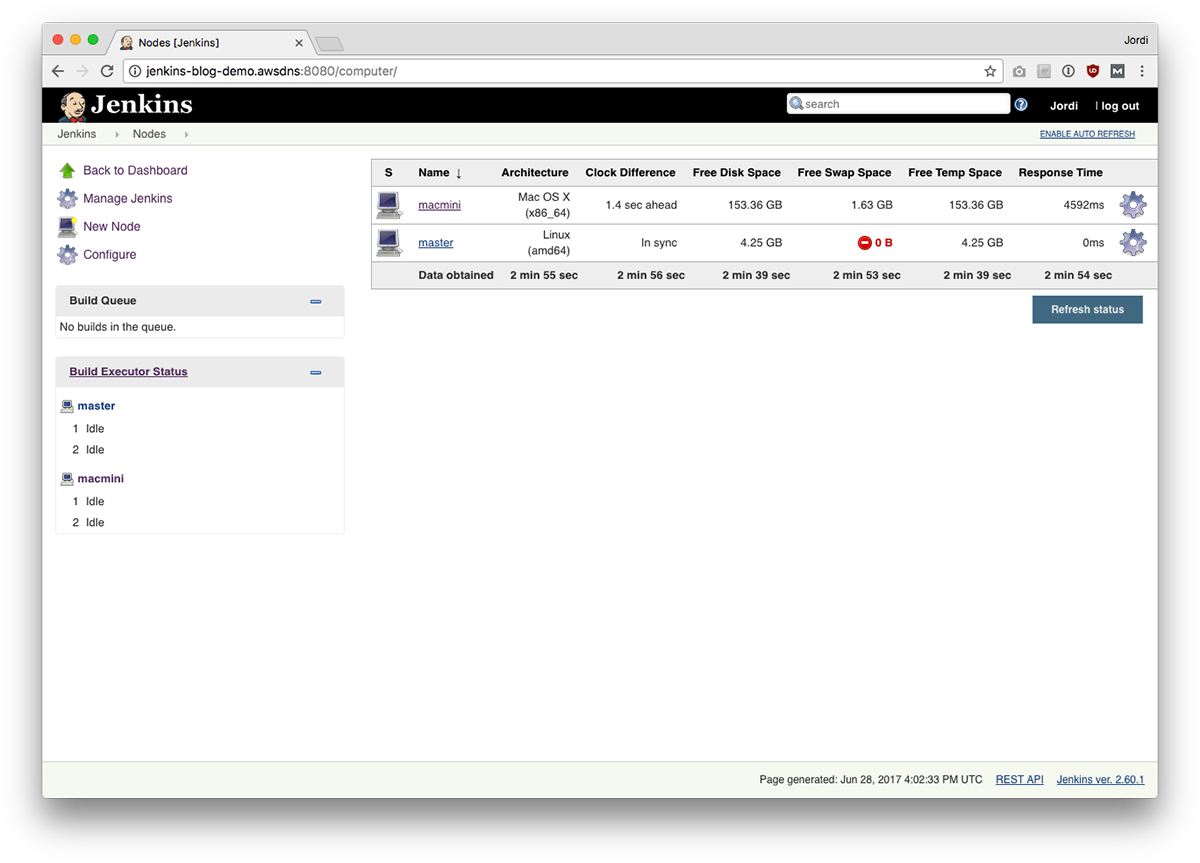
Step 4: Open the Node You Just Created and You Will Find a Command
Copy and paste this command in a terminal in your slave machine.
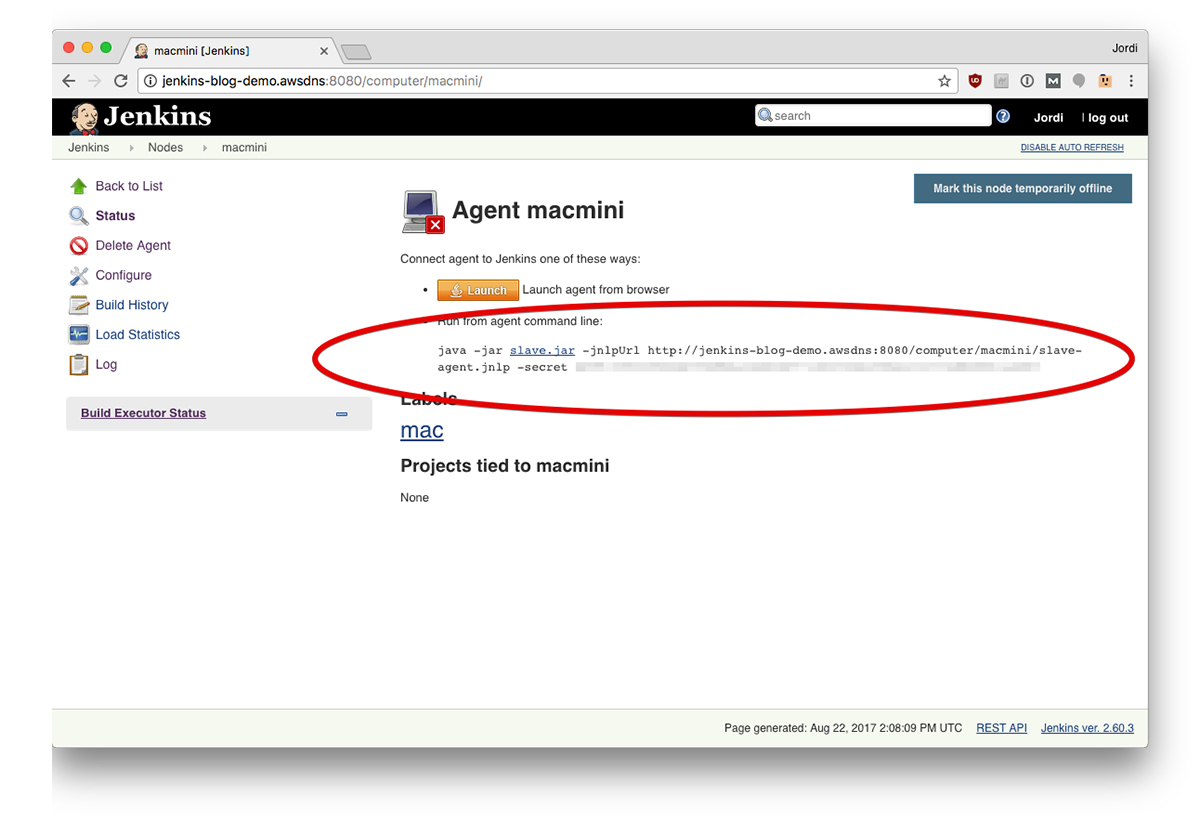
After a few seconds you’ll get the node up and running in your node list.
Now your node is ready to accept build jobs!
Step 5: Download Xcode
Since you are planning to build iOS projects, you will need to download Xcode. You can find it in the app store.
Command line tools: once you have Xcode installed, open a Terminal and type:
xcode-select --install
Configuring iOS Jobs
Now that you have a Mac worker machine with fast Wi-Fi, you’re ready to start building iOS apps.
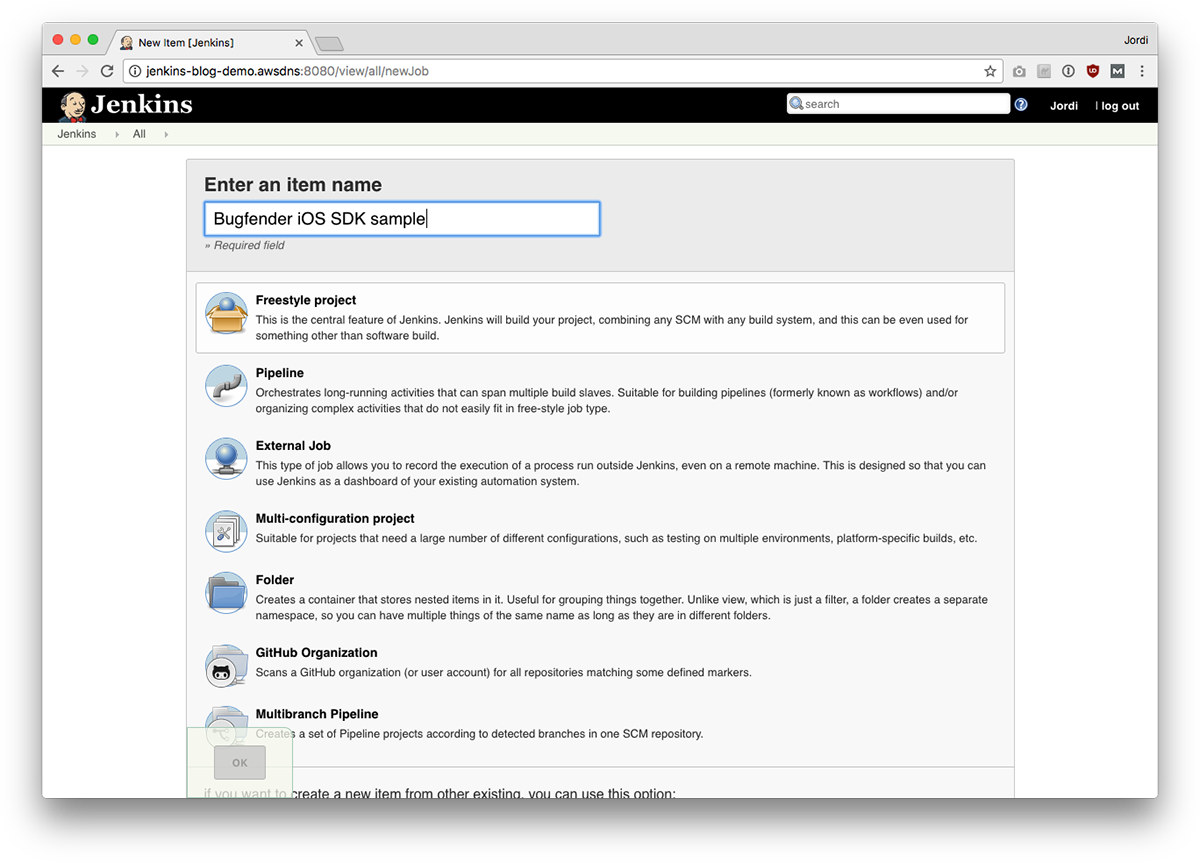
Step 1: Open https://your-ci-server-name.com on your browser and select New Item
Specify the name of the new job and select Freestyle project:
Step 2: Make sure your build is running exclusively on the Mac machine.
In order to do that, in the General tab, select “Restrict where this project can be run” and write mac as label expression (this label matches the one we chose for the Mac worker in the node configuration above).

Step 3: Under Source Code Management, specify the URL of your repository.
For our example, we’re building the Bugfender SDK sample app:

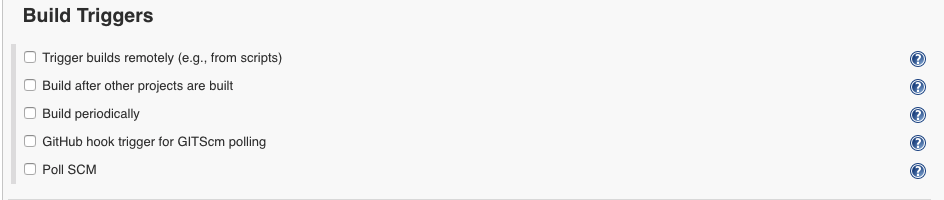
Step 4: Configuring automated build triggers.
You can select automated triggers for your builds if you don’t want to have to manually trigger them. Typically, you should configure it so that a new build is done automatically for every commit or a build is done periodically (eg. nightly builds):
Step 5: Once the code is downloaded, we need to specify how to build it.
In the Build section, we will Add a build step of type Execute shell and we will execute xcodebuild like this:
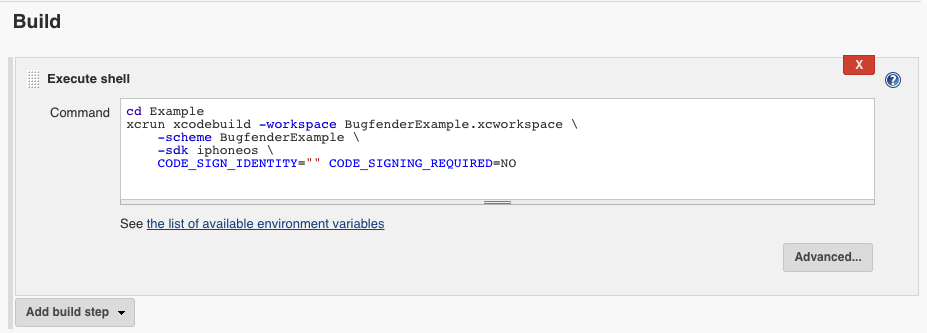
cd Example # in our example, the project is not in the root of the repository

xcrun xcodebuild -workspace BugfenderExample.xcworkspace \

    -scheme BugfenderExample \
    -sdk iphoneos \
    CODE_SIGN_IDENTITY="" CODE_SIGNING_REQUIRED=NO
This will trigger a build of the application for iOS devices, similar to when you use the Product > Build for Running in Xcode.
Make sure you add the CODE_SIGN_IDENTITY=”” CODE_SIGNING_REQUIRED=NO bits in order to prevent Xcode from trying to sign the built application, otherwise you will need to configure your provisioning profiles and developer certificate in that machine, which makes everything a bit more complicated.
Adding Tests
If you want to run tests, you can set them up with another build step:
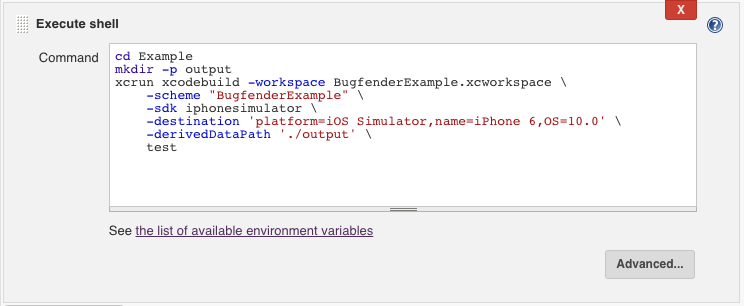
Code:
cd Example # again, we need to move directory

mkdir -p output # this directory will contain the output of the tests

xcrun xcodebuild -workspace BugfenderExample.xcworkspace \

    -scheme "BugfenderExample" \

    -sdk iphonesimulator \

    -destination 'platform=iOS Simulator,name=iPhone 6,OS=10.0' \

    -derivedDataPath './output' \

    test
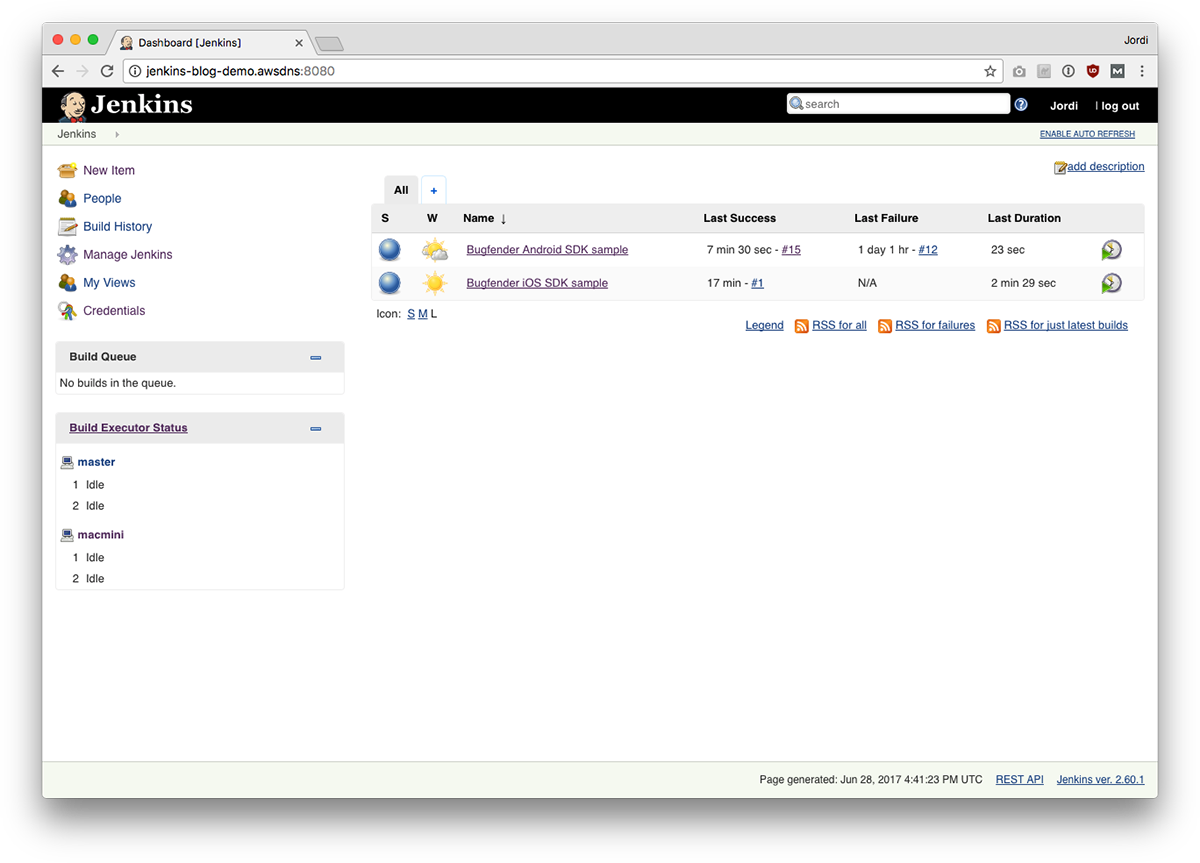
And that’s it! You’re ready to build and test our iOS sample application:
Looking for more information about developing apps? Check out:
For more posts in this series, check out:
- What Is Jenkins and Why Should You Be Using It?
- How to Install Jenkins in Ubuntu
- How to Add your First Android Job to Jenkins
Or for our complete ebook on Jenkins, head over to our Resources page.
This post was co-authored by Sarabeth Flowers Lewis.
Expect The Unexpected!
Debug Faster With Bugfender

Jordi Giménez
I help companies in their IT needs, especially on design and development of their IT strategy: web, mobile and back-end. Still a developer at heart.