9 Minutes
How to Create an npm Package Ready to Distribute From Scratch
Fix Bugs Faster! Log Collection Made Easy
What Is npm and Why Is It Important?
Node Package Manager, or npm (usually written in lower case) is one of the most commonly used package managers in JavaScript projects. It is built on top of Node and is so powerful that nearly everybody is using it.
What Is A Package Manager?
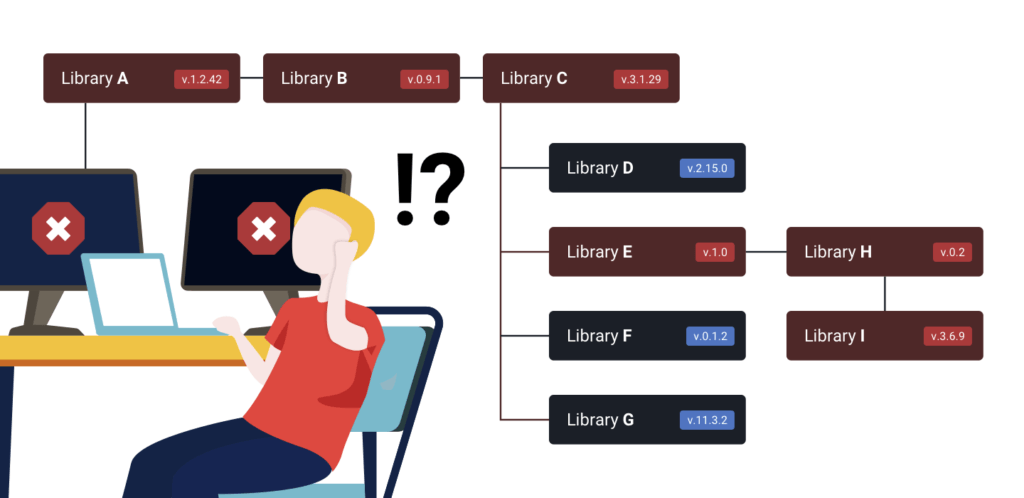
Imagine that you include library A to customize a text field. That library uses library B to format text and library C to show translations.
Imagine that, at the same time, library C uses another five different libraries to handle different languages and you end up with a scheme like this one.
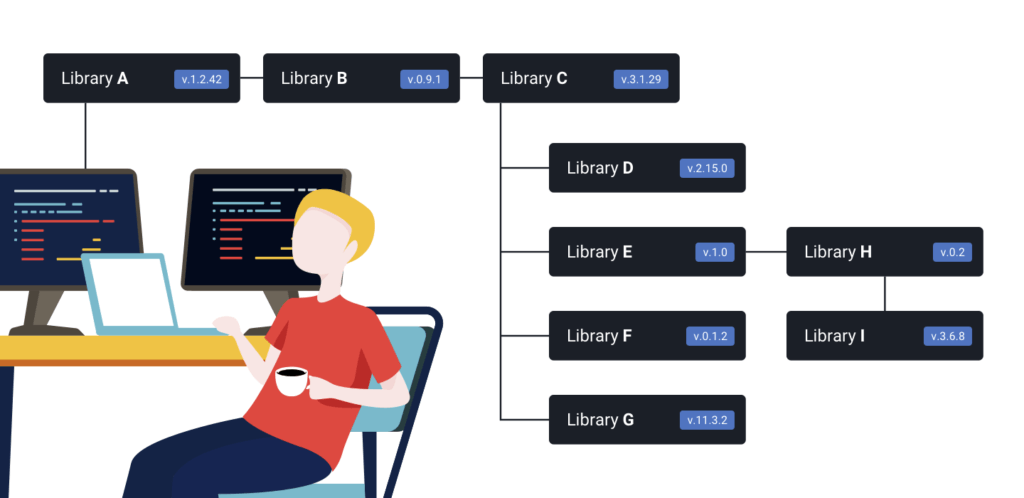
That’s called the dependency tree of your application.
Sooner or later your project will end up with dozens of dependencies (you won’t even be aware of some of them). And what’s even worse, each of those dependencies will only be compatible with certain specific versions.
This situation would be a nightmare to manage manually. A simple update in a submodule might break your dependency tree and your app might not compile. That’s exactly the problem that npm solves.
When you create an npm library you will create a json file called package.json in which you specify which dependencies your JS library has.
At the same time, the dependencies of your library will have their own package.json files, creating a full dependency tree.
If someone wants to add your library to their project, then they will just need to run:
$ npm install <your-library-package-name>Magically, all the dependencies of the tree will be downloaded and installed. This system is amazing because in practice you don’t need to care about the dependencies at all.
Is There Any Downside of Using a Package Manager?
The main one is that developers lose control of which code they are including in their projects. Concerns about security have arisen in the past and critical systems require a very controlled and strict dependency tree.
Take this example: a newly created project in React Native has more than 1500 dependencies. It is unlikely that more than a few people know them all. If someone introduced some malicious code – or just a bug – a lot of developers would probably adopt this code without even knowing it.
Don’t worry. This is a very rare occurrence. However it has already happened a few times.
Another example is the dispute in 2019 between an open-source developer and an American company that almost broke the world’s internet. Long story short, the developer decided to remove a quite-trivial-yet-often-used library from npm and suddenly the dependency tree of thousands of projects around the world was broken.
Why Should You Create Your Own npm Package Libraries?
The fastest and safest way to write code is by not writing it. If you usually need to copy-paste some features among different projects, you might prefer to create a new JavaScript library and write those features only once.
Then, the next time you need to use those features, you don’t need to copy-paste or write them again – you just reuse your library. What’s more, if you find a bug, you can solve it once and distribute the fix to the rest of your projects.
Once you have written your node module, one of the easiest and fastest ways to include them in your projects is by using npm.
That’s exactly what we thought when we introduced the remote logger BugfenderJS. Our SDK can be included manually, but most of our users just install it using npm:
$ npm install @bugfender/sdkCreating Your Own npm Package
1. Create a New Git Repository
If you’ve already created some code you can skip this part. If you are starting from scratch, however, it is time to git init. Then you can go to GitHub and create a new git repo.
2. Create your package file
Now open the terminal and navigate to your project
$ cd folder/to/your projectAnd type
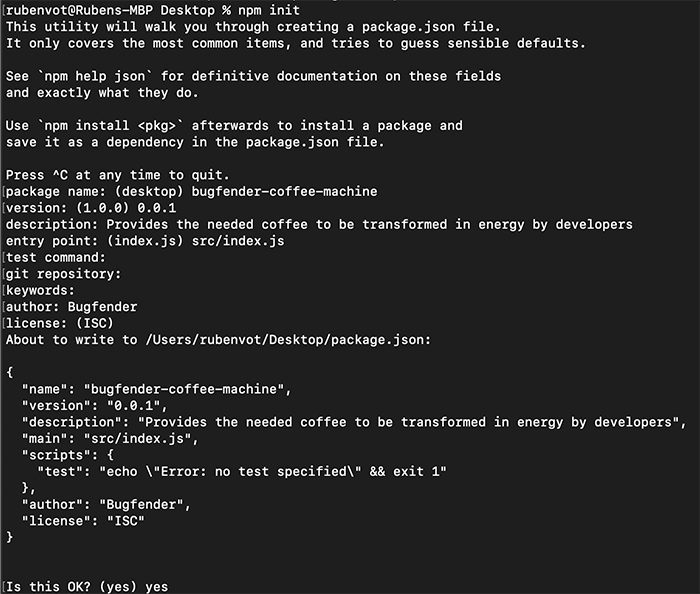
$ npm initThis tool will help you to create a new package.json asking you for the basic data needed. Some quick tips:
- Package name: remember to use kebab-case as this is the convention in the npm community.
- Version: you will be advised to start your project in version
1.0.0, however if you are just starting your project you’re probably better off starting with something like0.0.1and switching to1.0.0when the code has been tested further. Also, other developers using your library will appreciate that your versioning reflects the state of your code. - Description: straight to the point and easy to understand.
- Entry point: this is the entry file for your library. It is the file that other developers using your library will have to write when including it with
reguire('your-package'). If you are using only one file,index.jsis enough. However, if your project is about to have more files, it is better that you usesrc/index.js.
[sign-up-banner]
If you don’t want to fill the rest of the fields now, you can skip them and come back later to add them in the package.json file.
3. Adding Code To Your JavaScript Project and Establishing The Public API
Usually you have some code that you have been copy-pasting between various projects and you’re moving it to an npm module to reuse it in the future.
If that’s the case, now it’s time to add this code to the npm project. Next you will need to think of the API that you will expose to the world.
Define Your Public API With module.exports
The way that you tell npm what your library is exposing is by using module.exports, an object that should be present in the entry point of your library (usually the index.js).
You can specify whatever you want in the module.exports. It could be a number, a function, a class… Imagine you are building the module from the previous sample bugfender-coffee-machine. When a user types:
const coffeMachine = require('bugfender-coffee-machine');Then, your code will go to the index.js and will ascertain the value of the module. For example, if inside your index.js you set:
module.exports = 42;Then coffeMachine will be a number with value 42.
A more realistic approach would be to set this value to an instance of a class:
// index.js
module.exports = BugfenderCoffeeMachine;

// In your app
const CoffeeMachine = require('bugfender-coffee-machine');
const coffeeMachine = new CoffeeMachine();
coffeeMachine is now an instance of BugfenderCoffeeMachine and you can now do:
coffeeMachine.prepareCoffee() Add a README.md File
The easiest and trivial step is also one of the most important. Having a good Readme file ensures that other people will be able to understand what your library’s about – and how to use it.
You don’t need to be too creative about it, just use a template like this one and try to fill all the fields in a clear way.
The users of your npm library will appreciate that you saved them time. Even a future version of you will be happy to have clear docs!
Commit
Now your library is ready and you can proceed with your first commit.
Similar to the Readme file, there are already plenty of docs on how to write meaningful git commits.
4. Publish on npm
Sign up to npm
If you don’t have a npm account, it’s time to sign up.
npm is a command line tool. Open the console and write:
$ npm login # you will be prompted your mail and password You can check that you are correctly logged in with
$ npm whoamiTip: prior to publishing a new npm package, ensure that you are logged with the adequate user. This is especially important if you use the same machine for work and side projects.
Test Your Framework
We are almost ready to publish. But just before we do, we can run a quick local test.
First, navigate to your library file path, the same path in which you placed your package.json, and use the command npm link.
$ cd ./route-to-your-library/
$ npm link # This adds the project to your local npm registry
Now create a new JavaScript project in your system and again use npm link, but specifying the name of the package – the same one that you specified in the npm init step.
$ cd ./route-to-a-new-javascript-project/
$ npm link [name-of-the-package] # This installs the library in the project
You can use this process in the future when you plan to update your library so you don’t need to publish every time you want to test new changes.
Publish
Now that you’ve created the library and you tested it locally, it’s time to share it with the world.
$ cd ./route-to-your-library/
$ npm publish
npm will start to work on publishing your library to the official repository.
When it finishes, the library should be available in https://www.npmjs.com and every user in the world should be able to install it using npm install <package-name>.
5. Updating your library
We’re arriving at the end of the article, but it’s only the beginning of your library.
If you start using it and other users adopt it, you will also need to maintain it. From time to time you will have to introduce new features or update deprecated code. Whenever you do that, remember to use Semantic Versioning (major.minor.patch).
npm eases the process of maintaining your code with the npm versioning tools:
$ npm version patch # From 0.0.1 to 0.0.2
$ npm version minor # From 0.1.0 to 0.2.0
$ npm version major # From 1.0.0 to 2.0.0
Be aware that npm version updates the package.json, creates a commit and adds a TAG to git.
One Last Thing
At Bugfender we are software developers ourselves and we know how valuable these guides are. If you found this post helpful, you can help us in return by sharing it with your colleagues.
Bugfender is the remote console logger created for developers, by developers. The new Javascript SDK helps you to find bugs faster and provide even better customer support to your clients.
You can sign up for free in less than 20 seconds and add the SDK to your site in an additional 10 seconds using npm install @bugfender/sdk (not bad for half a minute ;-).
We publish tutorials and debugging stories regularly on our blog. Don’t forget to visit us from time to time or, even better, subscribe to our quarterly spam-free newsletter to get an overview of the new articles.
Expect The Unexpected!
Debug Faster With Bugfender

Rubén Vázquez