14 Minutes
How to perform an end-to-end test of a React app using Cypress
Fix Bugs Faster! Log Collection Made Easy
UI is nothing without UX. While user interface development is essential, it means nothing if it doesn’t lead to a good user experience. So whenever us devs add a new feature, or modifies the existing one, we must ensure the UX flows seamlessly. And that means thorough testing.
Generally, the development process should involve tests at both the module and unit level to ensure both work as expected through the changes. However, these tests won’t truly simulate a realistic scenario for the end user: only an end-to-end (E2E) test will achieve this.
Thankfully there are some great tools available to assist with user interface testing. In this article, we will learn about Cypress.io, a leading JavaScript testing framework, and specifically we’ll focus on using Cypress’s end-to-end testing feature with a ReactJS application.
By the end of this article, you’ll be able to set up Cypress with a React App, start writing the test cases, and think of how to write test scenarios.
Excited? Right, let’s get started.
Cypress and End-to-End Testing
The test-driven development (TDD) is a key factor for applications and it’s changes over time. Unfortunately, a lot of applications still shy away from adopting TDD; setting things up, learning a new technology and up-skilling the team is complex, and many devs see it as separate to the app-building process, rather than as a key part of it.
Cypress adds major value here. It gives devs tools to set up their tests and offers fully baked APIs to write them. You can run the tests as if you are running the application, and Cypress’s error messages help you debug.
If you are a web developer or a QA engineer building applications using modern JavaScript frameworks, Cypress enables you to write test cases to perform:
- Unit Tests
- End-to-End Tests
- Integration Tests
The ReactJS Application
We will be using Cypress’s end-to-end test with a ReactJS application. To kick things off, let’s create a simple yet useful ReactJS application called registration.
To do so, open a command prompt or terminal window and execute the following command.
npx create-react-app registration
Here we are creating a ReactJS app using the create-react-app tool. Once complete, you will have a basic default ReactJS app ready to go. You can run the app straightway using the yarn start or the npm run start command and it will be accessible locally on the [<http://localhost:3000>](<http://localhost:3000>) URL.
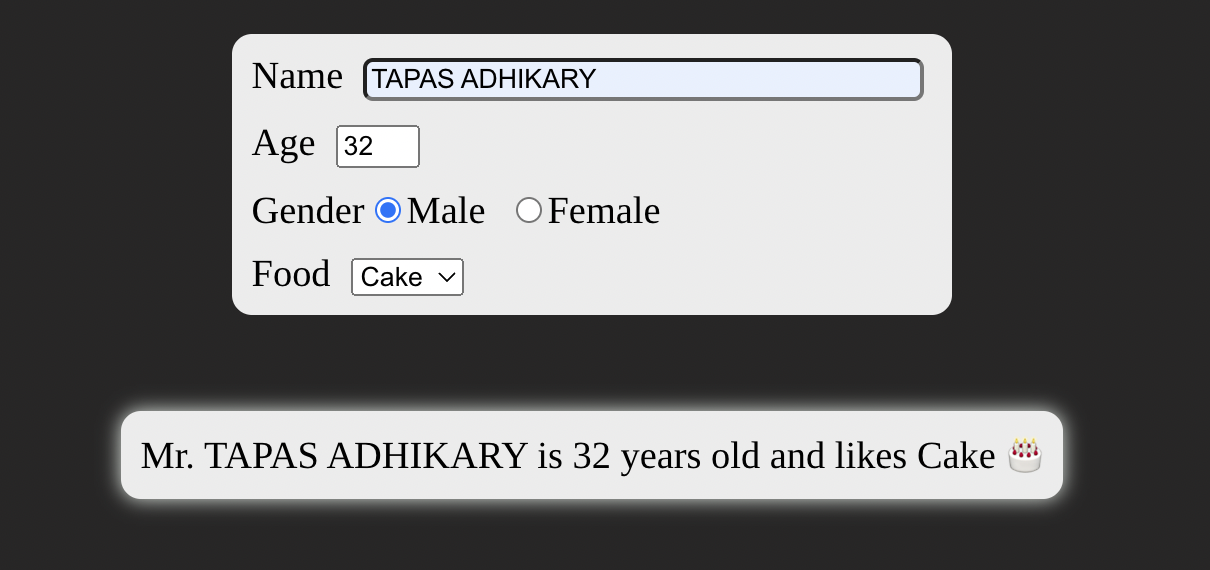
To kick things off, let’s modify the default app to build something more exciting and impactful. Our registration app will collect a bunch of user information and print out a message based on the inputs. For example, it will collect information like name, age, gender, and food choice to build a message that will be sent back to the user.
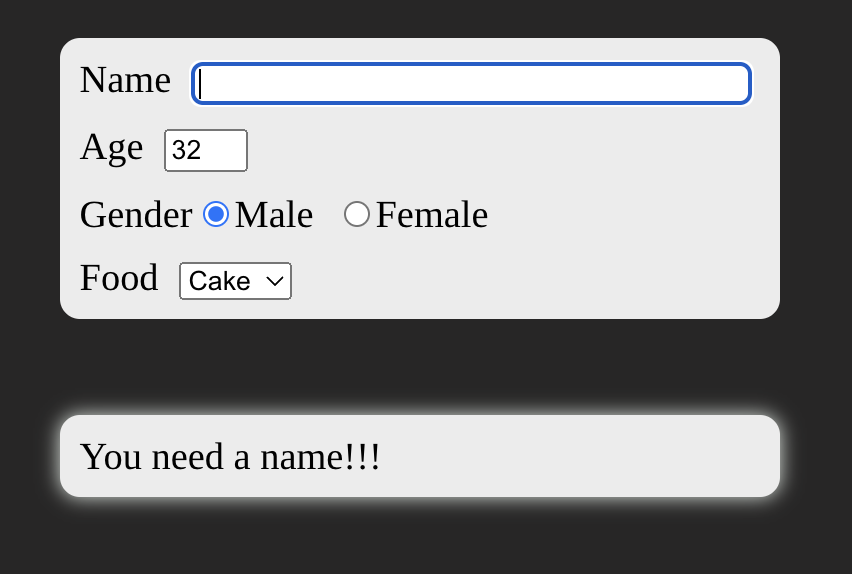
We will also add a case where the message changes to ask the user to provide a name if they haven’t already done so.
Ok, now let’s get back to our registration app codebase. To do so, open the App.js file and replace the content of the file with the following:
import { useState } from "react";
import "./App.css";

function App() {
  const [state, setState] = useState({
    name: "",
    age: 18,
    gender: "M",
    food: "Pizza",
  });

  const handleChange = (event) => {
    setState({
      ...state,
      [event.target.name]: event.target.value,
    });
  };

  return (
    <div className="App">
      <form>
        <div className="form-group">
          <label htmlFor="name-id">Name</label>
          <input
						autoFocus
						id="name-id"
						type="text"
						name="name"
						value={state.name}
						onChange={(e) => handleChange(e)} />
        </div>
        <div className="form-group">
          <label htmlFor="age-id">Age</label>
          <input
						id="age-id"
						type="number"
						name="age"
						min={18}
						max={99}
						value={state.age}
						onChange={(e) => handleChange(e)}/>
        </div>
        <div className="form-group">
          Gender
          <input
            id="male-id"
            type="radio"
            name="gender"
            value="M"
            checked={state.gender === 'M'}
            onChange={(e) => handleChange(e)} />
          <label htmlFor="male-id">Male</label>
          <input
            id="female-id"
            type="radio"
            name="gender"
            value="F"
            checked={state.gender === 'F'}
            onChange={(e) => handleChange(e)} />
          <label htmlFor="female-id">Female</label>
        </div>
        <div className="form-group">
          <label htmlFor="food-id">Food</label>
          <select
						name="food"
						id="food-id"
						label="Favorite Food"
						onChange={(e) => handleChange(e)}>
            <option value="Pizza">
              Pizza
            </option>
            <option value="Pasta">Pasta</option>
            <option value="Cake">Cake</option>
          </select>
        </div>
      </form>

      <div className="details">
        { state. name ?
          <p>
            {state.gender==='M'? 'Mr.': 'Mrs.'}
            {' '}
            {state.name} is {state.age} years old and likes
            {' '}
            {state.food} {' '}
            {state.food === 'Pizza' ? '🍕' :
              state.food === 'Pasta' ? '🍝' :
                state.food === 'Cake' ? '🎂' :
                 null
            }
          </p> : <p>You need a name!!!</p>
        }
      </div>
    </div>
  );
}

export default App;
The above code is a ReactJS component that renders a form of four inputs: name, age, gender, and food.
Each of the inputs is associated with an event handler that will detect any changes made to them. When the user changes any values of these elements, the handleChange method gets called and modifies the component’s state.
Next, we show the message based on the state value of the component. So if the state gets modified, the message also gets changed. We have also put up a condition saying that if the name value is undefined, the app should show a special message asking the user to provide a name.
Great! Now let’s create some styles so that the app looks presentable. Open the file App.css and replace the content of the file with the following:
@import url('<https://fonts.googleapis.com/css2?family=Tinos&display=swap>');

body {
  font-family: 'Tinos', serif;
  font-size: larger;
  background-color: rgb(39, 38, 38);
}
.App {
  display:flex;
  flex-direction:column;
  align-items:center;
  justify-content:center;
}

.App > form {
  display:flex;
  flex-direction:column;
  justify-content:center;
  margin: 2rem;
  background-color: #ececec;
  padding: 0.3rem;
  border-radius: 10px;
  width: 350px;
}

.App form .form-group{
  margin: 0.3rem;
}

.App form .form-group label {
  margin-right: 10px;
}

.App form .form-group INPUT[type="text"] {
  width: 80%;
  border-radius: 5px;
}

.App .details {
  display:flex;
  flex-direction:column;
  justify-content:center;
  margin: 1rem;
  background-color: #ececec;
  padding: 0.3rem;
  border-radius: 10px;
  min-width: 350px;
  box-shadow: #e2eae4 0px 0px 10px;
}

.App .details > P {
  margin: 0.3rem;
  padding: 0;
}
Now we have the app ready, and you should have it running successfully locally, as expected.

The End-to-End Test
Now let’s start setting up Cypress with our application. Open a command prompt in the project directory and use this command to install Cypress as a dev dependency.
npm install cypress -D
Next, use the following command to launch the Cypress application locally.
npx cypress open
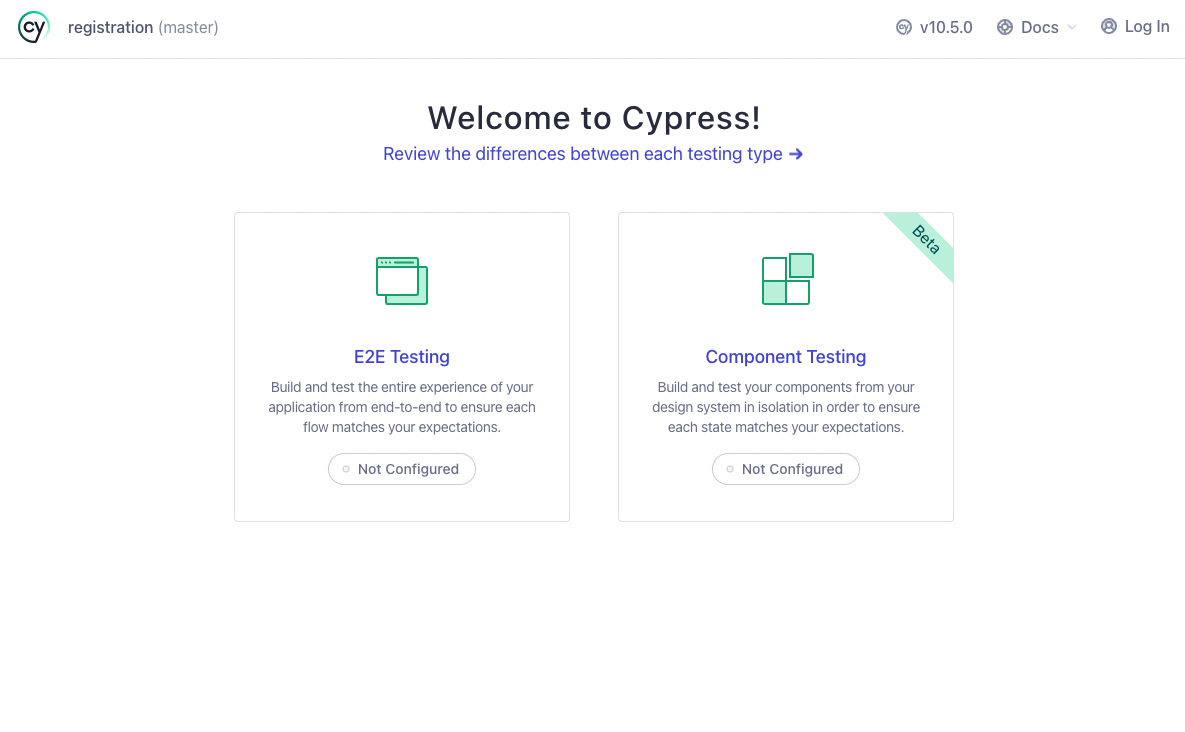
You should see the welcome screen with two options to get started. Cypress added the component testing feature with its latest release, and it’s in beta. But as our focus is on end-to-end testing, let’s click on the box that says E2E Testing.
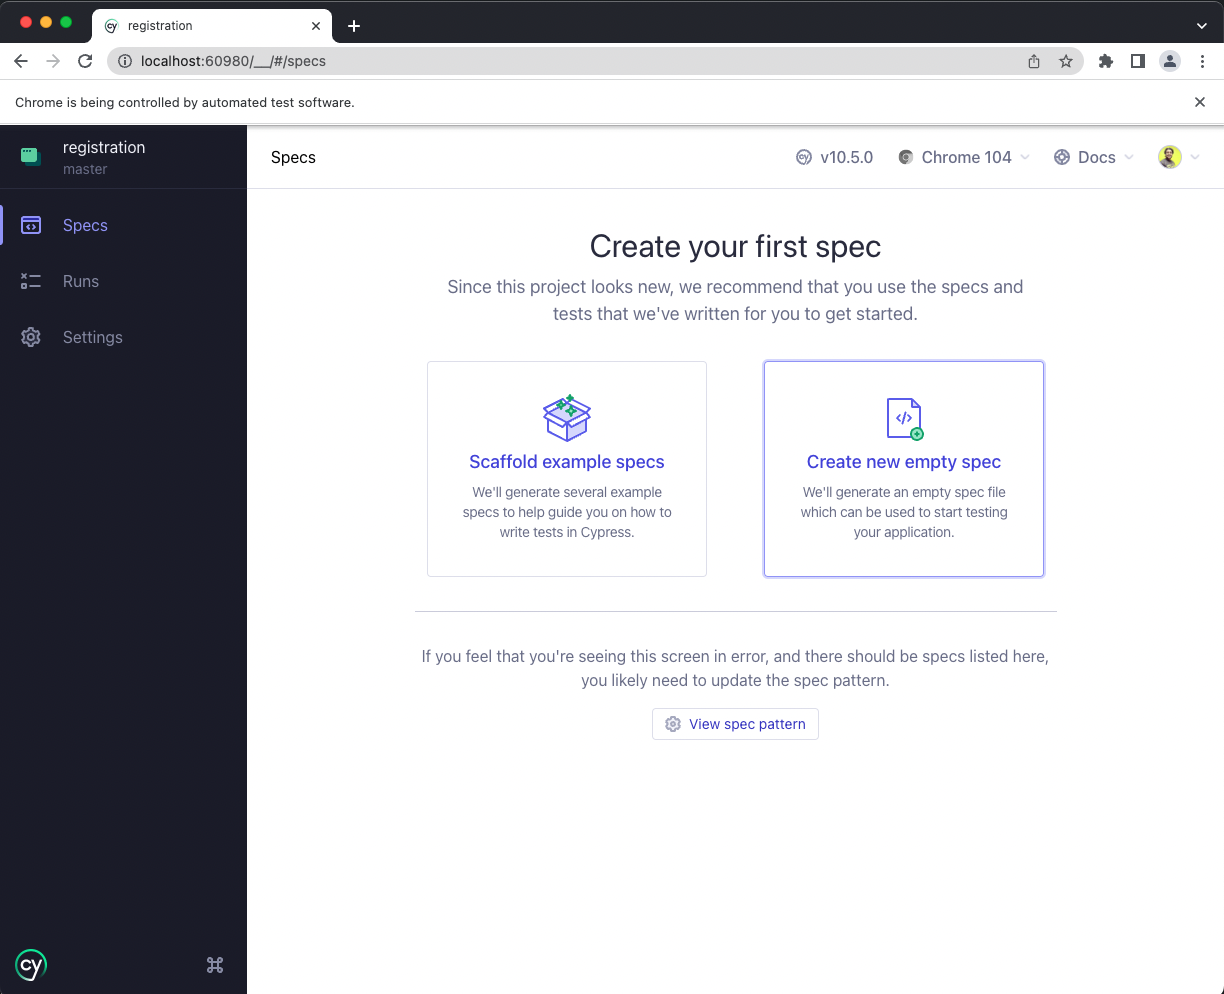
At this point, we do not have any test specifications written.
If you’re not familiar, a test specification is a file that contains a bunch of test cases we want to execute. Let’s create a new spec by clicking on the square highlighted in the image below.
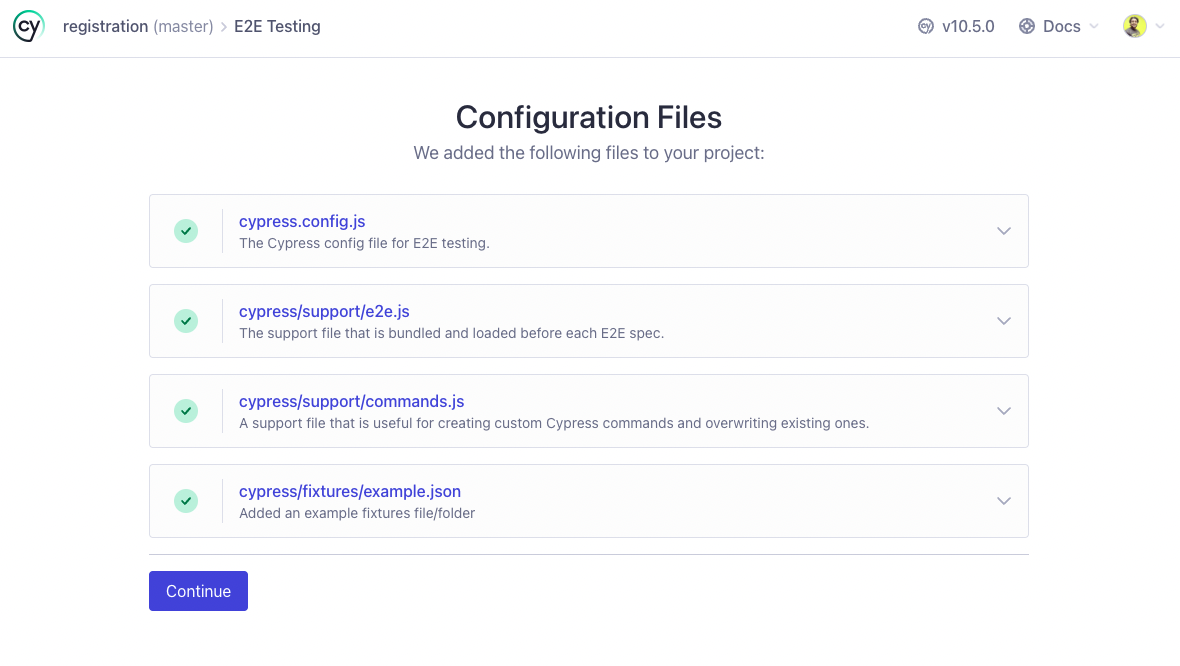
Now Cypress will create a configuration file called cypress.config.js at the root of the project folder. It will also create a cypress folder to store other important files like spec files, screenshots and scripts.
You can see the list of files on the screen. Please click on the Continue button to move forward.
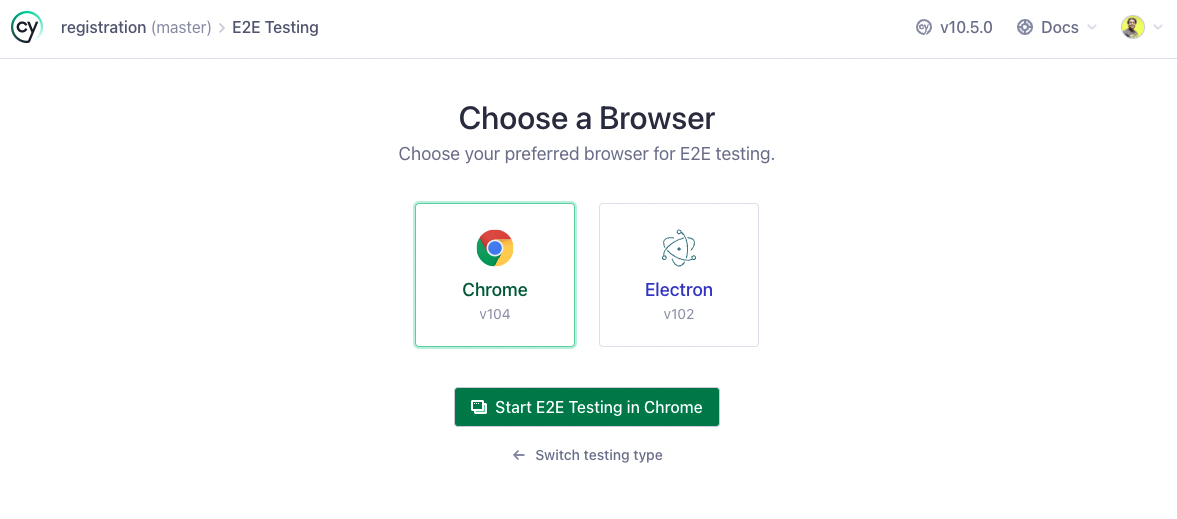
Cypress runs all your tests on the browser, so you need to select the browser environment to run the test (I’m using Google Chrome). Please select your preferred browser environment and click on the start button to create your first spec.
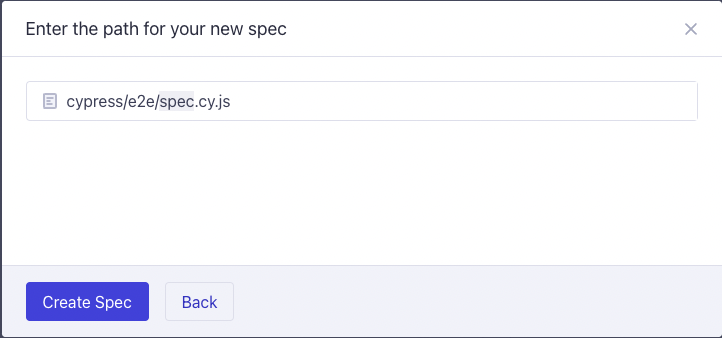
Cypress will prompt a default path for your spec file, and you can change it if required. Just click on the Create Spec button to create the spec.
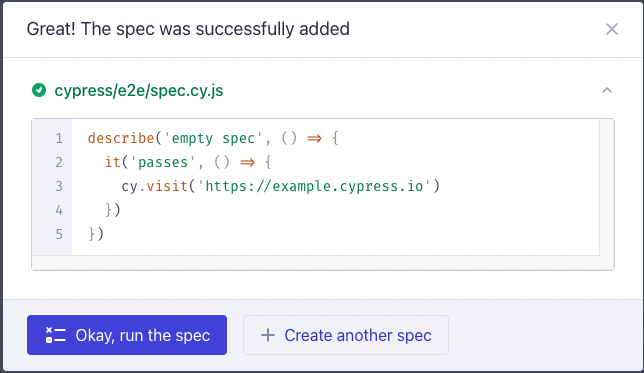
Great. You’ve created your first spec. There are a few lines of code that we’ll need to take a look at later, but first, let’s run the spec.
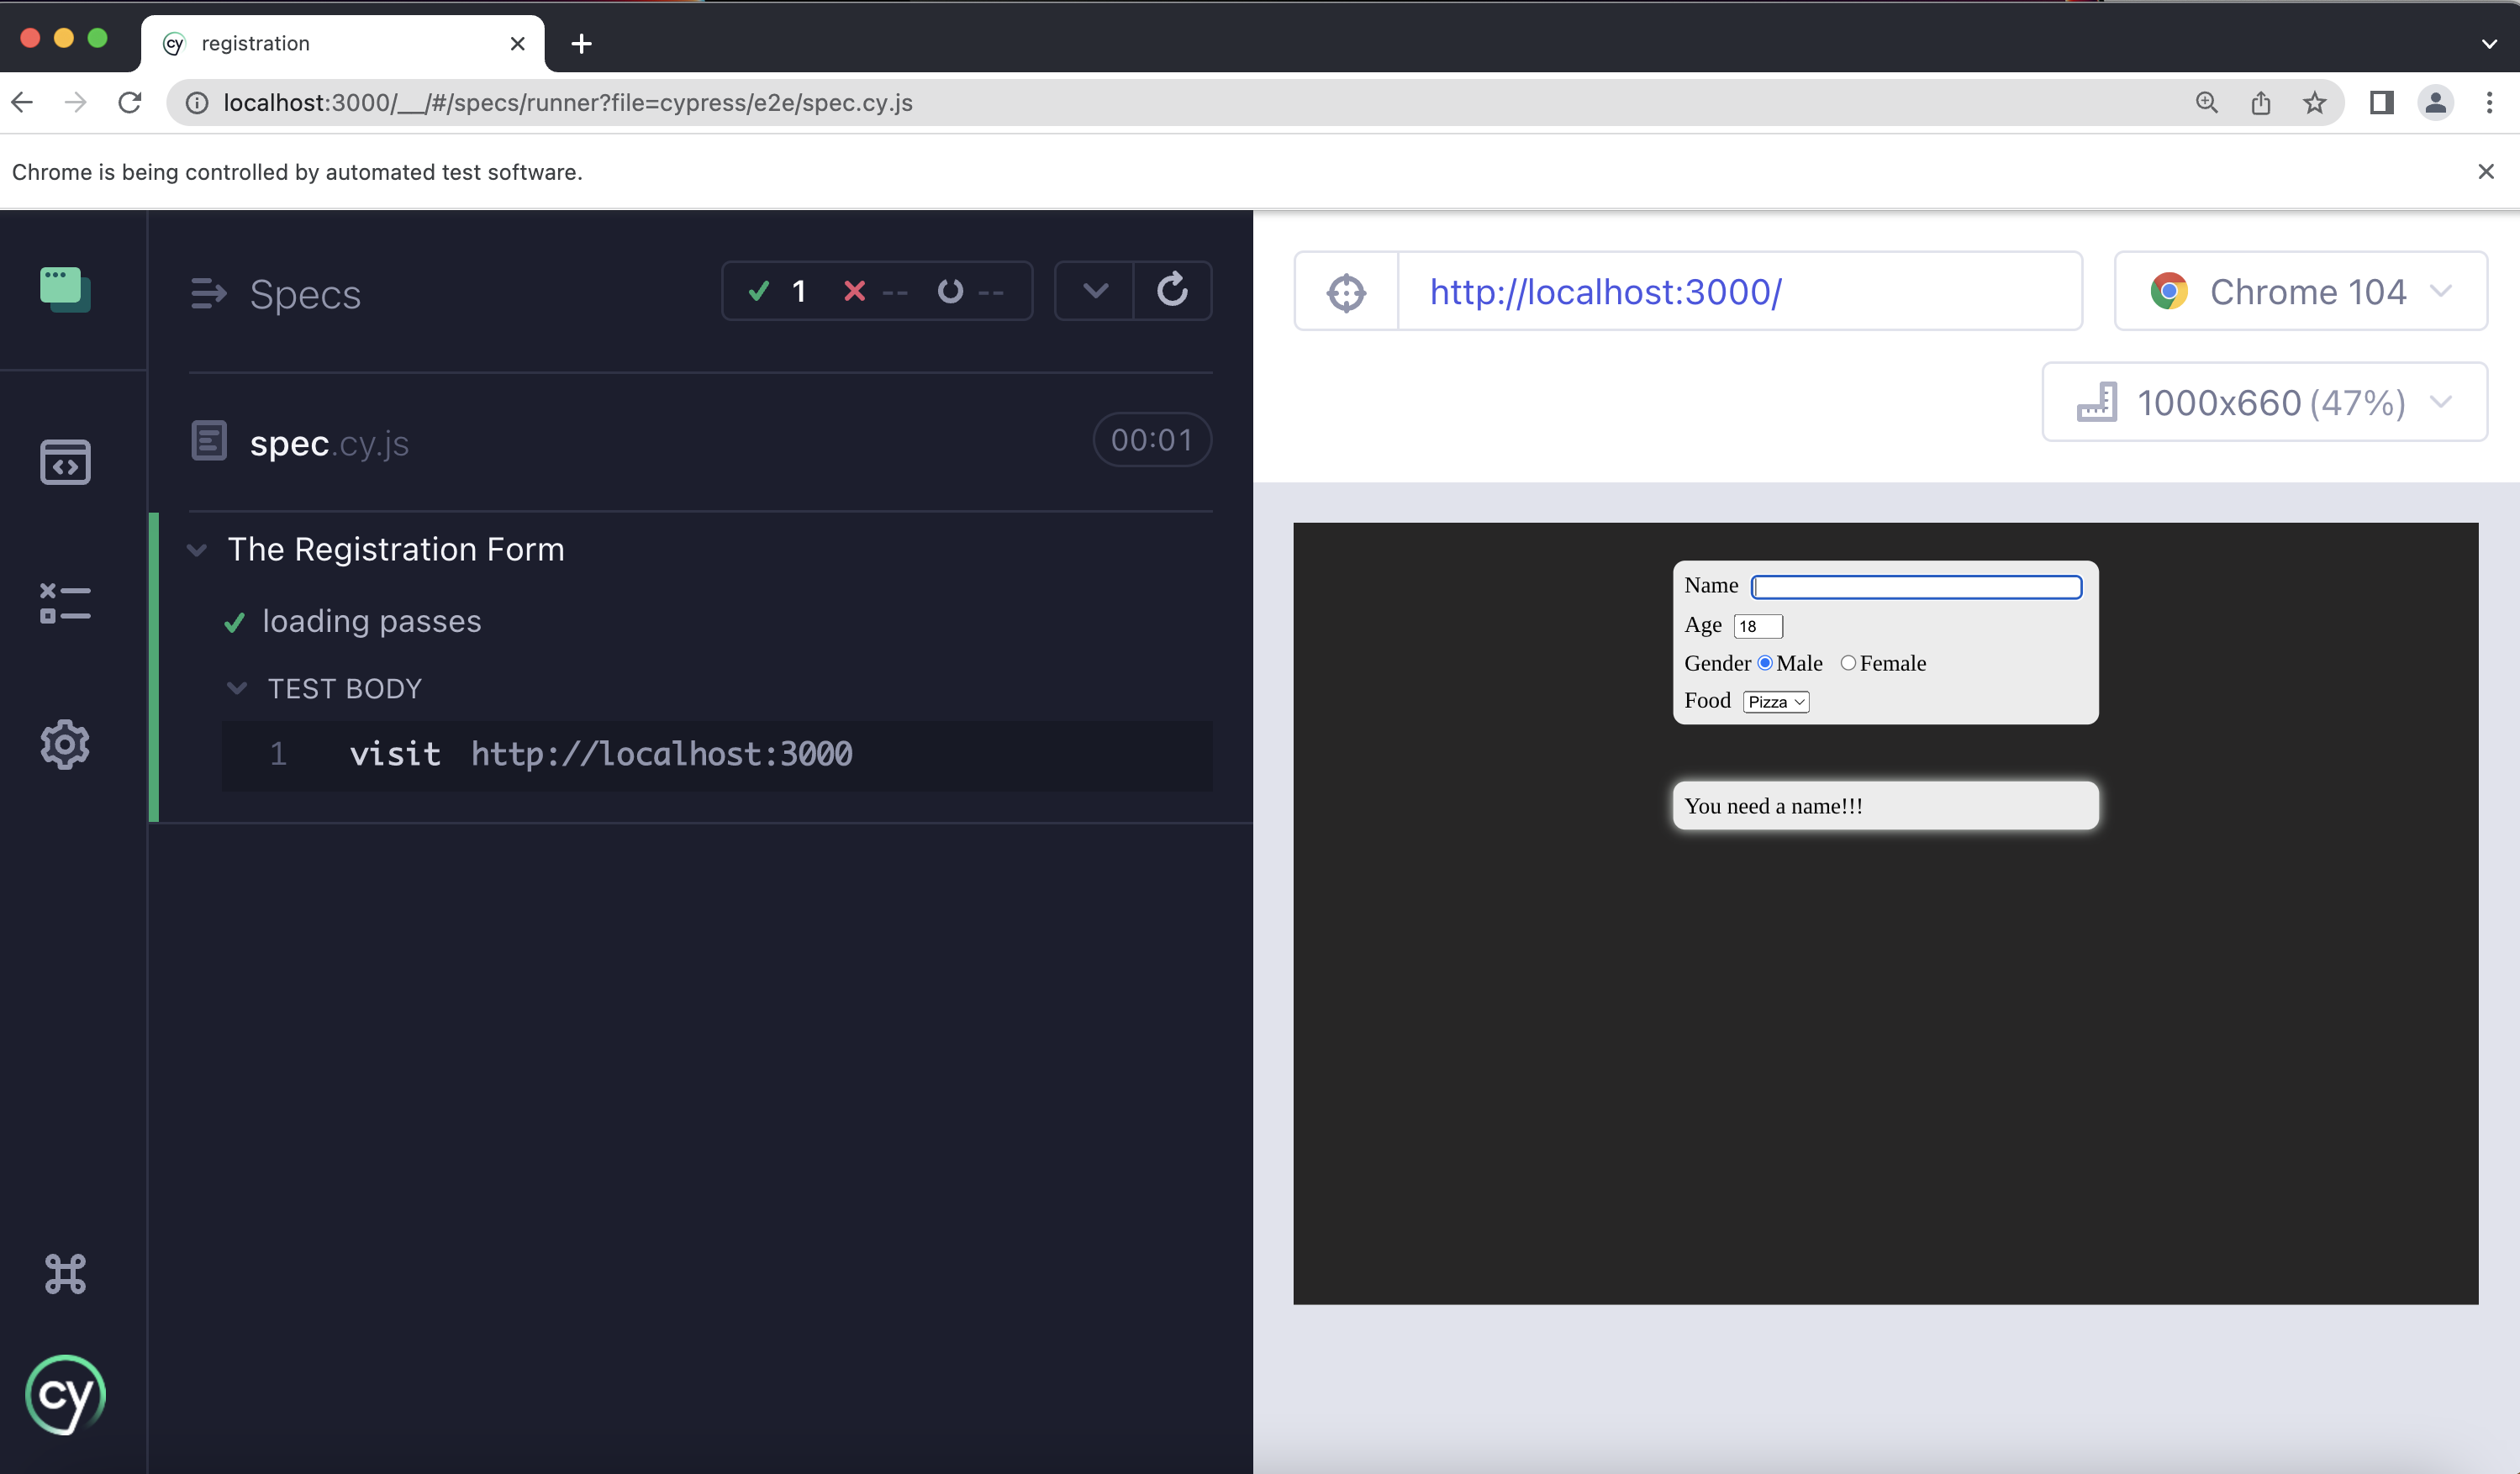
After you run it, you should see the spec run status in the left window, while the right-hand side window shows the execution result of the test.
In this case, the test was to visit a website using a URL, and this action was performed successfully.

Understanding Test Cases
Your application may have one or more spec files. Each file contains one or more test cases, and we write these test cases (or tests) using Cypress APIs.
Cypress uses the BDD syntax we find in Mocha. If you are already familiar with it, then you must know describe(), it(), before(), after(), and many more from the BDD interface. They make it much easier to read the tests.
In the test snippet below, we have described it as an empty spec, and when it passes, we want to do something. In this case, we want to visit a website URL. Please note that here we use a Cypress API to visit the website.
describe('empty spec', () => {
  it('passes', () => {
    cy.visit('<https://example.cypress.io>')
  })
})
Let’s change the above snippet a bit (just as a warm-up exercise). We can give the test a better description by saying it’s for a registration form. When the loading stage passes, we want to visit our registration app running locally.
describe('The Registration Form', () => {
  it('loading passes', () => {
    cy.visit('<http://localhost:3000>')
  })
})
After we save the changes and the test runs, we will now see our registration app instead of the Kitchen Sink app we saw previously.
Now, Let’s Add More Tests
So far, we have added just one test to visit the app locally. We have learned to use a few BDD interfaces, and one Cypress API method called visit.
Now we will add some more tests, and while doing that, we will learn a few more excellent APIs.
As part of the end-to-end test, we must ensure the application’s flow has not been altered unexpectedly to cause user experience issues. Our small application has a few characteristics like:
- If the name is blank, show a message saying, “You need a name!!!”
- If the name is provided, show that name as part of the message.
- Show a food emoji based on the food selection.
- The Gender radio buttons should select the correct characters (M/F) for male and female.
As these characteristics build the expectation from the app, we need to make sure it behaves the same way.
Cypress relies on the query selectors to pick an element from the DOM (remember, it runs on the browser!) and run its APIs. We will see a few tests to gauge the expected behaviour of the name, food, and gender field.
Test 1: The Name Field
Now we need to the following code snippet in the spec file, and save.
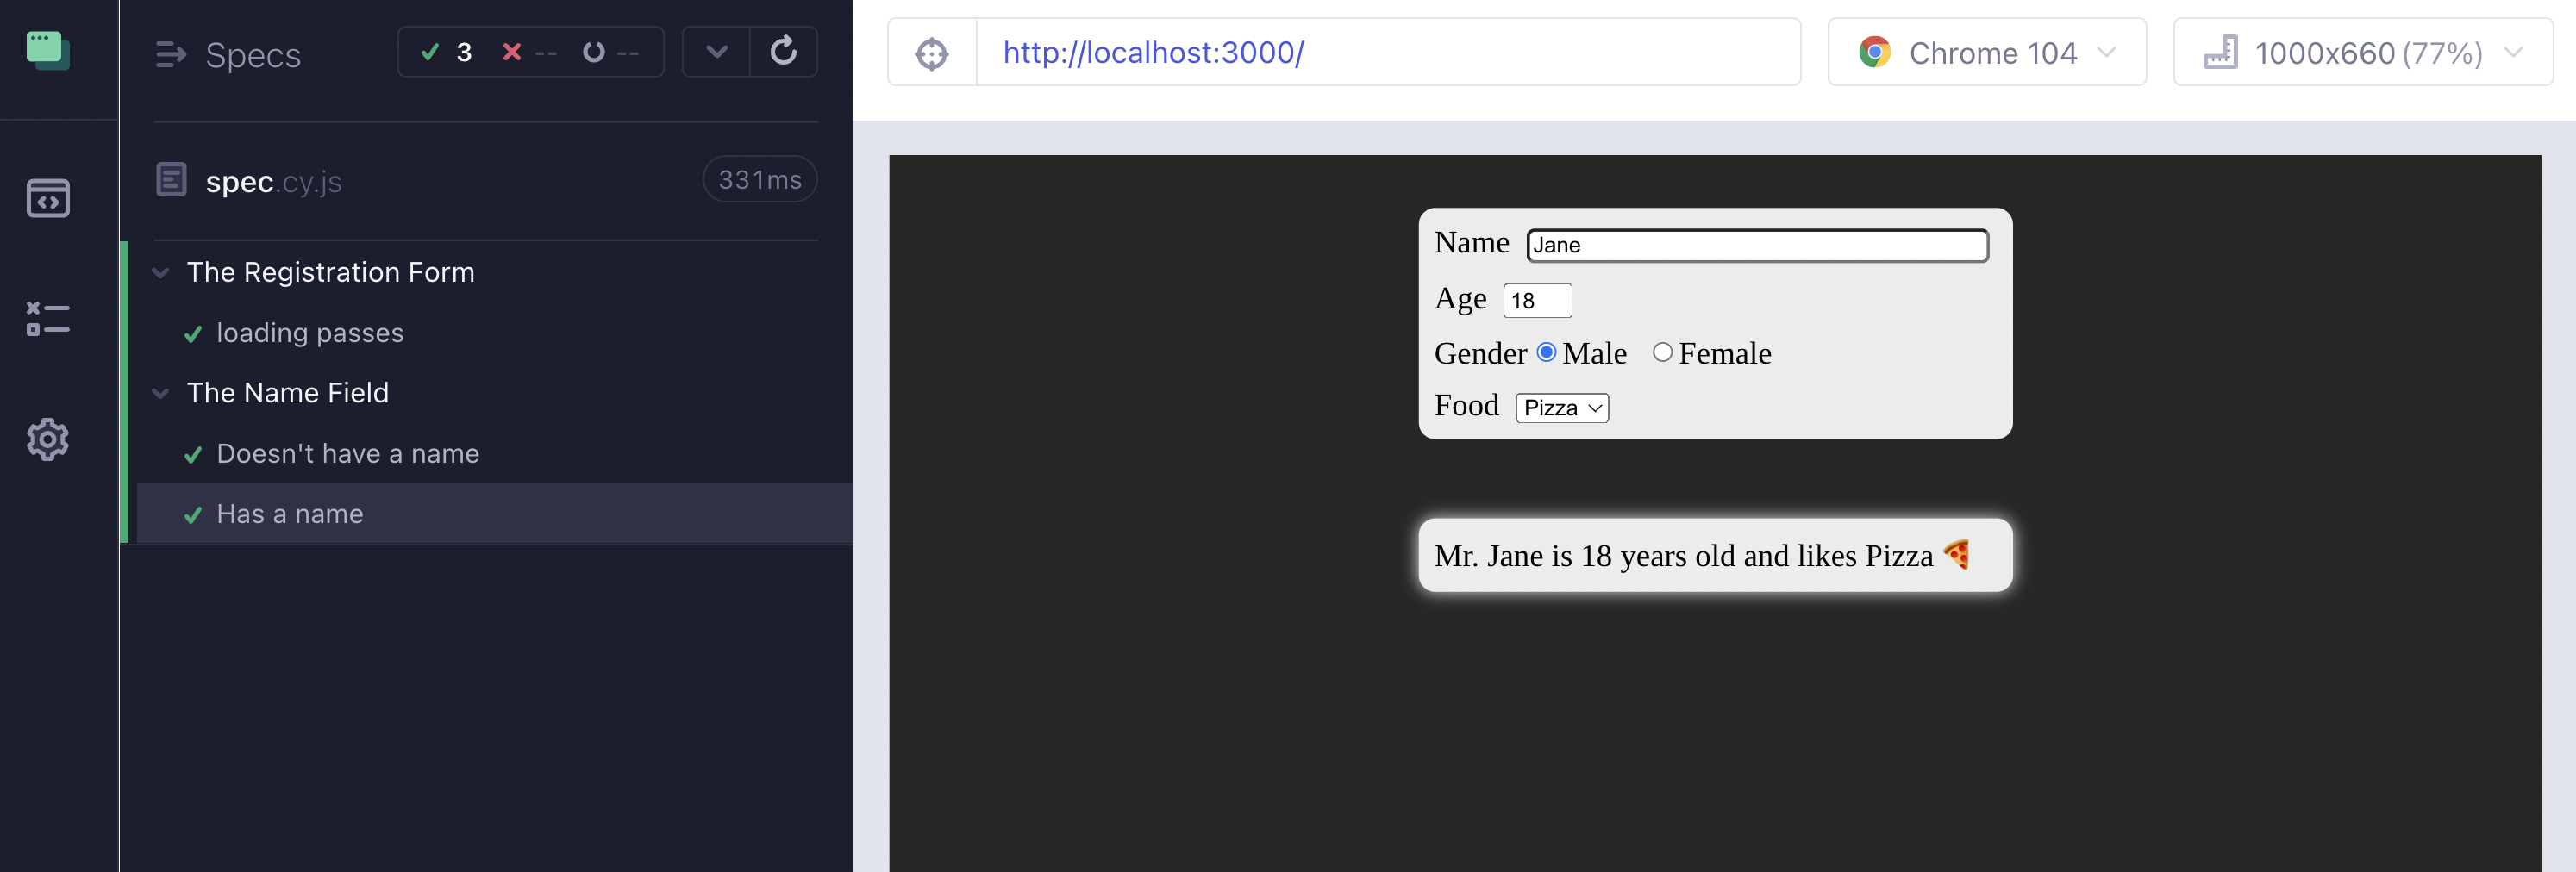
Note that we have two tests here. The first one checks whether the expected message appears when we clear the name field, while the second confirms that the name appears in the message when we type a name in the name field.
describe('The Name Field', () => {
  it("Doesn't have a name", () => {
    cy.get('input[name="name"]').clear();
    cy.get('.details > p').should('contain',"You need a name!!!");
  });

  it('Has a name', () => {
    cy.get('input[name="name"]')
    .clear().type('Jane');
    cy.get('.details').should('contain', 'Jane');
  });
});
Both tests pass, and we see that in the Cypress console. The left panel shows the list of tests passed (with a green tick), and the right panel shows the run of the tests.
Now, let’s tweak one of the tests to show a failed result. Let’s expect the name June in the message when Jane was typed as a name.
it('Has a name', () => {
    cy.get('input[name="name"]')
    .clear().type('Jane');
    cy.get('.details').should('contain', 'June');
  });
As you see below, the test failed, showing the output with an elaborated debug message.

Test 2: The Food Field
Now let’s write three tests that will check whether the respective emojis appear in the message when we select a food name from the select box. Please note that we use the select API here.
describe('The food field', () => {
  it('Has Pasta', () => {
    cy.get('select').select("Pasta");
    cy.get('.details > p').should('contain',"🍝");
  });

  it('Has Cake', () => {
    cy.get('select').select("Cake");
    cy.get('.details > p').should('contain',"🎂");
  });

  it('Has Pizza', () => {
    cy.get('select').select("Pizza");
    cy.get('.details > p').should('not.contain',"🎂");
  });
});
Test 3: The Gender Field
Now we can check the radio button value and then validate the expectations. The check API helps us with that.
Here, we are checking whether the radio button with the value F has been selected.
describe('The Gender field', () => {
  it('Has Female value', () => {
    cy.get('[type="radio"]').check('F');
  });
});
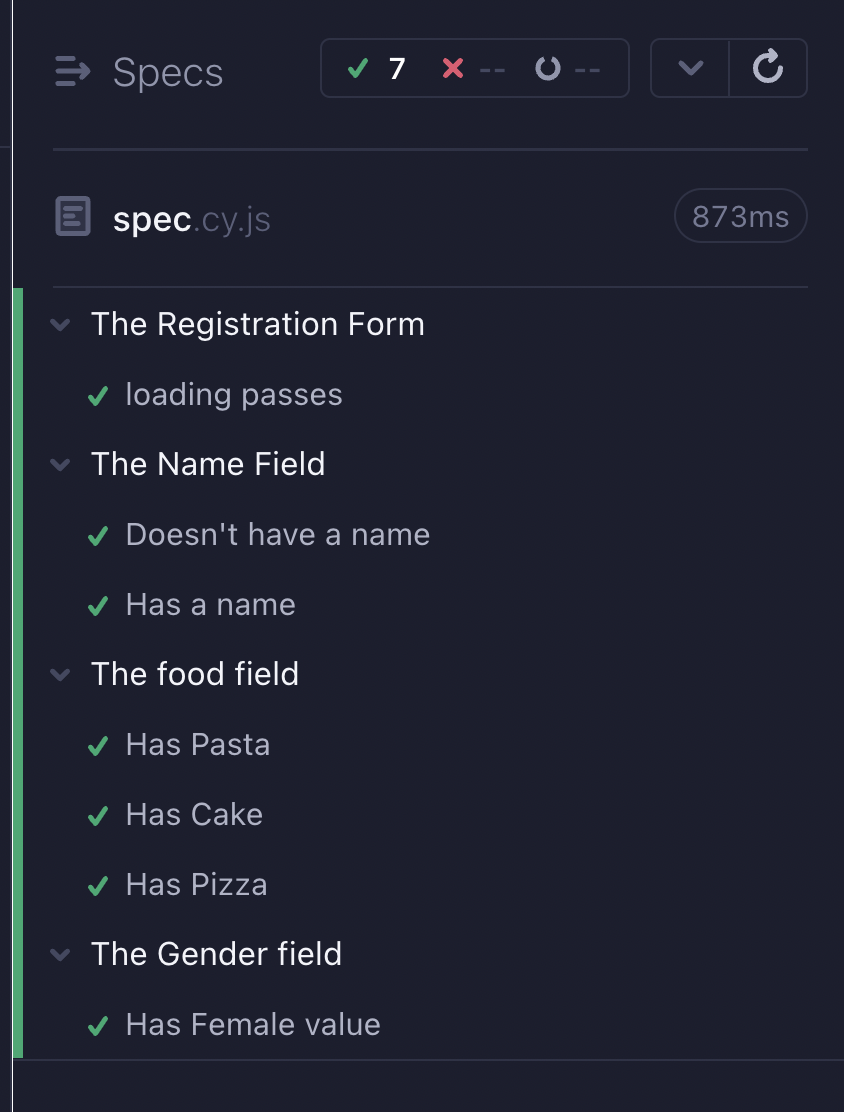
Here is how all our tests run together from the spec.
Test 4: Take a Screenshot
Besides running tests, Cypress also offers APIs to perform some handy operations. One of them is taking screenshots. You may want to take them and compare them.
describe('Overall Snapshot', () => {
  it('takes a screenshot', () => {
    cy.screenshot()
  })
})
Ok, that’s all for now!
Cypress contains loads more useful APIs and features on top of the ones we’ve discussed so far. Please explore them further from the Cypress Website and learn how it works under the hood.
And if you want to take your test to the next level, you can use Bugfender for React. With our SDK you’ll be able to get all the test logs and crashes, which will make it a lot easier to fix any problems, as you’ll be able to see everything that led the test to fail.
You can find all the source code used in this article from our GitHub repository. Please feel free to fork/clone/extend.
Expect The Unexpected!
Debug Faster With Bugfender

Tapas Adhikary
Tapas Adhikary is a Full Stack Developer. He loves building web apps, mobile apps, and JAMstack solutions. He is a technology blogger who publishes articles for freeCodeCamp, daily.dev, dev.to, his blog.greenroots.info and also in his YouTube Channel. Follow him on Twitter(@tapasadhikary) to stay connected.