
18 Minutes
Progressive Web Apps (PWAs): Bridging the Gap Between Web and Mobile Development
Fix Bugs Faster! Log Collection Made Easy
Not even Tim Berners-Lee, the inventor of the world wide web, could have predicted the pace or breadth of its expansion over the last 30 years.
Once, the web was only accessible via clunky desktop computers. Today it can be reached from laptops, tablets, mobile phones and even smartwatches. So today’s consumers want native apps that are unique to a particular platform and they expect updates to arrive seamlessly.
Thankfully web browsers have evolved, too. The first generation of basic, homespun browsers (hello Mosaic, Midas and Netscape Navigator) have been replaced with feature-rich gateways equipped with modern APIs, which enable developers to achieve a native app experience without maintaining different codebases. And the Progressive Web App(PWA) is a crucial part of this evolution.
The Progressive Web App
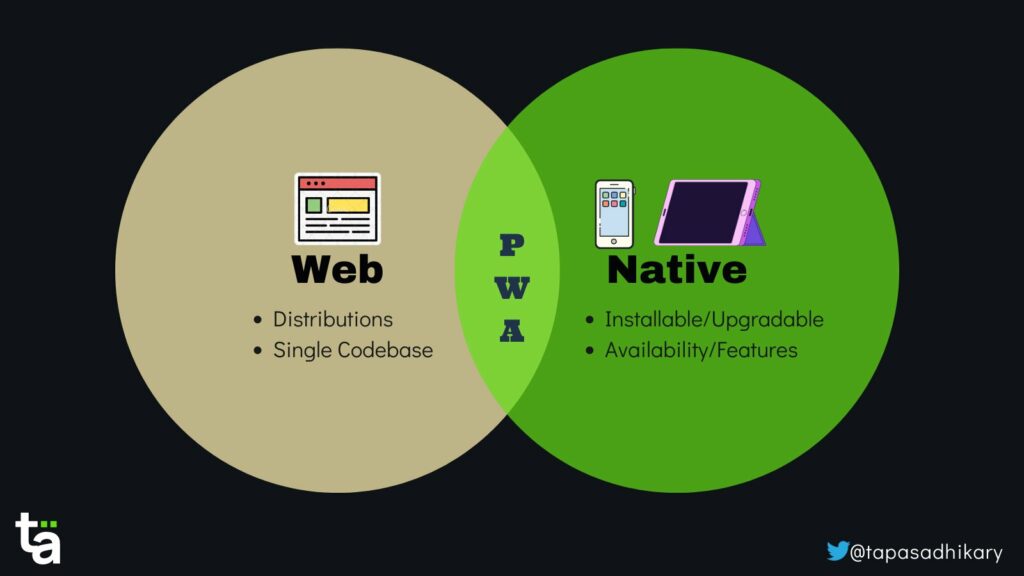
A Progressive Web App is an application built with modern browser APIs on the web platform to provide a native (platform-specific) user experience from the same codebase. They bridge the gap between two distinct development approaches:
- A native platform-specific mobile app (like Android and iOS apps). These are easy to install and update, provide access to native hardware and can be smoothly integrated with the app store. But they require us to maintain platform-specific codebases, which means different development environments and different maintenance skills.
- Web applications (which run on browsers). These do not need different codebases to maintain, and we can distribute them easily over the web. However, the experience is not as rich as a native app.
Progressive web apps provide a third way. PWA app developers can use the modern browser APIs to build applications from the same codebase, with the experience of native apps. You can install them, automatically update them, integrate them with the app store, make them work offline and more.
When we consider PWA features from the end user’s perspective, we will find them at the intersection of web and mobile applications.
Ok, now let’s look at the various aspects of building a Progressive Web Application and create one ourselves using Plain JavaScript and Vite.
Service Workers
There are a few fundamental pillars of PWA you should be aware of. Service workers are one such pillar, helping with caching, offline availability and fast loading.
Service workers are JavaScript source code that run in a dedicated thread, separated from the main thread. They act like a proxy server between a client and a server; in the case of a PWA, the client is the browser, and the server is the data source (a dedicated physical server or cloud).
Service workers specialize in intercepting network requests and performing appropriate actions, like serving the data to the client from the cache storage (using the CacheStorage API) when offline, or from the server when online. They also aid the transmission of push notifications and background syncing.
Before you apply the service workers to your PWA, you must register them within your PWA. After successful registration, the service worker gets downloaded on the client to start the installation and activation process.
To register a service worker, you must check that the browser supports the service worker API, and register it. The code snippet below registers a service worker that is written in the serviceworker.js file.
if ('serviceWorker' in navigator) {
   navigator.serviceWorker.register("/serviceworker.js");
}
You can also use your browser’s dev tools to establish whether a service worker has been activated successfully after registration. The image below shows that a service worker is successfully registered, activated, and running.
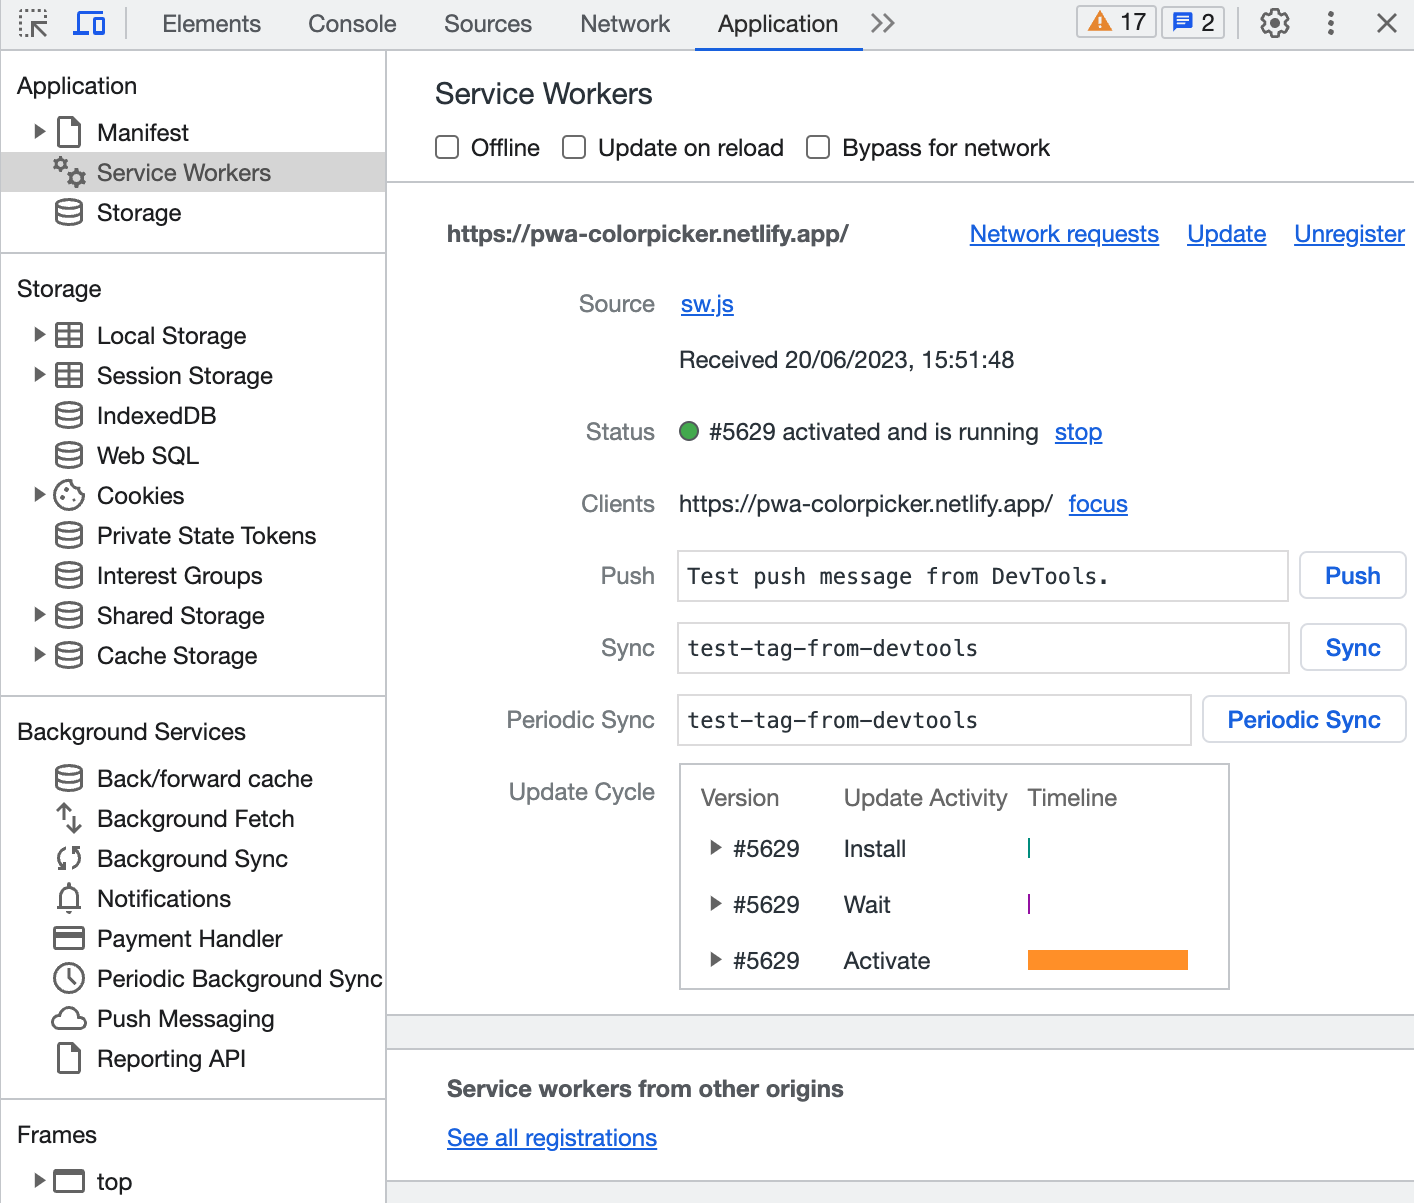
Also, please note that you can have only one service worker per progressive web app (PWA). The service worker only works over HTTPS, not HTTP, to ensure security and encryption.
Web App Manifest File
Your PWA also needs meta-information about the application, such as the name, description, icons, and launch mode (standalone or full-screen).
You need to provide this information in the app web manifest file, a JSON file called manifest.json. Here is an example of how the content of the app manifest file may appear:
{
  "name": "Color Picker",
  "short_name": "ColorPicker",
  "start_url": "/",
  "display": "standalone",
  "background_color": "#fdfdfd",
  "theme_color": "#ffffff",
  "orientation": "portrait-primary",
  "icons": [
    {
      "src": "/images/icons/icon-72x72.png",
      "type": "image/png", "sizes": "72x72"
    },
    {
      "src": "/images/icons/icon-96x96.png",
      "type": "image/png", "sizes": "96x96"
    },
    {
      "src": "/images/icons/icon-128x128.png",
      "type": "image/png","sizes": "128x128"
    },
    {
      "src": "/images/icons/icon-144x144.png",
      "type": "image/png", "sizes": "144x144"
    },
    {
      "src": "/images/icons/icon-152x152.png",
      "type": "image/png", "sizes": "152x152"
    },
    {
      "src": "/images/icons/icon-192x192.png",
      "type": "image/png", "sizes": "192x192"
    },
    {
      "src": "/images/icons/icon-384x384.png",
      "type": "image/png", "sizes": "384x384"
    },
    {
      "src": "/images/icons/icon-512x512.png",
      "type": "image/png", "sizes": "512x512"
    }
  ]
}
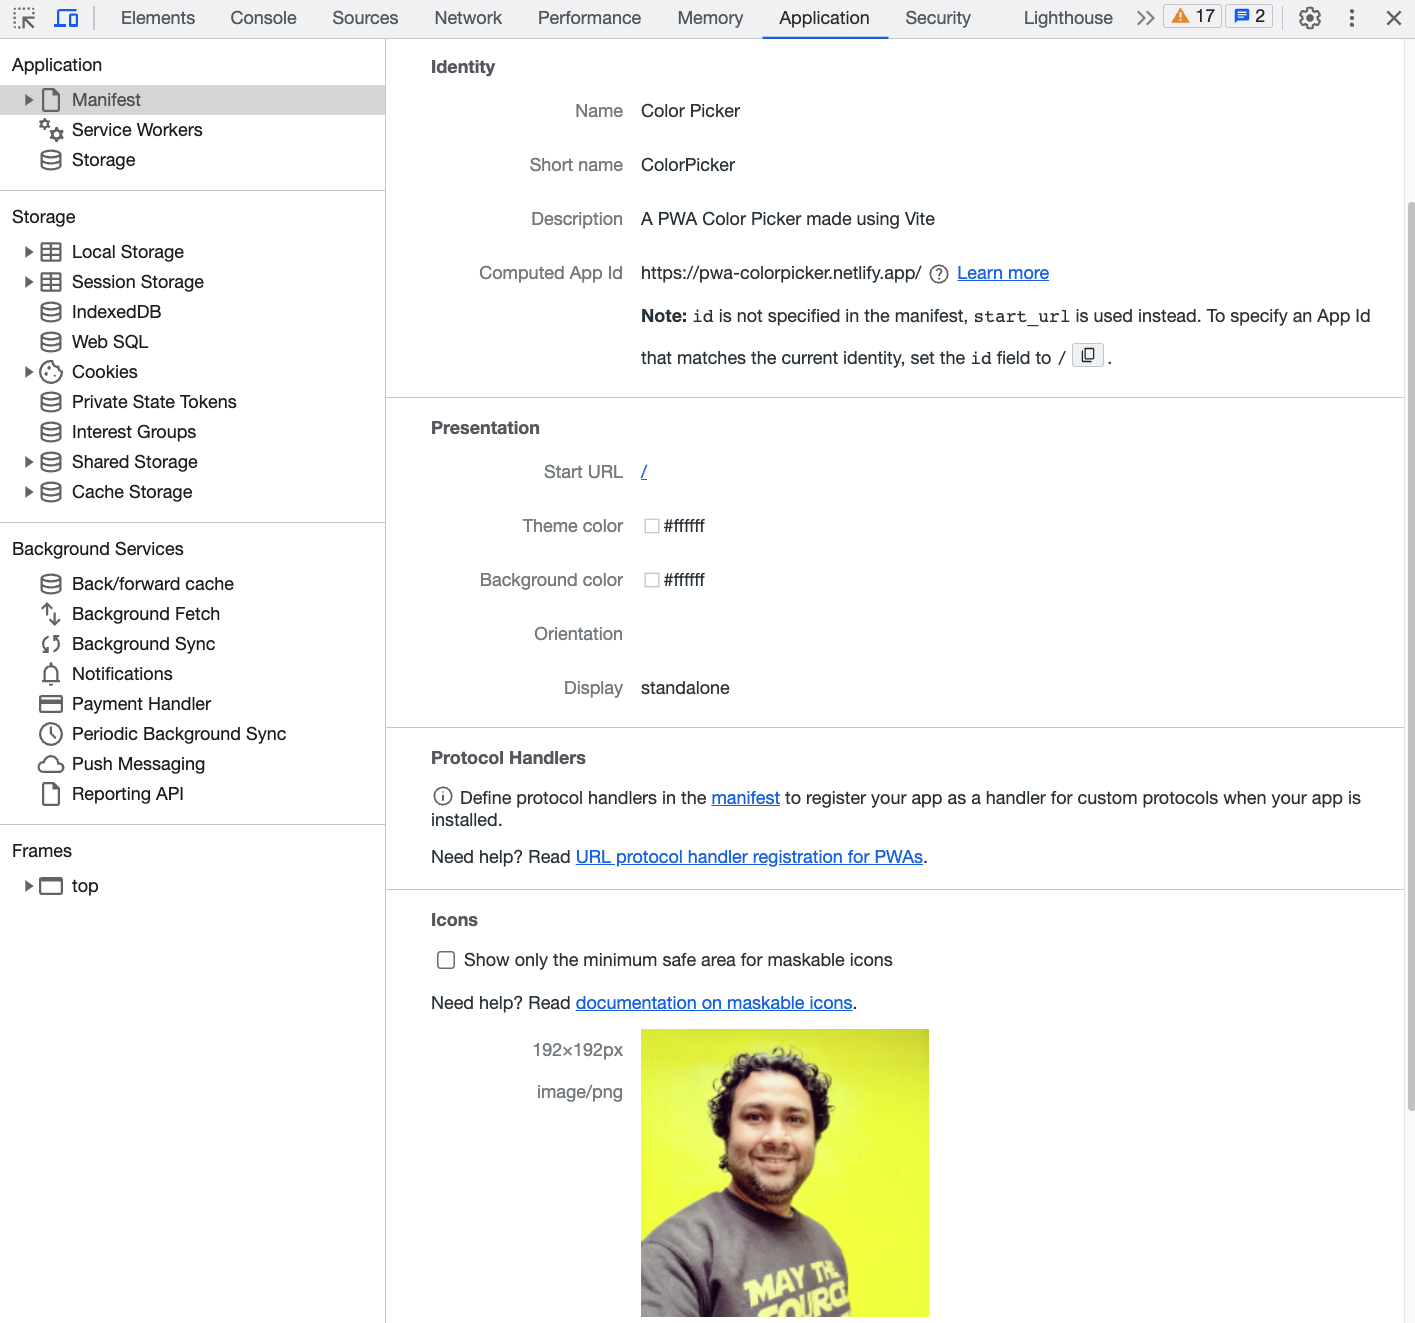
All the details you provide in the manifest.json file will be used in the mobile app installation process; the app icon, app name and app mode will all be taken from the file. You can see the details in the manifest file loaded into your app from the browser’s DevTools.
The image below shows how the manifest information is loaded into the app from the manifest file example we saw above.
Caching
Progressive Web Apps are known for offering speed and high availability on users’ mobile devices. So much so, in fact, that they can work completely or partially in offline mode. Caching helps achieve that, which makes the gap between a PWA and native mobile app smaller and increasing the user engagement.
The service worker uses Cache Storage API to interact with the cache and manage assets as appropriate. As a developer of the PWA, you must decide what you want to cache and what your caching strategy should be.
For example, you may want to cache the following assets:
- All the static images
- CSS Styles
- All static fonts
- Static data that comes from a JSON file
- The entry-point index.html page or any other pages
- JavaScript files that serve the business logic
You also need to consider the space on the user’s mobile device before considering what you would like to cache.
You can explore and adapt various caching strategies, based on the application’s use cases. Here are the five most popular strategies to explore:
- Cache only
- Network only
- Stale-While-Revalidate
- Cache first, then Network
- The network first, then Cache
Some of them are self-explanatory, but a few need explanations that are outside the scope of this article. You can read more about caching here.
Let’s Build a Progressive Web App using JavaScript and Vite
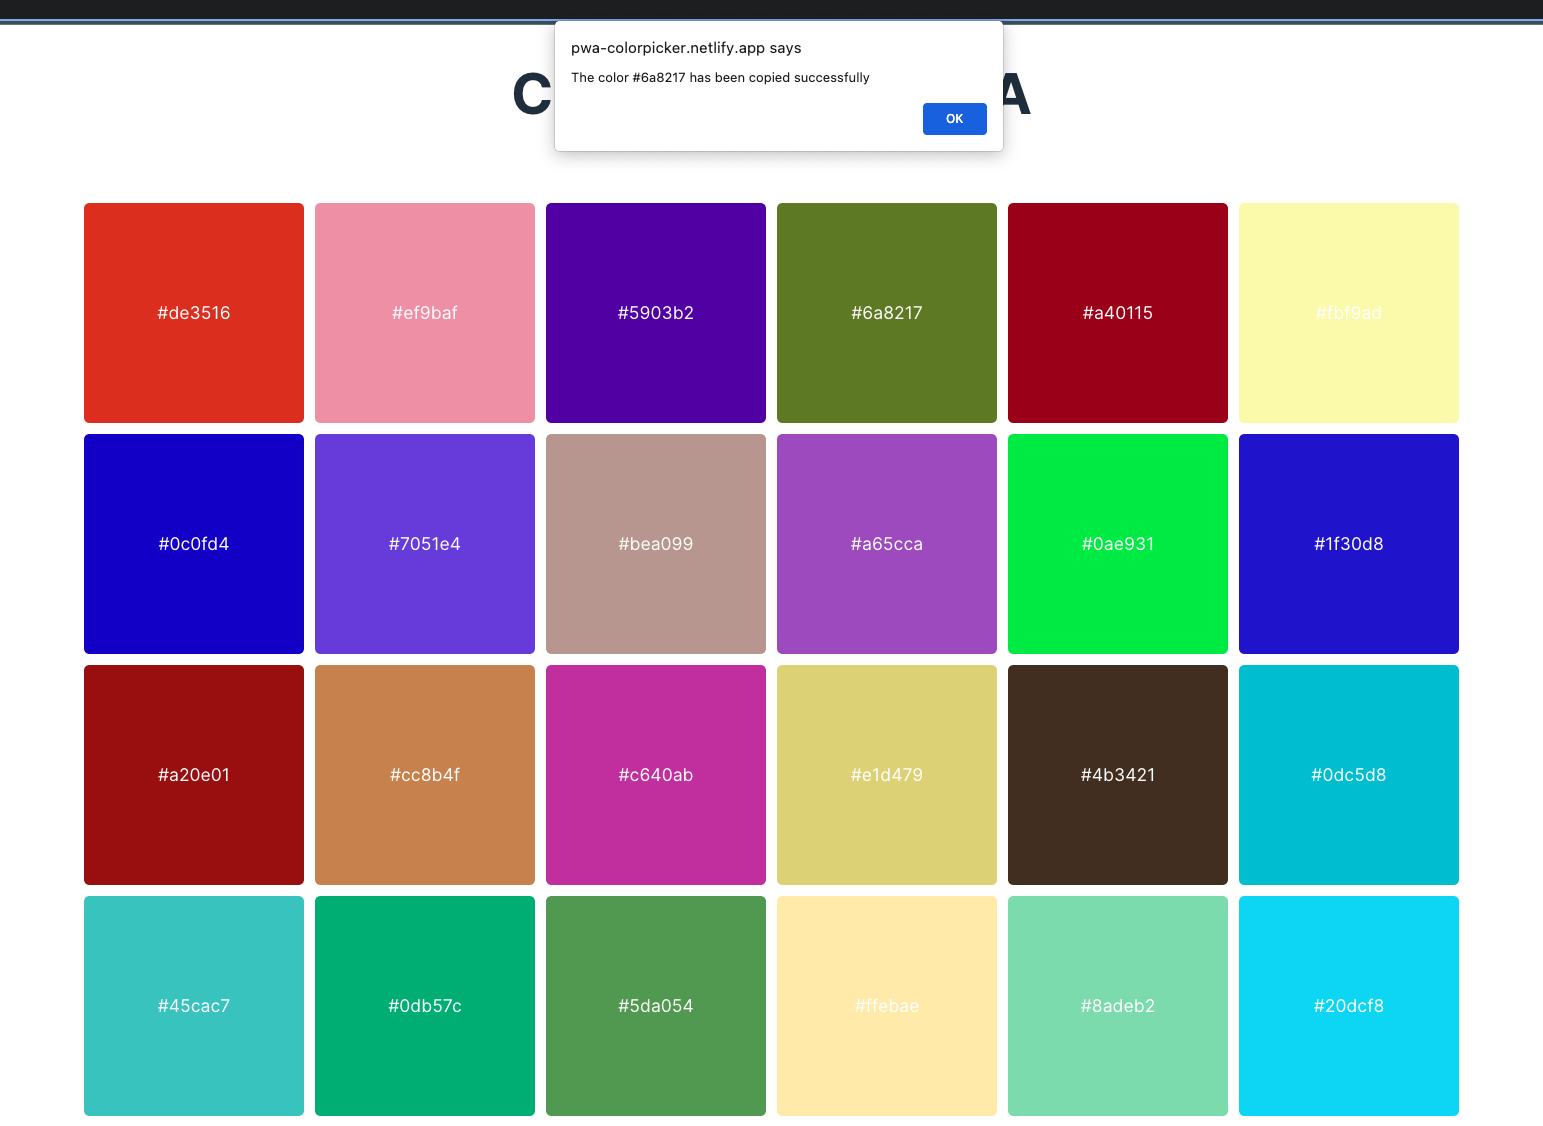
We now have enough foundations to build a Progressive Web App and understand things practically. So let’s build a simple Colour Picker app, where users can see a bunch of color palettes and select a color code by clicking on it.
We will use plain JavaScript, HTML, and CSS to build this application (this can also be done using other libraries or frameworks like React or Angular). We will also use a front-end tooling system called Vite, which has a plug-in to support PWA.
If you get stuck at any point, the application source code is available here for you to follow, along with the article:
GitHub – atapas/colorpicker-pwa: A project to demonstrate PWA strategies
Setting things up
First, open a command prompt or terminal and execute the following command to create a vanilla (plain) JavaScript project using Vite.
yarn create vite colorpicker-pwa --template vanillaThis will create all the necessary files and folders for you to get started with the JavaScript application.

Next, we will install the Vite PWA plugin. The plugin vite-plugin-pwa abstracts away lots of low-level complexities from the developer and helps define necessary things declaratively.
yarn add vite-plugin-pwaGetting the assets ready
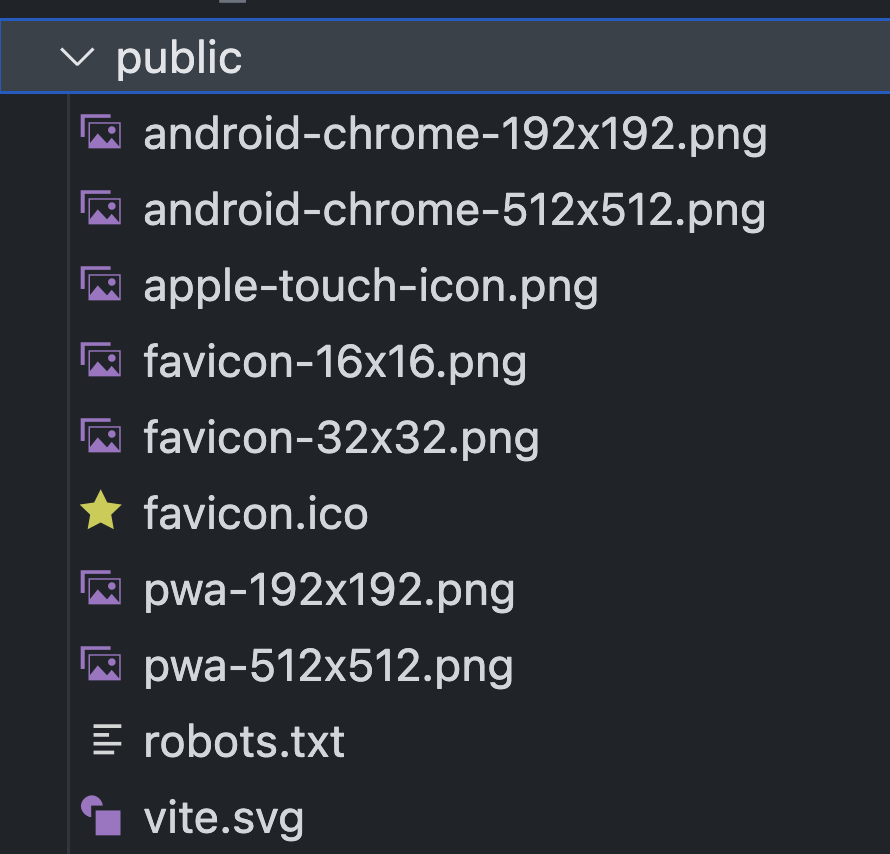
We need to create a few assets to build a logo, icon, and favicon for our app. I use favicon.io to create these assets; you can upload a picture, and it will create a bunch of assets for you. Please extract them and copy them under the public folder of your project.
Now, create the robots.txt file under the public folder with the following text:
User-agent: *
Disallow:
At this stage, the content of the public folder may look like this:
Next, open the index.html file and add these assets as meta tags. Use the following code to replace the content of the index.html file.
<!DOCTYPE html>
<html lang="en">
  <head>
     <meta charset="UTF-8" />
     <!-- Fields you will add start   -->
     <meta name="viewport" content="width=device-width, initial-scale=1.0" />
     <title>Color Picker</title>
     <meta name="description" content="A PWA Color Picker made using Vite">
     <meta charset="UTF-8" />
     <link rel="manifest" href="/manifest.webmanifest">
     <link rel="icon" href="/favicon.ico" />
     <link rel="apple-touch-icon" sizes="180x180" href="/apple-touch-icon.png">
     <link rel="icon" type="image/png" sizes="32x32" href="/favicon-32x32.png">
     <link rel="icon" type="image/png" sizes="16x16" href="/favicon-16x16.png">
     <link rel="mask-icon" href="/masked-icon.png" color="#FFFFFF">
     <meta name="theme-color" content="#ffffff">

     <script type="module" src="/main.js" defer></script>

  </head>
 <body>
  <div>
    <header>
      <h1>
        Color Picker - PWA
      </h1>
    </header>
    <div id="app"></div>
  </div>

  </body>
</html>
Build the application logic
Now, let’s build the application logic.
First, we will create the data that represents the color palette. To do this, create a data folder at the root of the project folder and create the file color-data.js under it, with the following content.
export const colors = [
  {
      "data": "#de3516"
  },
  {
      "data": "#ef9baf"
  },
  {
      "data": "#5903b2"
  },
  {
      "data": "#6a8217"
  },
  {
      "data": "#a40115"
  },
  {
      "data": "#fbf9ad"
  },
  // add more colors of your choice
]
We will use this data in the main.js file and build our logic to create the colour palette. To do this, open the main.js file and replace the content with the following:
import './style.css'
import {colors} from './data/color-data'

const createColorPallet = () => {
  colors.forEach((color) => {
    const colorPallet = document.createElement('div')
    colorPallet.classList.add('color-pallet')
    colorPallet.style.backgroundColor = color.data
    const colorName = document.createElement('div')
    colorName.classList.add('color-name')
    colorName.textContent = color.data
    colorPallet.appendChild(colorName)
    colorPallet.addEventListener('click', () => {
      const colorCode = color.data
      console.log(colorCode)
      copyContent(colorCode)
    })
    document.querySelector('#app').appendChild(colorPallet)
  })
}

const copyContent = async (text) => {
  try {
    await navigator.clipboard.writeText(text);
    console.log('Content copied to clipboard');
    alert(`The color ${text} has been copied successfully`);
  } catch (err) {
    console.error('Failed to copy: ', err);
  }
}

createColorPallet()
Let’s go over the code:
- We first import the colour data, which is an array.
- Then we iterate over the array and create the required DOM elements to create the pallet.
- Next, we add a click handler on each colour DIV to copy the colour code into the clipboard.
Lastly, let’s add some styles to make things look better. Open the style.css file and replace the content with the following code.
body {
  margin: 0;
}

#app {
  max-width: 1280px;
  margin: 0 auto;
  padding: 2rem;
  text-align: center;
  display: flex;
  flex-direction: row;
  flex-wrap: wrap;
  align-content: center;
  justify-content: center;
  align-items: center;
}

.color-pallet {
  width: 200px;
  height: 200px;
  margin: 5px;
  border-radius: 5px;
  display: flex;
  justify-content: center;
  align-items: center;
  cursor: pointer;
}

.color-name {
  color: #ffffff;
}
That’s it! Now if you run the app locally (using the yarn dev command) or by deploying somewhere on the cloud (like Netlify or Vercel), it will look and behave like this:
Now, Let’s Configure PWA
The app is ready now, it’s time to configure and turn it into Progressive Web App to provide a better user experience to our customers.
The PWA Vite plug-in allows you to configure things declaratively. To take advantage of this feature, create a file vite.config.js at the root of the project folder, with this content:
import { defineConfig } from 'vite';
import { VitePWA } from 'vite-plugin-pwa';

export default defineConfig({
  plugins: [
  VitePWA({
      registerType: 'prompt',
      includeAssets: ['favicon.ico', 'apple-touch-icon.png'],
      manifest: {
        name: 'Color Picker',
        short_name: 'ColorPicker',
        description: 'A PWA Color Picker made using Vite',
        theme_color: '#ffffff',
        start_url: '/',
        "display": "standalone",
        icons: [
          {
            src: 'pwa-192x192.png',
            sizes: '192x192',
            type: 'image/png',
          },
          {
            src: 'pwa-512x512.png',
            sizes: '512x512',
            type: 'image/png',
          },
          {
            src: 'pwa-512x512.png',
            sizes: '512x512',
            type: 'image/png',
            purpose: 'any maskable',
          },
        ],
      },
    }),
  ],
});
As you see here, we have defined the application metadata in the configuration file and passed it to the VitePWA plugin. If you are not using the plugin, you must create a manifest.json file at the root of the project folder, with all the metadata information.
Register the Service Worker
The last thing we need to do is to register the service worker so that it starts caching the assets we need offline. Open the main.js file and import the registerSW function.
import { registerSW } from 'virtual:pwa-register'Next, add the following code to register the service worker.
if ("serviceWorker" in navigator) {
  const updateSW = registerSW({
    onNeedRefresh() {
      const isUpdate = window.confirm('New Update Available. Click OK to update');
      if (isUpdate) {
        updateSW(true);
      }
    }
  });
}
Here we are doing something more than just registering.
- We first check whether the service worker API is supported by the browser.
- Then we invoke the
registerSW()function to register the service worker. - We pass a configuration object to the register method to define a callback so that we can prompt the user if the PWA is updated later.
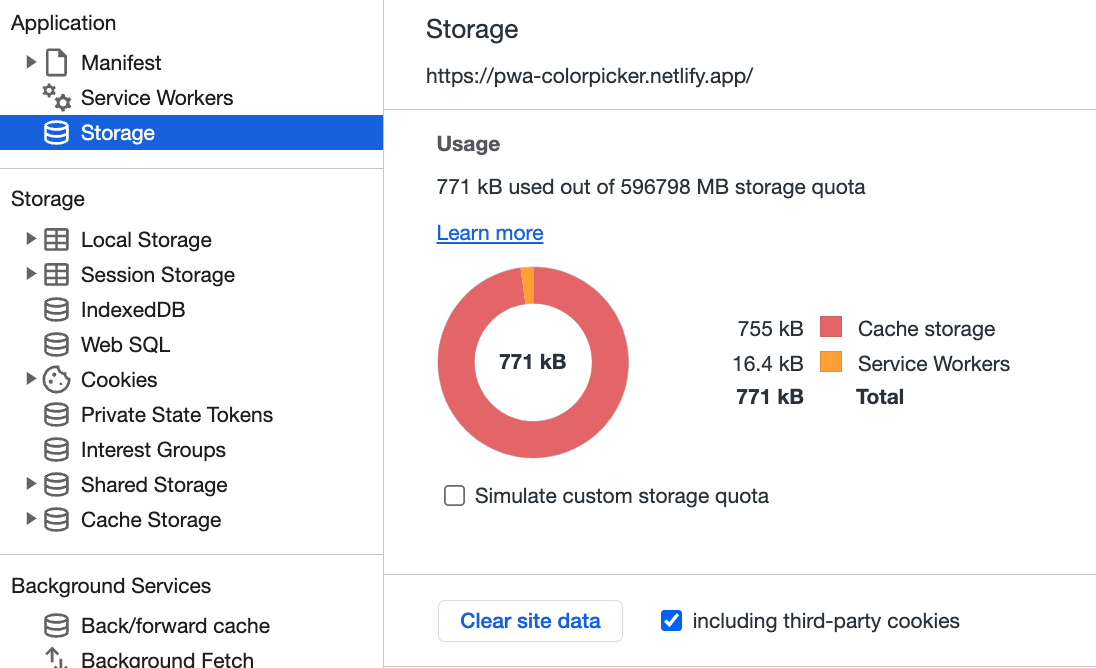
Now, build the app using the yarn build command and preview it using the yarn preview command. You can also deploy and host the app publicly on Netlify/Vercel. Simply launch the app on your browser, and open the DevTools.
Here we used Google Chrome. Under the Application tab of DevTools, we can navigate to the Storage option to see all the cached assets.
Now, click the Service Workers option and select the offline mode to check the app works from the cached data.
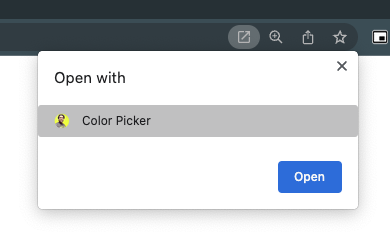
You can now install the app locally on your device and add it to the home screen to access it easily!
Once installed, the app will be updated automatically, and you can launch it anytime.
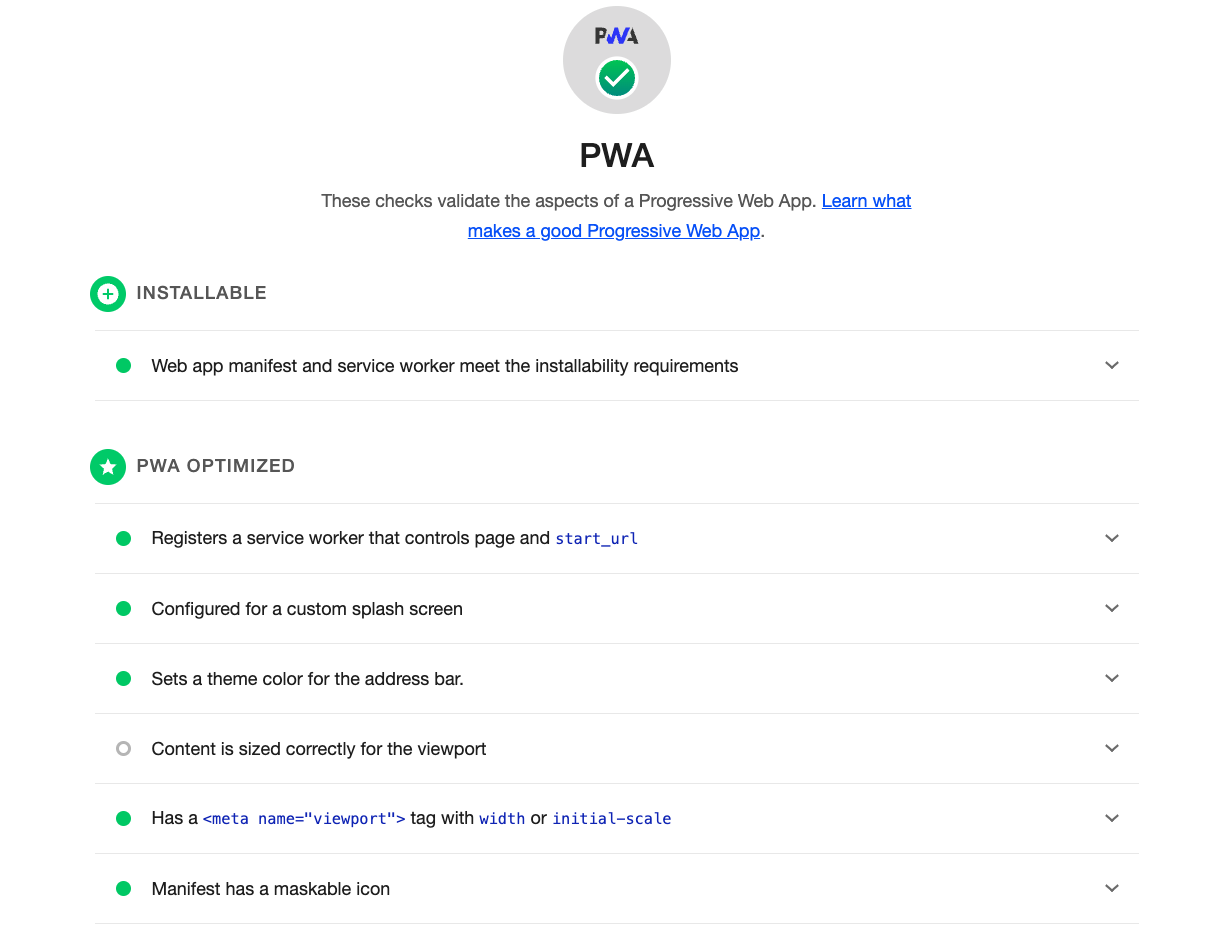
Validate PWA with Browser’s DevTools like Lighthouse
Now open the lighthouse tool from the Chrome DevTools and run the assessment. Once the assessment is over, it will show a stamp if the application is PWA-enabled.
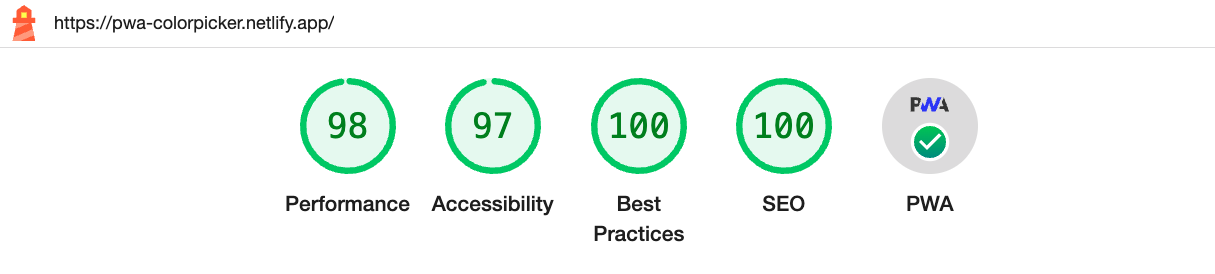
You can click on the PWA icon to drill down into various audits of your app and take action accordingly.
PWA FAQ
What is a Progressive Web App (PWA)?
A Progressive Web App (PWA) is a web application that utilizes modern web technologies to provide mobile users with a native app-like experience. PWAs are designed to work across multiple devices and platforms, offering features such as offline functionality, push notifications, and the ability to be installed on the user’s home screen. They combine the best of web and native app experiences.
How does PWA development differ from traditional web development?
The development of a PWA involves leveraging web technologies such as HTML, CSS, and JavaScript, and enhancing them with service workers, which allow for offline capability and background sync. PWA development requires a focus on performance, responsiveness, and user experience across different devices and networks.
What are the benefits of developing a PWA?
Developing a PWA comes with several benefits. Firstly, PWAs can be accessed and used on any device with a web browser, eliminating the need for users to download and install separate apps. They also offer offline functionality, allowing users to access content even when they have limited or no internet connectivity. PWAs can also be easily updated without requiring users to download and install updates from an app store.
Can PWAs be discovered and distributed through app stores?
Yes, PWAs can be discovered and distributed through app stores. Both the Google Play Store and Microsoft Store support the listing and distribution of PWAs. This allows users to find and install PWAs just like they would with native apps, while still benefiting from the advantages of a web-based application.
How do push notifications work in PWAs?
Push notifications in PWAs works in a similar way to native apps push notifications. Making use of service workers and modern web APIs they can take advantage of push notifications in a similar way to a native app. By implementing a push notification system, PWAs can keep users informed about new content, promotions, or any other updates that might be relevant to them. These notifications can be personalized and delivered directly to the user’s device.
Can PWAs work offline?
Yes, one of the key features of PWAs is their ability to work offline. By utilizing service workers, which are background scripts that can cache website assets, PWAs can continue to function even when there is no internet connection. Users can still access previously visited pages, view content, and interact with the app, ensuring a seamless user experience even in offline scenarios.
How do PWAs improve user experience?
PWAs improve user experience by providing fast and reliable performance, regardless of the user’s network conditions. They offer seamless navigation and a smooth user interface that mimics the feel of a native app. Additionally, PWAs can be installed on the user’s home screen, enabling quick access and eliminating the need to search for the app in a crowded app store.
Do PWAs support native app features?
PWAs can support many native app features through the use of modern web APIs. This includes features such as push notifications, background sync, camera access, geolocation, and more. With the advancements in web technologies, the gap between PWAs and native apps continues to narrow, offering users a comparable experience.
What are some best practices for PWA development?
Some best practices for PWA development include optimizing performance by minimizing code and resource size, implementing responsive design for various screen sizes, enabling offline functionality with service workers, and designing a user-friendly interface. It’s also important to continuously test and iterate on the PWA to ensure it meets the needs and expectations of users.
Can existing websites be converted into PWAs?
Yes, existing websites can be converted into PWAs. This process involves adding PWA-specific features like service workers, web app manifests, and implementing responsive design. By following the necessary steps and best practices, it is possible to enhance an existing website with PWA capabilities and provide users with an app-like experience.
And That’s it!
I hope you found this article insightful and got some useful information about PWAs and how to build them.
All the source code used in this article is in my GitHub repository. Don’t forget to give a ⭐ if you have liked the work. Also, this project is open-source, so feel free to tweak it, and enhance it to adapt other caching strategies.
Expect The Unexpected!
Debug Faster With Bugfender

Tapas Adhikary
Tapas Adhikary is a Full Stack Developer. He loves building web apps, mobile apps, and JAMstack solutions. He is a technology blogger who publishes articles for freeCodeCamp, daily.dev, dev.to, his blog.greenroots.info and also in his YouTube Channel. Follow him on Twitter(@tapasadhikary) to stay connected.