34 Minutes
Comprehensive Guide to Testing React Apps: Unit, Integration, and E2E Testing
Fix Bugs Faster! Log Collection Made Easy
When building apps, it’s tempting to dive right into writing code. But if we do this, there’s a good chance that our code will eventually break, as new changes are made and new features are introduced. This is particularly true of React, a library that’s constantly evolving.
Testing in React isn’t only about catching hidden bugs but also about maintaining code quality day-to-day. In this guide, we’ll explore the different testing strategies developers can use to test React apps, including unit, integration, end-to-end (E2e) testing, and more.
And, naturally, We’ll also look at how Bugfender can enhance the React testing process. Our remote debugger is designed to give testers greater flexibility and freedom, but we’ll talk about that later.
💡 If you don’t have time to read through this post, that’s no problem. You can jump straight to the full implementation on GitHub.
Now, let’s get started!
Table of Contents
Why write tests?
Writing tests in React, or any other language, will achieve the following benefits:
- It helps catch bugs before they get to production.
- It can serve as documentation for your code.
- Developers have more confidence in refactoring old code.
- It forces developers to think well about component structure, which improves code design.
Ok, so how do I go about running a React test?
First, let’s set up a Sample Project
Let’s start from the bottom. We can create a new React project with Vite, TypeScript, Tailwind CSS and DaisyUI. Open up your terminal and enter the commands below:
# Create a new Vite project
npm create vite@latest movie-search -- --template react-ts

# Navigate to project directory
cd movie-search

# Install base dependencies
npm install

# Install additional dependencies
npm install -D tailwindcss postcss autoprefixer daisyui

# Initialize Tailwind CSS
npx tailwindcss init -p
Next, update the tailwind.config.js file as follows:
/** @type {import('tailwindcss').Config} */
export default {
  content: [
    "./index.html",
    "./src/**/*.{js,ts,jsx,tsx}",
  ],
  theme: {
    extend: {
      colors: {
        primary: '#1a1a1a',
        secondary: '#2d2d2d',
        accent: '#646cff'
      }
    },
  },
  plugins: [
    require('daisyui'),
  ],
}
Then add Tailwind directives to your ./src/index.css:
@tailwind base;
@tailwind components;
@tailwind utilities;
Now, let’s put the app together
For the sake of this demo, our application will be divided into:
- A movie search interface
- Movie cards with details
Before you proceed, get an API key from OMDB API:
- Go to http://www.omdbapi.com/apikey.aspx
- Register for a free API key.
Once that is done, proceed to create the movie interface in src/types/index.ts:
export interface Movie {
  Title: string;
  Year: string;
  imdbID: string;
  Type: string;
  Poster: string;
}
Components
Now let’s create our main components. First, the SearchBar component:
// src/components/SearchBar.tsx
import React, { useState } from 'react';

interface SearchBarProps {
  onSearch: (searchTerm: string) => void;
}

const SearchBar: React.FC<SearchBarProps> = ({ onSearch }) => {
  const [searchTerm, setSearchTerm] = useState('');
  const [isDisabled, setIsDisabled] = useState(true);

  const handleSubmit = (e: React.FormEvent<HTMLFormElement>) => {
    e.preventDefault();
    const trimmedSearchTerm = searchTerm.trim();
    onSearch(trimmedSearchTerm);
  };

  const handleInputChange = (e: React.ChangeEvent<HTMLInputElement>) => {
    const inputValue = e.target.value;
    setSearchTerm(inputValue);
    setIsDisabled(inputValue.trim() === '');
  };

  return (
    <form onSubmit={handleSubmit} className='flex gap-2 max-w-2xl mx-auto'>
      <input
        type='text'
        name='search'
        placeholder='Search for movies...'
        className='input input-bordered w-full'
        value={searchTerm}
        onChange={handleInputChange}
        required
      />
      <button type='submit' className='btn btn-primary' disabled={isDisabled}>
        Search
      </button>
    </form>
  );
};

export default SearchBar;
The MovieCard Component:
// src/components/MovieCard.tsx
import { Movie } from '../types';

interface MovieCardProps {
  movie: Movie;
}

const MovieCard = ({ movie }: MovieCardProps) => {
  if (!movie || Object.keys(movie).length === 0) {
    return <div>Error: Movie data is not available</div>;
  }

  return (
    <div className='card card-side bg-base-100 shadow-xl h-full'>
      <figure className='w-1/3'>
        <img
          src={movie.Poster !== 'N/A' ? movie.Poster : '/placeholder-movie.jpg'}
          alt={movie.Title}
          className='h-full w-full object-cover'
        />
      </figure>
      <div className='card-body w-2/3'>
        <h2 className='card-title'>{movie.Title}</h2>
        <p>Year: {movie.Year}</p>
        <p>Type: {movie.Type}</p>
        <div className='card-actions justify-end mt-auto'>
          <a
            href={`https://www.imdb.com/title/${movie.imdbID}`}
            target='_blank'
            rel='noopener noreferrer'
            className='btn btn-primary'
          >
            View on IMDB
          </a>
        </div>
      </div>
    </div>
  );
};

export default MovieCard;
Now, update App.tsx as follows:
import { useState } from 'react';
import MovieCard from './components/MovieCard';
import SearchBar from './components/SearchBar';
import { Movie } from './types';

const API_KEY = 'YOUR OMDB API kEY';
const API_URL = '<https://www.omdbapi.com>';

const App = () => {
  const [movies, setMovies] = useState<Movie[]>([]);
  const [loading, setLoading] = useState(false);
  const [error, setError] = useState<string | null>(null);

  const searchMovies = async (searchTerm: string) => {
    if (!searchTerm) return;
    setLoading(true);
    setError(null);

    try {
      const response = await fetch(
        `${API_URL}/?apikey=${API_KEY}&s=${searchTerm}`
      );
      const data = await response.json();
      if (data.Response === 'True') {
        setMovies(data.Search);
      } else {
        setError(data.Error);
        setMovies([]);
      }
    } catch (err) {
      console.log('Error:', err);
      setError('Failed to fetch movies. Please try again.');
      setMovies([]);
    } finally {
      setLoading(false);
    }
  };

  return (
    <div className='min-h-screen bg-base-200 p-4'>
      <div className='container mx-auto'>
        <h1 className='text-4xl font-bold text-center mb-8'>Movie Search</h1>
        <SearchBar onSearch={searchMovies} />

        {loading && (
          <div className='flex justify-center mt-8'>
            <span className='loading loading-spinner loading-lg'></span>
          </div>
        )}

        {error && (
          <div className='alert alert-error mt-4'>
            <span>{error}</span>
          </div>
        )}

        <div className='grid grid-cols-1 md:grid-cols-2 lg:grid-cols-3 gap-6 mt-8'>
          {movies.map((movie) => (
            <MovieCard key={movie.imdbID} movie={movie} />
          ))}
        </div>
      </div>
    </div>
  );
};

export default App;
Then, run the application and confirm that everything is working properly.
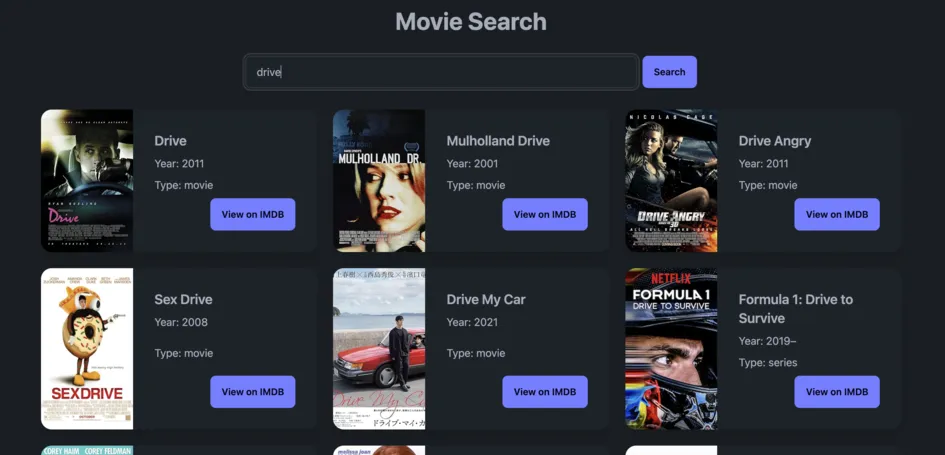
Great! We’re all set. So let’s move on to testing.
Writing Unit Tests
Unit testing is the practice of testing individual units in isolation from the rest of the application. This ensures that all parts of the application work correctly and independently.
When testing React applications, unit tests typically focus on:
- Pure functions and utilities
- Individual component rendering
- Component state management
- Event handlers.
When considering unit testing javascript applications, two popular frameworks can be used; Jest or Vitest. We will be focusing on the Vitest testing library for this explanation.
Installing dependencies:
npm install -D vitest @testing-library/react @testing-library/jest-dom @testing-library/user-event jsdom
Configure Vite and Vitest:
Update vite.config.ts:
import { defineConfig } from 'vite';
import react from '@vitejs/plugin-react';

export default defineConfig({
  plugins: [react()],
  test: {
    globals: true,
    environment: 'jsdom',
    setupFiles: './vitest.setup.ts',
    include: ['**/*.{test,spec}.{js,mjs,cjs,ts,mts,cts,jsx,tsx}'],
  },
});
Set Up Test Environment:
In the root of the application, create the vitest.setup.ts file with the code below:
import '@testing-library/jest-dom';
import { expect, afterEach } from 'vitest';
import { cleanup } from '@testing-library/react';
import matchers from '@testing-library/jest-dom/matchers';

// Safer matchers extension
if (typeof matchers === 'object' && matchers !== null) {
  expect.extend(matchers);
} else {
  console.error('Jest DOM matchers could not be loaded');
}

// Enhanced cleanup
afterEach(() => {
  try {
    cleanup();
  } catch (error) {
    console.warn('Cleanup failed:', error);
  }
});
Also, be sure to add the following lines of code to your tsconfig.app.json file:
tsconfig.app.json:
{
  "compilerOptions": {
  ...
  "include": ["src", "vitest.setup.ts"],
  "types": ["jest", "vitest/globals", "@testing-library/jest-dom"]
  }
}
The include array will ensure that TypeScript knows what part of the project to process. By Specifying this, it will compile files in the src directory as well as the vitest.setup.ts file.
The types array adds global type definitions for Jest, Vitest, and React Testing Library, which allows you to use test-related global functions like describe, it, and expect and custom matchers like toBeInTheDocument throughout the project without needing to import them explicitly.
Testing Pure Functions with Vitest
Pure functions return the same output when given the same input. They have no side effects, don’t modify the external state, and don’t interact with APIs, making them ideal candidates for unit testing.
Example: Testing a Pure Function
Let’s create a utility function that formats movie titles by taking an input string and capitalizing the first letter of a word. For example, by transforming “hello world” to “Hello World”.
Proceed to create FormatTitle.ts file with the code:
// src/utils/formatTitle.ts
export const formatTitle = (title: string): string => {
  const formatted = title
    .split(' ')
    .map((word) => word.charAt(0).toUpperCase() + word.slice(1))
    .join(' ');
  return formatted;
};
Then quickly update the SearchBar.tsx component with this function by importing it at the top.
// src/components/SearchBar.tsx
import React, { useState } from 'react';
import { formatTitle } from '../utils/formatTitle';
...
Continuing with the SearchBar.tsxcomponent, update the handleSubmit function by wrapping the trimmedSearchTerm with the formatTitle function.
...
 const handleSubmit = (e: React.FormEvent<HTMLFormElement>) => {
    e.preventDefault();
    const trimmedSearchTerm = searchTerm.trim();
    const formattedTitle = formatTitle(trimmedSearchTerm);
    onSearch(formattedTitle);
  };
...
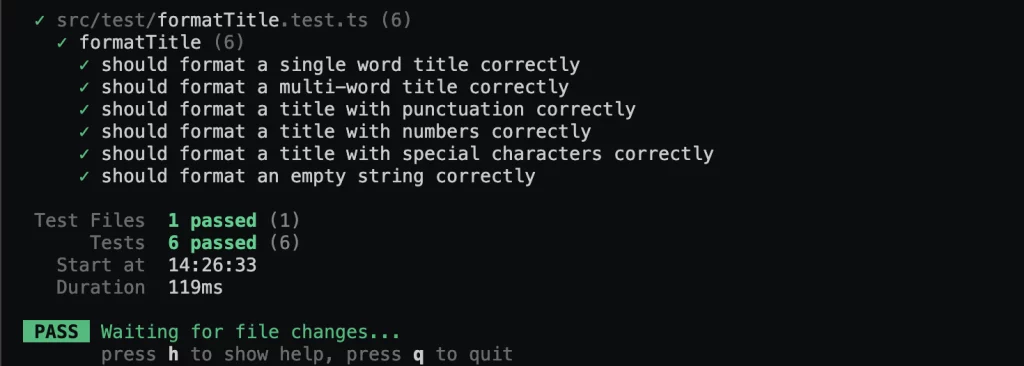
Now, let’s write a test for this function. Create a file with the directory src/test/FormatTitle.test.ts.
// src/test/FormatTitle.test.ts
import { formatTitle } from '../utils/formatTitle';

describe('formatTitle', () => {
  it('should format a single word title correctly', () => {
    expect(formatTitle('hello')).toBe('Hello');
  });

  it('should format a multi-word title correctly', () => {
    expect(formatTitle('hello world')).toBe('Hello World');
  });

  it('should format a title with punctuation correctly', () => {
    expect(formatTitle('hello, world!')).toBe('Hello, World!');
  });

  it('should format a title with numbers correctly', () => {
    expect(formatTitle('hello 123 world')).toBe('Hello 123 World');
  });

  it('should format a title with special characters correctly', () => {
    expect(formatTitle('hello @ world')).toBe('Hello @ World');
  });

  it('should format an empty string correctly', () => {
    expect(formatTitle('')).toBe('');
  });
});
And here’s the outcome:
Testing components with the React Testing Library
Now, we need to change our approach slightly. Testing react components focuses on testing the rendered output rather than the internal implementation. It is a user-centric method of testing, where the developer can check how the app would behave when certain actions are taken by a user in the real world (such as clicking buttons or filling forms), rather than looking simply at the code block.
Example: Testing the SearchBar Component
In the test folder, Create a SearchBar.test.ts file with the code below:
import { describe, it, expect, vi } from 'vitest';
import { render, screen } from '@testing-library/react';
import userEvent from '@testing-library/user-event';
import React from 'react';
import SearchBar from '../components/SearchBar';

describe('SearchBar', () => {
  it('renders search input and button', () => {
    const mockOnSearch = vi.fn();
    render(React.createElement(SearchBar, { onSearch: mockOnSearch }));

    expect(
      screen.getByPlaceholderText('Search for movies...')
    ).toBeInTheDocument();
    expect(screen.getByRole('button', { name: /search/i })).toBeInTheDocument();
  });

  it('button should be disabled when input is empty', () => {
    const mockOnSearch = vi.fn();
    render(React.createElement(SearchBar, { onSearch: mockOnSearch }));

    const searchButton = screen.getByRole('button', { name: /search/i });
    expect(searchButton).toBeDisabled();
  });

  it('button should be enabled when input has value', async () => {
    const mockOnSearch = vi.fn();
    render(React.createElement(SearchBar, { onSearch: mockOnSearch }));

    const searchInput = screen.getByPlaceholderText('Search for movies...');
    const searchButton = screen.getByRole('button', { name: /search/i });

    await userEvent.type(searchInput, 'test movie');
    expect(searchButton).toBeEnabled();
  });

  it('trims whitespace from input value', async () => {
    const mockOnSearch = vi.fn();
    render(React.createElement(SearchBar, { onSearch: mockOnSearch }));

    const searchInput = screen.getByPlaceholderText('Search for movies...');
    await userEvent.type(searchInput, '   test movie   ');

    const searchButton = screen.getByRole('button', { name: /search/i });
    expect(searchButton).toBeEnabled();
  });

  it('calls onSearch with formatted title when form is submitted', async () => {
    const mockOnSearch = vi.fn();
    render(React.createElement(SearchBar, { onSearch: mockOnSearch }));

    const searchInput = screen.getByPlaceholderText('Search for movies...');
    await userEvent.type(searchInput, 'star wars');

    const searchButton = screen.getByRole('button', { name: /search/i });
    await userEvent.click(searchButton);

    expect(mockOnSearch).toHaveBeenCalledWith('Star Wars');
  });

  it('prevents default form submission behavior', async () => {
    const mockOnSearch = vi.fn();

    // Render the component
    const { container } = render(
      React.createElement(SearchBar, { onSearch: mockOnSearch })
    );

    // Type a search term
    const searchInput = screen.getByPlaceholderText('Search for movies...');
    await userEvent.type(searchInput, 'test movie');

    // Get the form
    const form = screen.getByTestId('search-form');

    // Create a spy on the form's submit event
    const preventDefaultSpy = vi.fn();

    // Simulate form submission with a custom event
    const submitEvent = new Event('submit', {
      bubbles: true,
      cancelable: true,
    });

    // Add a preventDefault method to the event
    Object.defineProperty(submitEvent, 'preventDefault', {
      value: preventDefaultSpy,
      writable: true,
      configurable: true,
    });

    // Dispatch the custom submit event
    form.dispatchEvent(submitEvent);

    // Verify that preventDefault was called
    expect(preventDefaultSpy).toHaveBeenCalled();

    // Verify that onSearch was called with the formatted title
    expect(mockOnSearch).toHaveBeenCalledWith('Test Movie');
  });

  it('maintains input value after form submission', async () => {
    const mockOnSearch = vi.fn();
    render(React.createElement(SearchBar, { onSearch: mockOnSearch }));

    const searchInput = screen.getByPlaceholderText('Search for movies...');
    await userEvent.type(searchInput, 'test movie');

    const searchButton = screen.getByRole('button', { name: /search/i });
    await userEvent.click(searchButton);

    expect(searchInput).toHaveValue('test movie');
  });

  it('does not call onSearch with empty input', async () => {
    const mockOnSearch = vi.fn();
    render(React.createElement(SearchBar, { onSearch: mockOnSearch }));

    const searchButton = screen.getByRole('button', { name: /search/i });
    await userEvent.click(searchButton);

    expect(mockOnSearch).not.toHaveBeenCalled();
  });

  it('trims leading and trailing whitespace from input value', async () => {
    const mockOnSearch = vi.fn();
    render(React.createElement(SearchBar, { onSearch: mockOnSearch }));

    const searchInput = screen.getByPlaceholderText('Search for movies...');
    await userEvent.type(searchInput, '   test movie   ');

    const searchButton = screen.getByRole('button', { name: /search/i });
    await userEvent.click(searchButton);

    expect(mockOnSearch).toHaveBeenCalledWith('Test Movie');
  });

  it('calls onSearch with multiple words', async () => {
    const mockOnSearch = vi.fn();
    render(React.createElement(SearchBar, { onSearch: mockOnSearch }));

    const searchInput = screen.getByPlaceholderText('Search for movies...');
    await userEvent.type(searchInput, 'star wars episode iv');

    const searchButton = screen.getByRole('button', { name: /search/i });
    await userEvent.click(searchButton);

    expect(mockOnSearch).toHaveBeenCalledWith('Star Wars Episode Iv');
  });

  it('calls onSearch with special characters', async () => {
    const mockOnSearch = vi.fn();
    render(React.createElement(SearchBar, { onSearch: mockOnSearch }));

    const searchInput = screen.getByPlaceholderText('Search for movies...');
    await userEvent.type(searchInput, 'star wars: episode iv');

    const searchButton = screen.getByRole('button', { name: /search/i });
    await userEvent.click(searchButton);

    expect(mockOnSearch).toHaveBeenCalledWith('Star Wars: Episode Iv');
  });

  it('calls onSearch with numbers', async () => {
    const mockOnSearch = vi.fn();
    render(React.createElement(SearchBar, { onSearch: mockOnSearch }));

    const searchInput = screen.getByPlaceholderText('Search for movies...');
    await userEvent.type(searchInput, 'star wars 1977'); // Simulate user input with spaces

    const searchButton = screen.getByRole('button', { name: /search/i });
    await userEvent.click(searchButton); // Simulate form submission

    expect(mockOnSearch).toHaveBeenCalledWith('Star Wars 1977'); // Verify the output
  });
});
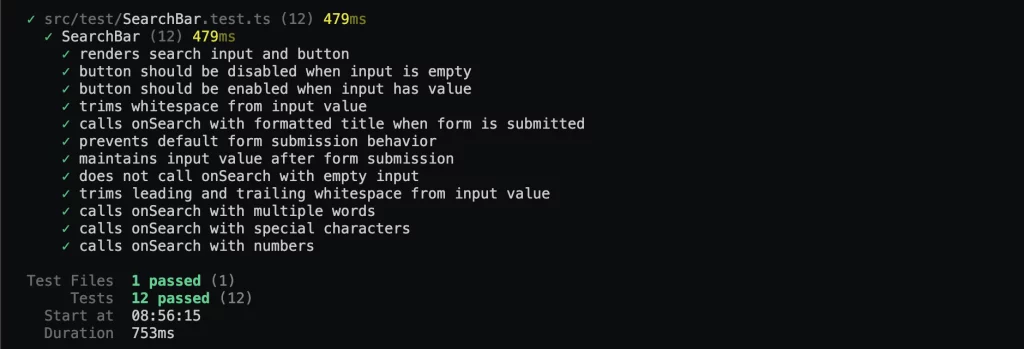
The code above is self-explanatory and covers multiple scenarios that a user might encounter when using the application.
Outcome:
Writing Integration Tests
We’ve looked at the individual elements of our app. In this next stage of React testing, we need to bring them together and move into integration testing.
Integration testing is a level of software testing where individual units or components of a software application are combined and tested as a group. This includes testing component interactions, context, props, and API integrations.
Why is Integration Testing Important?
Firstly, integration testing verifies that components interact correctly with each other while also helping to identify issues that may arise when components are integrated. Then it ensures that data flows correctly between components, especially when props, context, or state are involved.
Testing Component Interactions
Component interactions refer to how different components in a React app communicate with one another. This can include things like:
- A parent component passing props to a child component
- A child component updating its parent component’s state
- Two sibling components communicating with each other through a shared context.
The interdependency of one component on another means that we have to ensure that each of these components, as individual parts, is free of logical errors. Otherwise, an error from one component could affect how a dependent component works, even if the dependent component is free of errors.
Example: Testing SearchBar and MovieCard Interaction with the App component
In this example, we will test the interaction between the SearchBar and MovieCard components with the App component. We will verify that the SearchBar component correctly passes the search term to the App component, which then fetches movie data and renders the MovieCard components.
To get started, let’s create a new file, App.test.ts, in the src/test directory:
// src/test/App.test.ts
import React from 'react';
import { render, fireEvent, screen, waitFor } from '@testing-library/react';
import App from '../App';
import axios from 'axios';
import { vi } from 'vitest';

vi.mock('axios');

test('App component fetches and renders correct movies when search term is submitted', async () => {
  const mockMovieData = {
    data: {
      Search: [
        {
          Title: 'The Shawshank Redemption',
          Year: '1994',
          imdbID: 'tt0111161',
          Type: 'movie',
          Poster: '<https://example.com/poster.jpg>',
        },
      ],
    },
  };

  axios.get.mockImplementation(() => Promise.resolve(mockMovieData));

  render(React.createElement(App, {}));

  const searchInput = screen.getByPlaceholderText('Search for movies...');
  const searchButton = screen.getByText('Search');

  fireEvent.change(searchInput, {
    target: { value: 'The Shawshank Redemption' },
  });
  fireEvent.click(searchButton);

  // Wait for the movie title to appear
  const movieTitle = await screen.findByText('The Shawshank Redemption');
  expect(movieTitle).toBeInTheDocument();
  expect(screen.getByText('Year: 1994')).toBeInTheDocument();
});

test('App component displays loading state when search term is submitted', async () => {
  axios.get.mockImplementation(() => new Promise(() => {}));

  render(React.createElement(App, {}));

  const searchInput = screen.getByPlaceholderText('Search for movies...');
  const searchButton = screen.getByText('Search');

  fireEvent.change(searchInput, {
    target: { value: 'The Shawshank Redemption' },
  });
  fireEvent.click(searchButton);

  // Check if the loading spinner is displayed
  expect(screen.getByTestId('loading-spinner')).toBeInTheDocument();
});

test('App component hides loading state when movies are fetched', async () => {
  const mockMovieData = {
    data: {
      Search: [
        {
          Title: 'The Shawshank Redemption',
          Year: '1994',
          imdbID: 'tt0111161',
          Type: 'movie',
          Poster: '<https://example.com/poster.jpg>',
        },
      ],
    },
  };

  // Mock the API call to resolve with mock data
  axios.get.mockImplementation(() => Promise.resolve(mockMovieData));

  render(React.createElement(App, {}));

  const searchInput = screen.getByPlaceholderText('Search for movies...');
  const searchButton = screen.getByText('Search');

  // Simulate user input and form submission
  fireEvent.change(searchInput, {
    target: { value: 'The Shawshank Redemption' },
  });
  fireEvent.click(searchButton);

  // Wait for the loading spinner to disappear
  await waitFor(() => {
    expect(screen.queryByTestId('loading-spinner')).not.toBeInTheDocument();
  });

  // Verify that the movie details are rendered
  expect(screen.getByText('The Shawshank Redemption')).toBeInTheDocument();
  expect(screen.getByText('Year: 1994')).toBeInTheDocument();
});

test('App component hides error message when movies are fetched successfully', async () => {
  const mockMovieData = {
    data: {
      Search: [
        {
          Title: 'The Shawshank Redemption',
          Year: '1994',
          imdbID: 'tt0111161',
          Type: 'movie',
          Poster: '<https://example.com/poster.jpg>',
        },
      ],
    },
  };

  axios.get.mockImplementation(() => Promise.resolve(mockMovieData));

  render(React.createElement(App, {}));

  const searchInput = screen.getByPlaceholderText('Search for movies...');
  const searchButton = screen.getByText('Search');

  fireEvent.change(searchInput, {
    target: { value: 'The Shawshank Redemption' },
  });
  fireEvent.click(searchButton);

  // Wait for the movie title to appear
  const movieTitle = await screen.findByText('The Shawshank Redemption');
  expect(movieTitle).toBeInTheDocument();
  expect(screen.getByText('Year: 1994')).toBeInTheDocument();

  // Ensure the error message is not present
  expect(
    screen.queryByText('Failed to fetch movie data')
  ).not.toBeInTheDocument();
});

vi.restoreAllMocks();
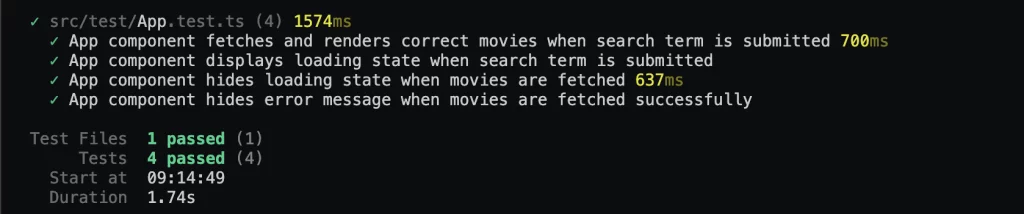
And here’s the outcome:
Testing Context and Props
Context and props are essential aspects of React components. While they perform similar objectives, props are used to directly transfer data from one component to another, usually from the parent to the child, while context, on the other hand, communicates data from one component to the other without having to transfer it.
Example: Testing MovieCard with Props
The MovieCard component receives a movie prop, which contains details like Title, Year, and Poster. We need to ensure that the component renders these details correctly.
We can do this by creating a new file, MovieCard.test.ts, in the src/test directory:
// src/test/MovieCard.test.ts
import React from 'react';
import { render, screen } from '@testing-library/react';
import MovieCard from '../components/MovieCard';

const mockMovie = {
  Title: 'The Shawshank Redemption',
  Year: '1994',
  imdbID: 'tt0111161',
  Type: 'movie',
  Poster: '<https://example.com/poster.jpg>',
};

describe('MovieCard component', () => {
  it('renders movie details correctly', () => {
    render(React.createElement(MovieCard, { movie: mockMovie }));

    expect(screen.getByText('The Shawshank Redemption')).toBeInTheDocument();
    expect(screen.getByText('Year: 1994')).toBeInTheDocument();
    expect(screen.getByText('Type: movie')).toBeInTheDocument();
    const image = screen.getByRole('img');
    expect(image).toHaveAttribute('alt', 'The Shawshank Redemption');
    expect(image).toHaveAttribute('src', '<https://example.com/poster.jpg>');
  });

  it('renders a placeholder image when the poster is not available', () => {
    const mockMovieWithoutPoster = {
      Title: 'The Shawshank Redemption',
      Year: '1994',
      imdbID: 'tt0111161',
      Type: 'movie',
      Poster: 'N/A',
    };

    render(React.createElement(MovieCard, { movie: mockMovieWithoutPoster }));

    const image = screen.getByRole('img');
    expect(image).toHaveAttribute('alt', 'The Shawshank Redemption');
    expect(image).toHaveAttribute('src', '/placeholder-movie.jpg');
  });

  it('renders an error message when the movie prop is empty', () => {
    render(React.createElement(MovieCard, { movie: {} }));

    expect(
      screen.getByText('Error: Movie data is not available')
    ).toBeInTheDocument();
  });

  it('renders an error message when the movie prop is null', () => {
    render(React.createElement(MovieCard, { movie: null }));

    expect(
      screen.getByText('Error: Movie data is not available')
    ).toBeInTheDocument();
  });
});
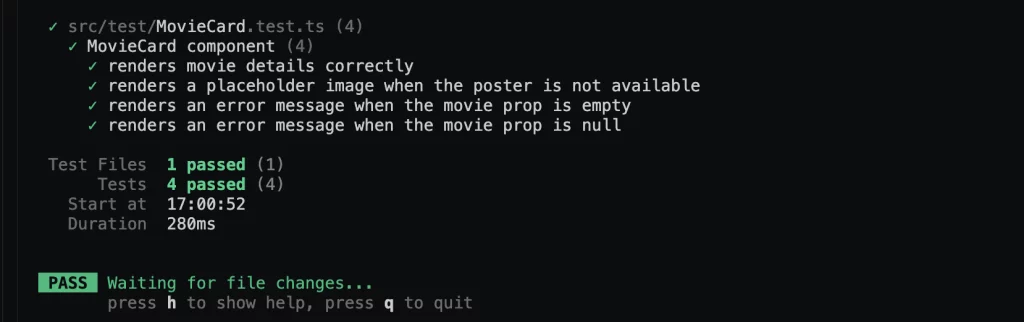
Outcome:
Testing External API Integration
Example: Testing the App Component’s API Integration
In this example, we will write an integration test for the App component’s API integration. Specifically, we will test the searchMovies function, which makes a GET request to the OMDB API to fetch movie data.
Create this test file**:** src/test/App.api.test.ts :
import React from 'react';
import { render, fireEvent, waitFor, screen } from '@testing-library/react';
import App from '../App';
import axios from 'axios';
import { vi } from 'vitest';

vi.mock('axios');

test('fetches and displays movie data from API', async () => {
  const mockResponse = {
    data: {
      Search: [
        {
          Title: 'The Shawshank Redemption',
          Year: '1994',
          imdbID: 'tt0111161',
          Type: 'movie',
          Poster: '<https://example.com/poster.jpg>',
        },
      ],
    },
  };

  axios.get.mockImplementation(() => Promise.resolve(mockResponse));

  render(React.createElement(App, {}));

  fireEvent.change(screen.getByPlaceholderText('Search for movies...'), {
    target: { value: 'The Shawshank Redemption' },
  });
  fireEvent.click(screen.getByText('Search'));

  await waitFor(() => {
    expect(screen.getByText('The Shawshank Redemption')).toBeInTheDocument();
    expect(screen.getByText('Year: 1994')).toBeInTheDocument();
    expect(screen.getAllByText('Type: movie')[0]).toBeInTheDocument();
  });
});
In the code above, we make use of the vi**.mock('axios')** to mock the behaviour of an axios request during the test. We then proceed to create a mockResponse object that simulates data returned by the API.
The mock axios instance returns the mock response when the get method is called. Then we render the App component, simulate a user typing in the search input field, simulate a user clicking the search button, and use waitFor to wait for the movie data to be displayed on the screen.
Lastly, we assert that the movie title and year are displayed on the screen using expect.
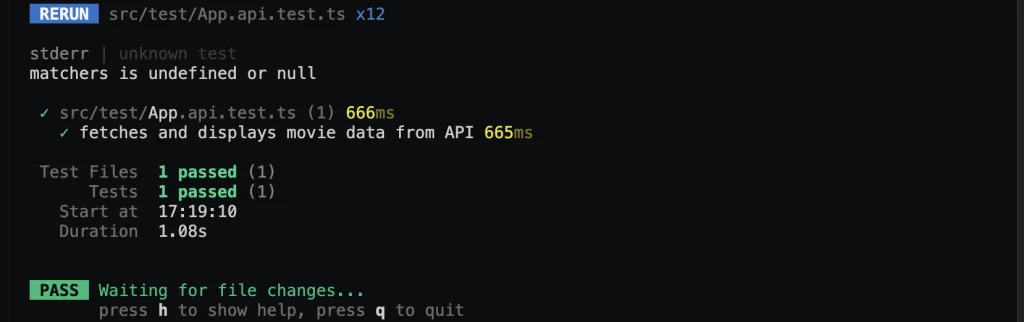
Outcome:
End-to-End Testing with Cypress
End-to-end (E2E) testing verifies an application’s entire workflow from the user’s perspective by simulating real interactions.
What is Cypress?
Cypress is a fast, easy, and reliable JavaScript-based E2E testing framework for web applications like those built with React. It’s built on top of Mocha and Chai and has a more intuitive API for writing tests.
According to the Cypress documentation:
Cypress can test anything that runs in a browser and surface insights into how to improve the health of your test suite and the quality of your application.
Aside from E2E testing, Cypress also supports Component testing, Accessibility testing, UI Coverage, etc.
Setting up Cypress
Run the following command in your terminal:
npm install cypress --save-dev
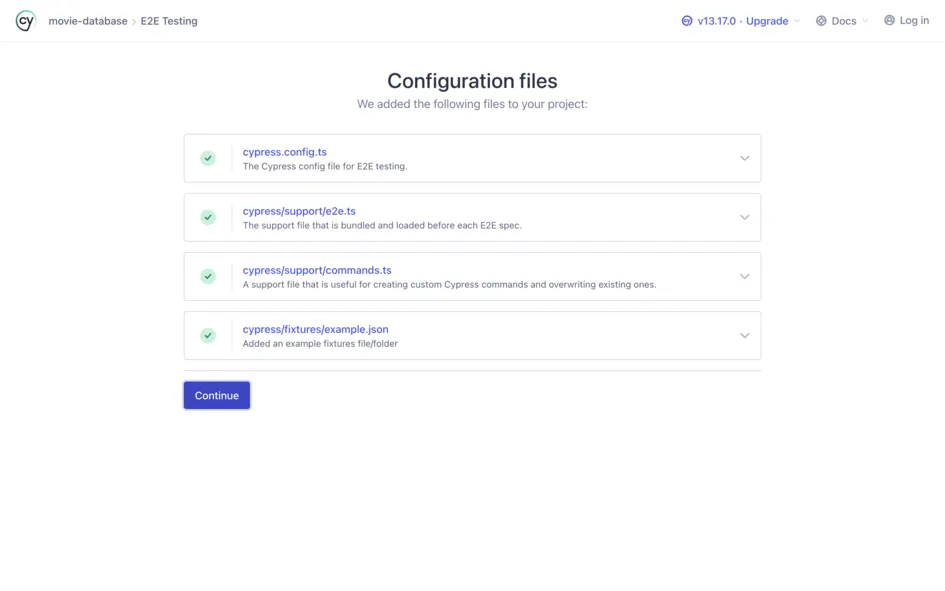
Once the installation is complete, some new files will be added to your project.
Navigate and update the “include” array with cypress.config.ts in tsconfig.node.json and tsconfig.app.json.
tsconfig.node.json :
  ...
  "include": ["vite.config.ts", "cypress.config.ts"]
tsconfig.app.json :
Also, add cypress to types array like so:
 ...
  "include": ["src", "vitest.setup.ts", "cypress.config.ts"],
  "types": ["jest", "vitest/globals", "@testing-library/jest-dom", "cypress"]
Now proceed to run Cypress using the command:
npx cypress open
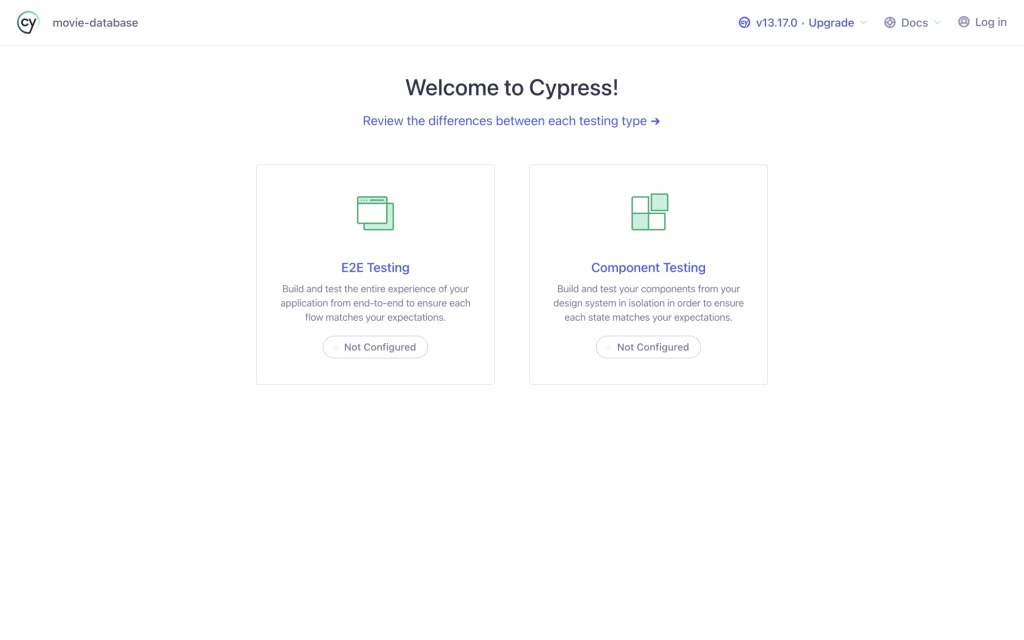
This will open the Cypress launchpad, where you can write and run your tests.
Select “E2E Testing**”.**
Click on “Continue”.
Now once you click on the continue button, you will most likely run into this error:
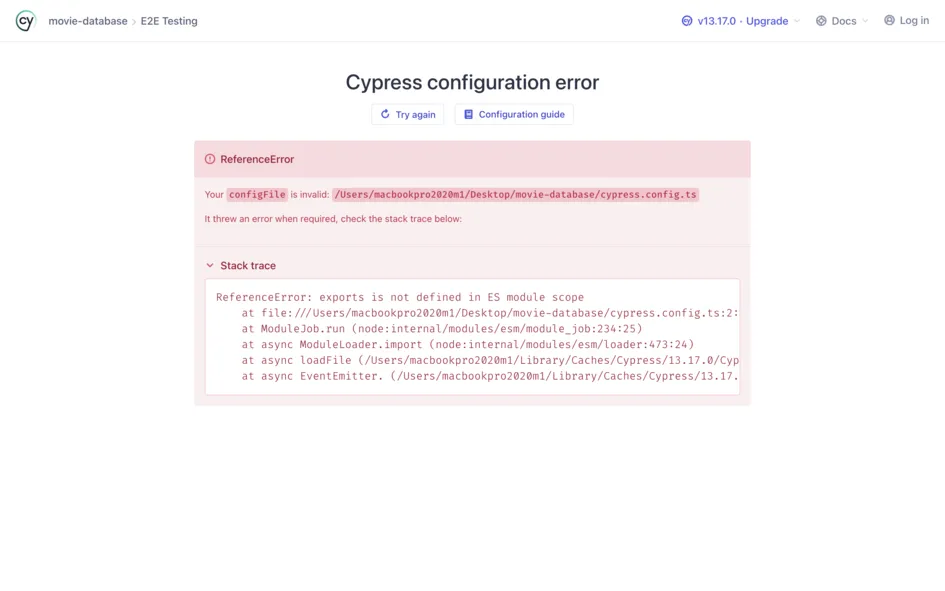
This is because Cypress supports the use of ES modules for configuration by default. So, as our app is built using TypeScript, we need to check both tsconfig.json and tsconfig.node.json to see whether they are correctly configured for ES modules.
For tsconfig.json, include the following code:
{
...
  "compilerOptions": {
    "module": "ESNext",
    "target": "ESNext",
    "moduleResolution": "node",
    "esModuleInterop": true
  }
}
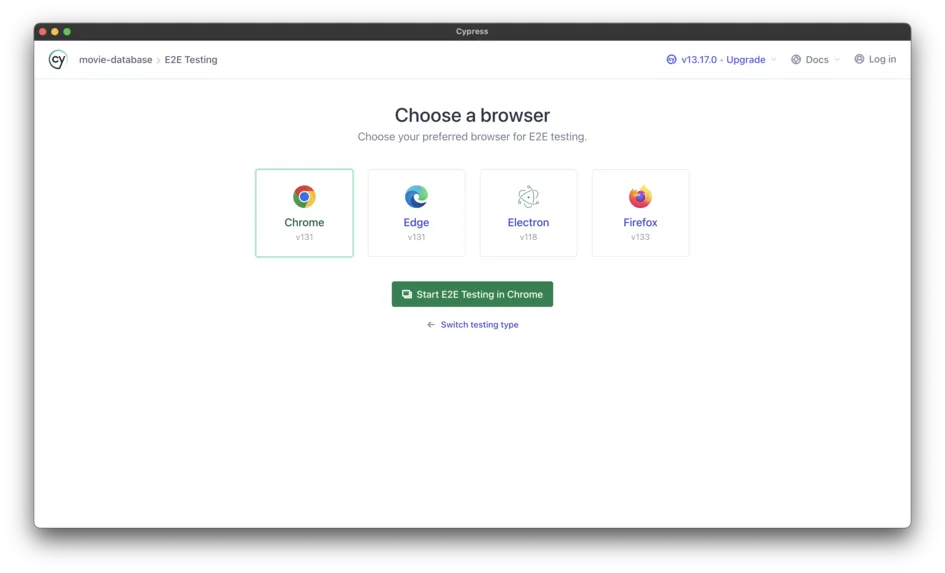
Great: E2E Testing is now configured!

Now proceed to select your browser of choice.
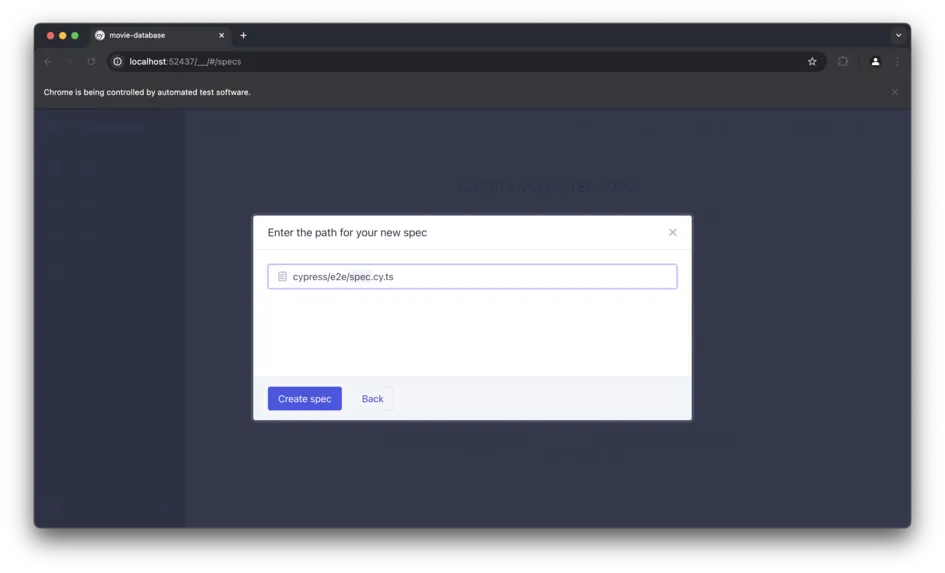
Click on “Create new spec”.
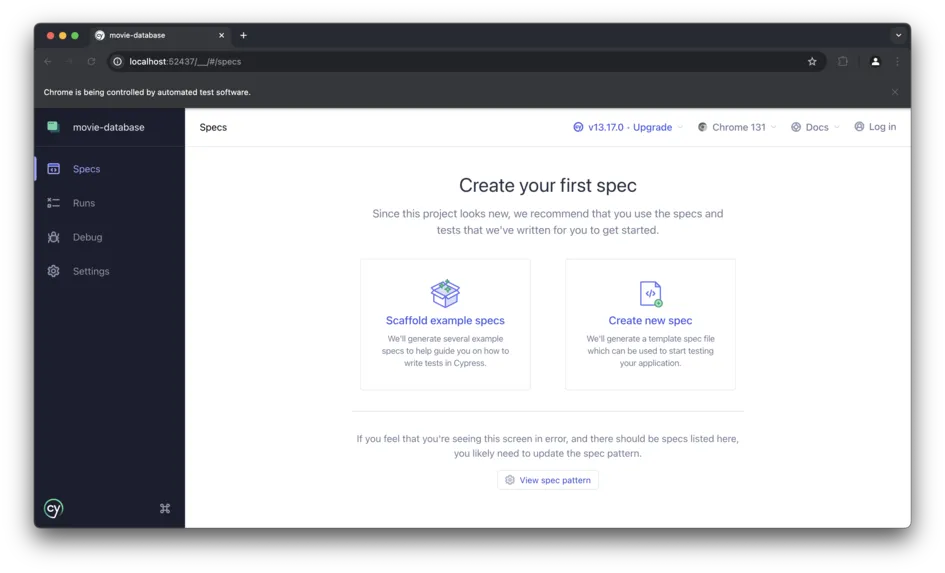
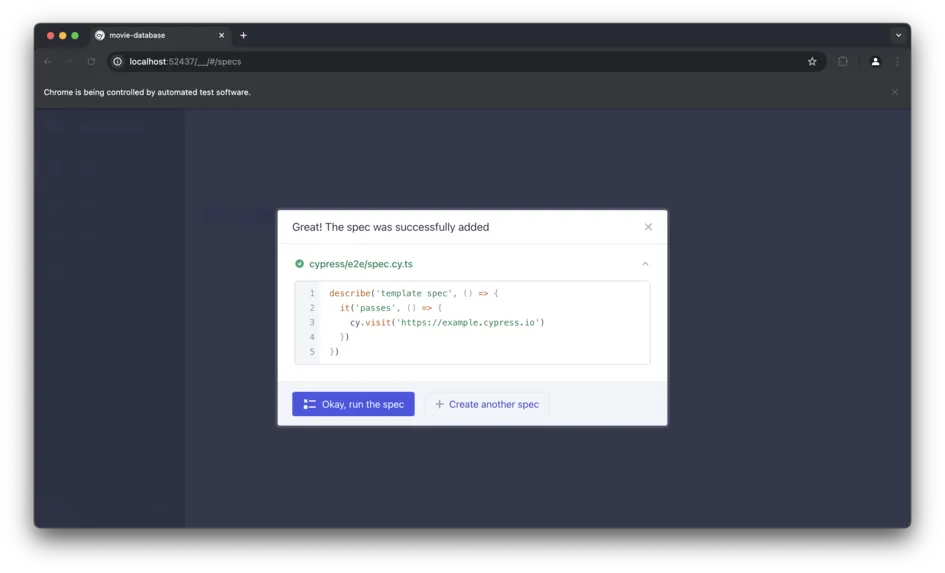
Click on “Create Spec”. This will automatically create the test file in cypress/e2e/spec.cy.ts.
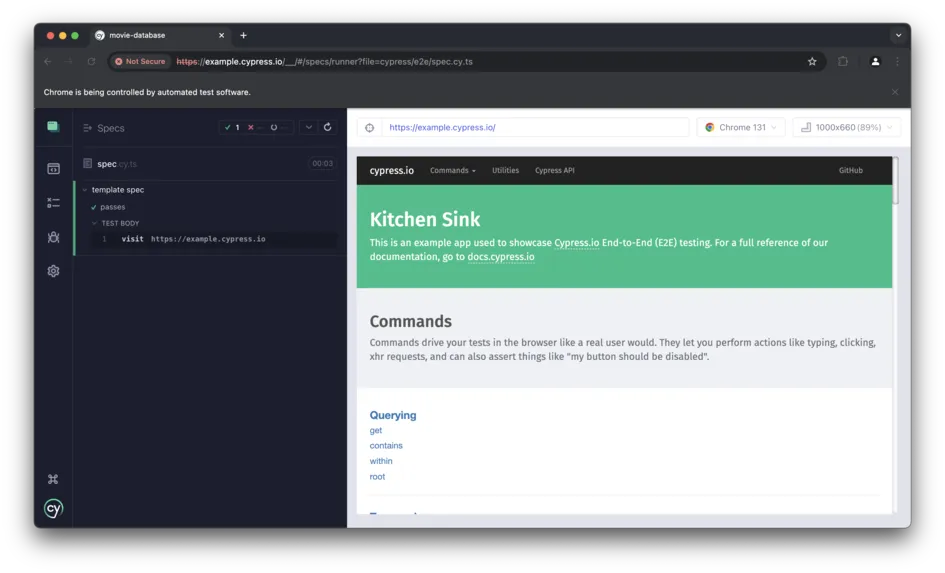
Click on the “Okay, run the spec” button:
Now here we can see this sample test passed.
Writing an E2E test for our application
- Add Mock Data to the Fixture: Create a fixture file
movies.jsonto mock the API response for the movie search:
{
  "Search": [
    {
      "Title": "The Shawshank Redemption",
      "Year": "1994",
      "imdbID": "tt0111161",
      "Type": "movie",
      "Poster": "<https://example.com/poster.jpg>"
    }
  ],
  "Response": "True"
}
- Ensure that the file is saved in the correct location:
cypress/ └── fixtures/ └── movies.json - In the
cypress/e2e/spec.cy.tsfile, add the following code:
describe('Movie Search Application', () => {
  beforeEach(() => {
    cy.visit('/'); // Visit the base URL
  });

  it('should search for a movie and display its details', () => {
    // Mock the API response using the fixture
    cy.intercept('GET', '<https://www.omdbapi.com/*>', {
      fixture: 'movies.json', // Use the fixture file
      delay: 1000, // Simulate a 1-second delay for the API response
    }).as('getMovies');

    // Check if the search bar is visible
    cy.get('input[placeholder="Search for movies..."]').should('be.visible');
    cy.get('button').contains('Search').should('be.visible');

    // Type a search term and submit the form
    cy.get('input[placeholder="Search for movies..."]').type(
      'The Shawshank Redemption'
    );
    cy.get('button').contains('Search').click();

    // Verify the loading spinner is displayed
    cy.get('[data-testid="loading-spinner"]', { timeout: 10000 }).should(
      'be.visible'
    );

    // Wait for the API call to complete
    cy.wait('@getMovies');

    // Verify the loading spinner is removed
    cy.get('[data-testid="loading-spinner"]').should('not.exist');

    // Verify that the movie cards are rendered
    cy.get('.card').should('have.length.at.least', 1);

    // Check if the movie details are displayed correctly
    cy.contains('The Shawshank Redemption').should('be.visible');
    cy.contains('Year: 1994').should('be.visible');
    cy.contains('Type: movie').should('be.visible');

    // Verify the IMDB link
    cy.get('a')
      .contains('View on IMDB')
      .should('have.attr', 'href', '<https://www.imdb.com/title/tt0111161>');
  });

  it('should handle empty search input', () => {
    // Ensure the search button is disabled when the input is empty
    cy.get('input[placeholder="Search for movies..."]').clear();
    cy.get('button').contains('Search').should('be.disabled');

    // Attempt to submit the form with an empty input
    cy.get('button').contains('Search').click({ force: true });

    // Verify no movies are displayed
    cy.get('.card').should('not.exist');
  });

  it('should display an error message when no movies are found', () => {
    // Mock an empty API response
    cy.intercept('GET', '<https://www.omdbapi.com/*>', {
      statusCode: 200,
      body: {
        Response: 'False',
        Error: 'Movie not found!',
      },
      delay: 1000, // Simulate a 1-second delay for the API response
    }).as('getMovies');

    // Type a search term and submit the form
    cy.get('input[placeholder="Search for movies..."]').type('Invalid Movie');
    cy.get('button').contains('Search').click();

    // Verify the loading spinner is displayed
    cy.get('[data-testid="loading-spinner"]', { timeout: 10000 }).should(
      'be.visible'
    );

    // Wait for the API call to complete
    cy.wait('@getMovies');

    // Verify the loading spinner is removed
    cy.get('[data-testid="loading-spinner"]').should('not.exist');

    // Check if the error message is displayed
    cy.get('.alert-error').should('be.visible');
    cy.contains('Movie not found!').should('be.visible');

    // Verify no movies are displayed
    cy.get('.card').should('not.exist');
  });
});
Once you’ve done this, add a baseUrl to your Cypress configuration file (cypress.config.ts) to avoid hardcoding the URL in your tests:
import { defineConfig } from 'cypress';

export default defineConfig({
  e2e: {
    baseUrl: '<http://localhost:5173>',
    setupNodeEvents(on, config) {
    ...
    },
  },
});
Before you run your test, ensure that your domain (in my case localhost:5173) is not blocked by a firewall or some network setting. Also if you use a VPN or proxy, try disabling it temporarily.
Proceed to run your tests:
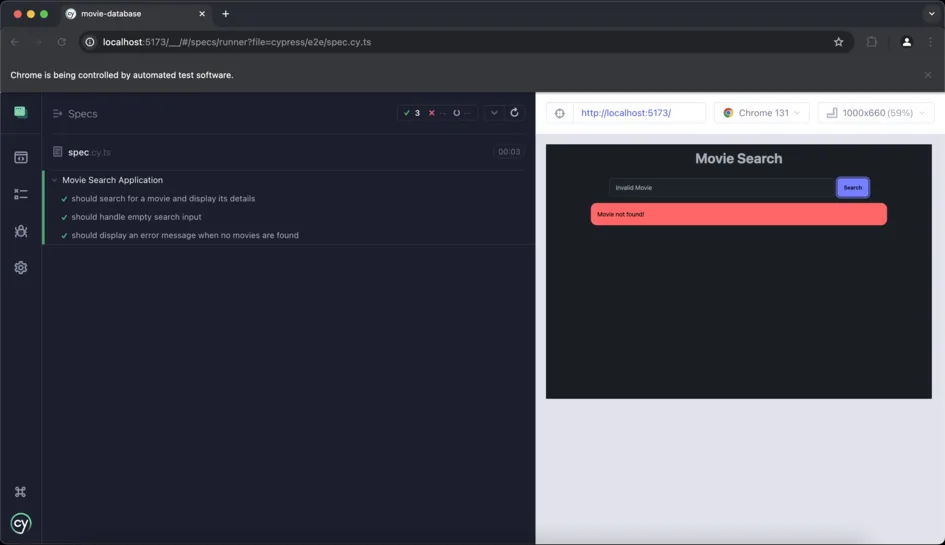
Yay, all test cases passed!!
Automated Testing
Due to the size of a full application, it becomes necessary to automatically test it and return feedback to the developer instead of manually checking for errors, which can be time-consuming.
Introducing Bugfender
Bugfender is a log aggregator platform favoured by app developers to conduct automated testing on their apps.
Though it is not specifically restricted to React app developers, Bugfender performs extremely well in storing app logs from all forms of app, and is great for testing React apps both in development and out in the world.
With the Bugfender SDK, developers can easily reproduce issues and fix them using the detailed log viewer and the stack trace of exceptions.
Advantages of Using Bugfender
With Bugfender as part of your React app, even when your app is running on user’s devices, logs of how the app is performing will be remotely sent to you for analysis.
With this real-time testing and log reporting, you can know what aspect of your code requires an update and the best part is that updating your React app won’t affect it. In fact, there are several advantages to using Bugfender:
- Quick spot: It lets you find out about errors or even potential ones before they escalate. This is possible because Bugfender collects logs of evertything that happens in your app, even if the app doesn’t crash.
- Advanced Filters: Bugfender allows developers to narrow down to specifics, and find out what’s wrong in a particular Operating System or even device type.
- Detail-Oriented: Unlike many other similar platforms. Bugfender gives deeper info about an error or a crash, instead of letting you figure out why it happened, Bugfender tells you the why, allowing you to rectify it in no time.
- Styled with Insightful Stats: Bugfender provides you with usage stats of your app, and you know what’s more fun? You can get all of these in your mail.
- Support: With Bugfender in your React app code, you can run your app on any platform without worry.
To learn more about Bugfender’s feature, take a look at this video.
How to integrate Bugfender into your React testing program
Integrating Bugfender in your React App is pretty straightforward.
- Sign up to the platform. Ideally, you should use the ‘Sign Up via GitHub’ method.
- Once you are in, you will be taken automatically to your dashboard where you will install the Bugfender SDK. Under Popular, you will find the one for React. Click on it to go to the instruction page.
- On the instruction page, you will find the following commands installation command
npm i @bugfender/sdk
- After this, you can initialize it in your
main.tsxfile (which is recommended for global accessibility) file before calling thecreateRoot(document.getElementById('root')!).render()function.
...
// Import Bugfender
import { Bugfender } from '@bugfender/sdk';

// Initialize. `appKey` is the only required option.
Bugfender.init({
    appKey: 'YOUR_APP_KEY_HERE',
    // apiURL: '<https://api.bugfender.com/>', //Usually not required, should be used for on-premises or custom data centers
    // baseURL: '<https://dashboard.bugfender.com>',  //Usually not required, should be used for on-premises or custom data centers
    // overrideConsoleMethods: true,
    // printToConsole: true,
    // registerErrorHandler: true,
    // version: '',
    // build: '',
});
...
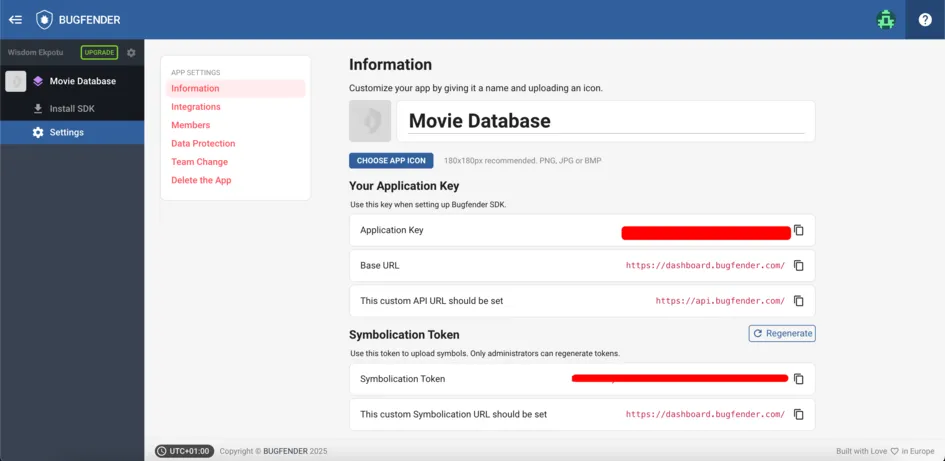
Go to your Bugfender Dashboard and get your Application key.
After you have initialized the SDK, you can start using it anywhere, simply by importing the Bugfender object.
In your App.tsx file, modify it as follows:
// App.tsx
import { Bugfender } from '@bugfender/sdk';
const App = () => {
...
    useEffect(() => {
        Bugfender.log('App Created');
    }, [])
...
}
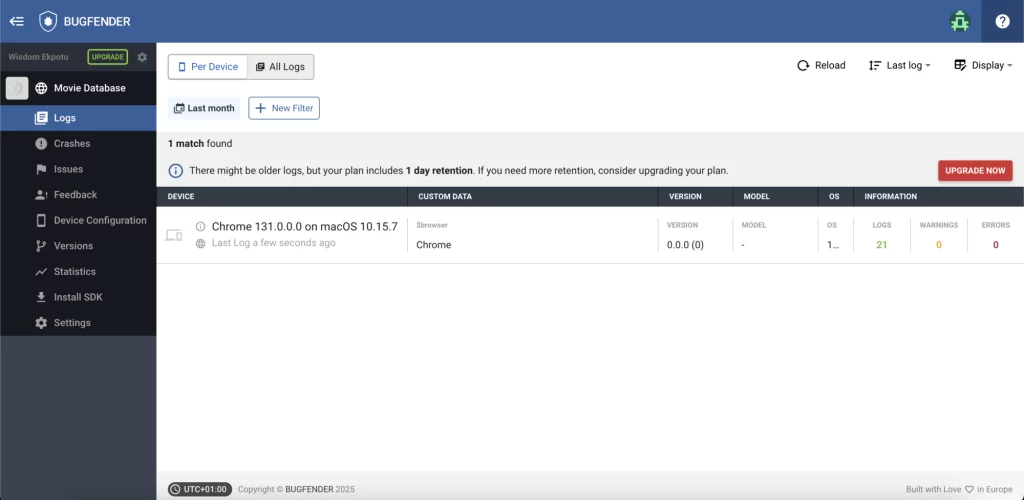
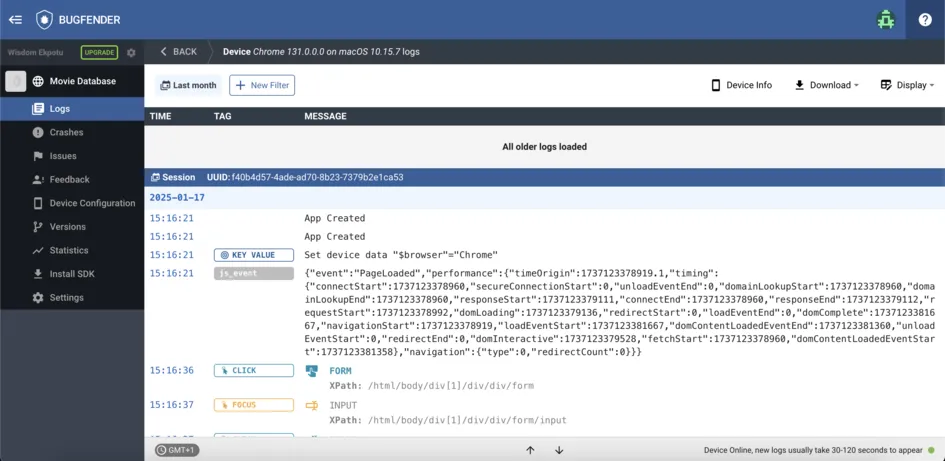
Go ahead and run your application and check the dashboard for insights:

Apart from using Bugfender.log(), there are other methods you can use to send data over from your app. Here are some of them:
Bugfender.trace() , Bugfender.info() , Bugfender.log() , Bugfender.warn() , Bugfender.error(), Bugfender.fatal() .
To get more comprehensive information on how to use Bugfender for testing React Apps, you can check out its specific docs page.
Testing Best Practices
Ok, so we’ve gone through all the key facets of React testing. Now let’s have a quick recap of the tips that’ll serve you well as you go on:
- When adding tests to our codebase, it is often a good rule of thumb to have more unit tests than integration tests, and more integration tests than end-to-end tests.
- Use descriptive names for test cases: In order not to confuse yourself, it is important to use descriptive names when naming your test units. Each test unit should be named with the appropriate component it is intended to verify. For instance, when testing for a form component, it must be named
LoginForm.test.tsinstead of justform.tsortest.ts, which is even worse. - Consistency: Ensure that you are consistent with how you write your values and variables. When testing, you can use test() and it() interchangeably, but we recommend sticking to one throughout your entire testing process or in an entire test file.
- Test components in isolation: Your test files should be tested as the individual units that they are. When you are writing an integration test, the components you are testing should also be tested as one isolated test file.
- Keep tests small: Breaking down each core functionality and testing them in small chunks makes your results more accurate.
- Automate Tests: Automating your tests with tools like Bugfender saves you time compared to manual testing, reduces errors and also ensures that changes made to your app do not negatively affect its effectiveness.
To sum up
React testing is an iterative process, so you should always start with the most critical paths and then gradually expand your test coverage as your application grows. Also refactoring tests regularly can help maintain their value and make them manageable.
If you have any questions of any of the topics we’ve covered today, or anything else related to React testing, don’t hesitate to reach out. Happy coding!
Expect The Unexpected!
Debug Faster With Bugfender