20 Minutes
A Comprehensive NextJS Router Guide for Developers
Fix Bugs Faster! Log Collection Made Easy
ReactJS is undoubtedly the most popular library for developers to build web and mobile applications. Its community is vast, so you get all the support you need as a developer while building applications.
However, ReactJS is just a library for user interface development. It encourages us to build applications with the component architecture, which follows a tree hierarchy. This is enough to start a single-page application, but when the application grows we may need to think about multi-page navigation, authentications and internationalization support. Furthermore, ReactJS does not provide a range of functionality that we can leverage out of the box.
That’s where Next.js comes in. Next.js a ReactJS-based framework which enables us to create production-ready applications, and offers us a variety of features to build a robust ReactJS application without worrying about any external dependencies.
In this article, we will learn about Next.js, the new App router, and the routing from scratch to the advanced level.
Table of Contents
- Next.js App router
- Create new routes and nested routes
- How to link and navigate between routes
- Handling errors in route navigation
- Handling a ‘page not found error’ for a missing route
- Handling loading state for a slow page load
- Understanding dynamic routing
- Parallel Routing
- What is route grouping?
- Next.JS API Route Handlers
- To sum up
Next.js App router
The Next.js App router has significantly improved the routing experience over its previous versions with page router. The app router uses file system-based routing, where a directory indicates a route, and a special file called page.js(or .ts) under the directory indicates a page of the route. A page is unique to a route, and you can create per route.
Now let’s explore the workings of the Next.js App router , with code examples.
Please note: All the source codes used in this article are in my GitHub repository. Please feel free to refer them side-by-side: https://github.com/tapascript/teach-next-js
Create a Next.js App Router Project
To get started, first open your command prompt/terminal and execute this command:
npx create-next-app@latest
Please make sure you have Node.js v18.x or above installed. If you do not have it, please download and install it from here.
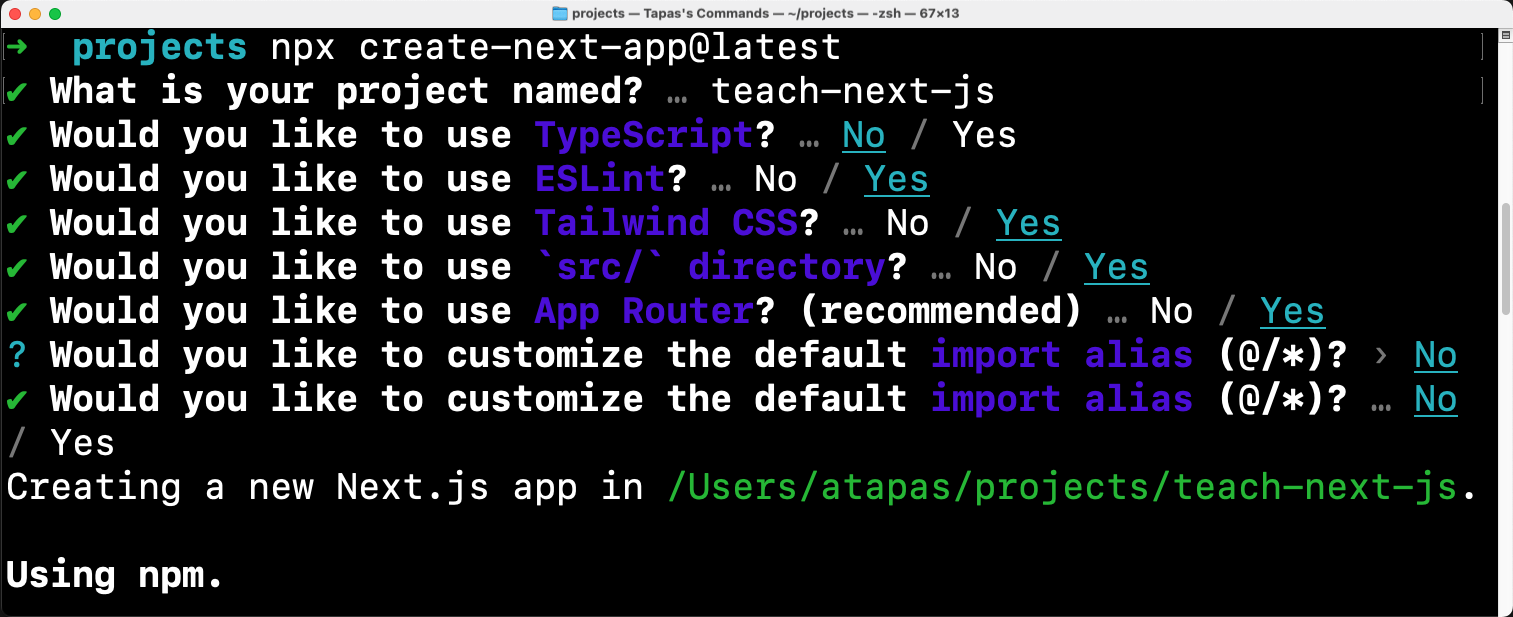
The Next.js installation process will ask you questions like the project name, whether you want to use TypeScript or JavaScript, etc. Please provide the answers as appropriate. However, be sure to opt for App Router when you are asked for it.
The screenshot below shows my answers to create a Next.js project with JavaScript and App Router. I have also opted for a src/ directory, which gives me a better way to arrange and manage other configuration files outside of the default app/ directory.
Create a Next.js application with App Router
Now change the directory to your project directory, i.e., teach-next-js using this command:
cd teach-next-js
Use the following command to run the project locally:
# Using npm
npm run dev

# Using yarn
yarn dev
By default, the application will run on this URL: http://localhost:3000.
Understanding the routes
Next.js creates a top-level app/ directory that acts as the root route(/). The page.js file under the app/ directory will act as the page for the root route, and the layout.js file will be the root layout.
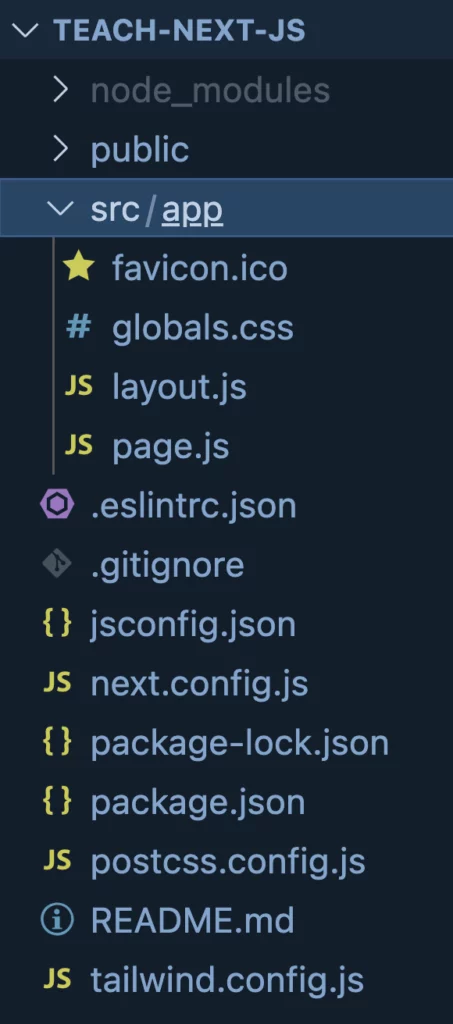
The initial directory structure
Any directory you create under the app/ directory will act as subroutes or nested routes. You need to create pages for each subroute so that they are accessible. Also, you can optionally create layouts for each of the subroutes.
The image below demonstrates how the directories can act like routes and subroutes.
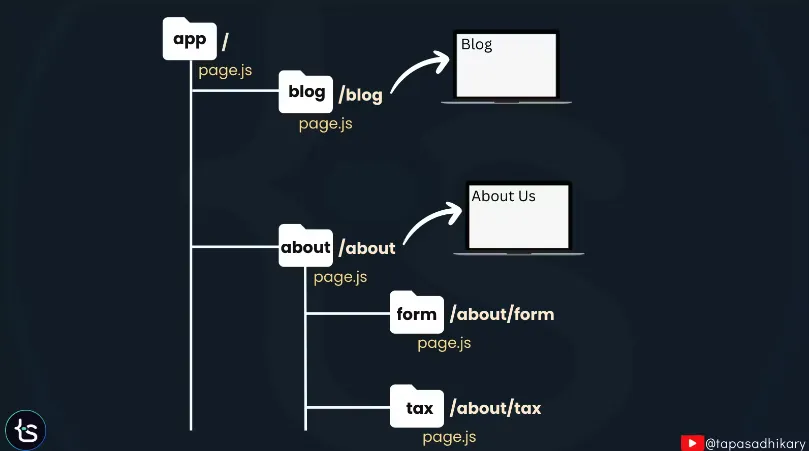
Demonstration of a directory structure maps to route
Here, we see the advantages of the Next.js App router over the Page Router we used in previous versions.
With Pages Router, we were forced to keep our pages inside a special pages directory, and thus had to move all other related files elsewhere in the project structure. With the App router, we have a single app/ directory to organize and manage the pages and other related files like layouts, components, etc. This strategy is called Colocation, and it allows a much better development experience.
Each page under a route is a ReactJS server component. We can utilize the power of ReactJS in pages, layouts, or designing any components. Here is an example of a simple page component.
// /app/page.js
export default function Page() {
  return <h1>Home Page</h1>
}
If a route misses a corresponding page.js file, the respective route will be inaccessible, resulting in a 404 page not found error. The image below demonstrates that each route directory has a page file to create a page for that route segment.

Create new routes and nested routes
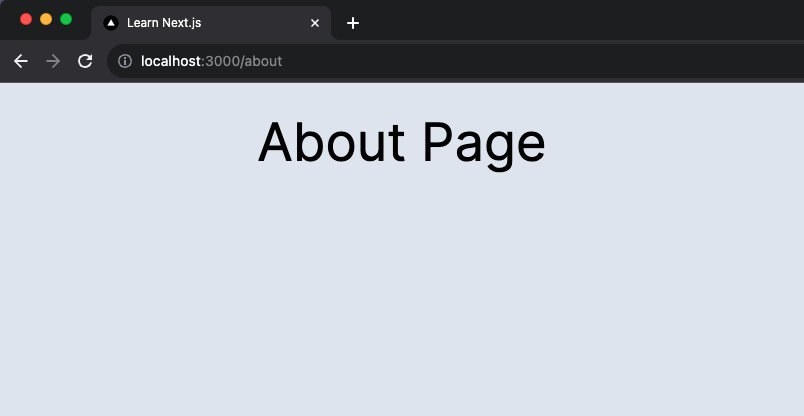
Now let’s create a new route, along with a few nested routes. To do so, create a directory called about/ under the app/ directory, then create a page.js file under the app/about/ directory with the following code:
const AboutPage = () => {
  return (
    <>
      <p className="text-3xl">About Page</p>
    </>
  )
}

export default AboutPage;
Now, we have a brand-new route called /about with a page like this:
Now, let’s create two subroutes of /about, one for the form page and another for the tax page. Create two directories called form/ and tax/ under the app/ directory, then create a page.js file under the app/about/form/ directory with the following code:
const FormPage = () => {
  return (
    <>
      <p className="text-3xl">Form Page</p>
    </>
  )
}

export default FormPage;
Similarly, to create another page.js file under the app/about/tax directory, we can use the following code:
const TaxPage = () => {
  return (
    <>
      <p className="text-3xl">Tax Page</p>
    </>
  )
}

export default TaxPage;
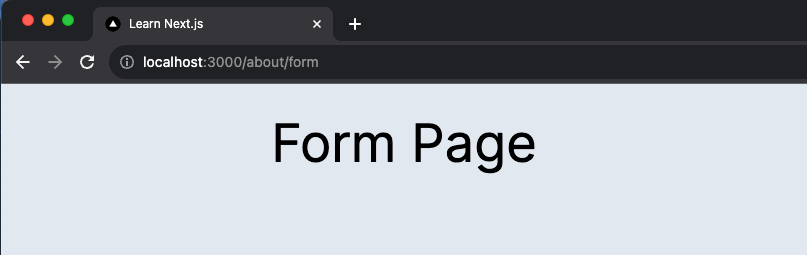
You can access the form page over the nested route about/form:
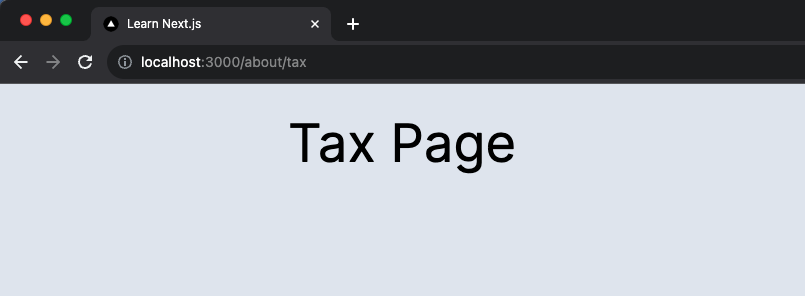
Similarly, the tax page at about/tax route:
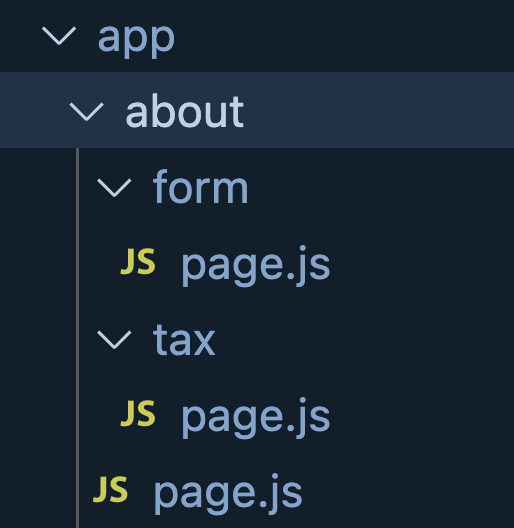
The directory structure of the created directories and folders will look like the following image:
Likewise, you can now create routes like a blog, play, store, or whatever else you feel like.
In an application, we invariably want to link one page to another. We usually use the anchor tag (<a/>) in web programming. However, with Next.js, we can use the anchor tag to link and navigate to a page that is external to an application, or to invoke ant functions.
Next.js provides a component called Link to navigate between routes. We can import the Link component from the next/link package and use it in any component.
Here is an example of a header component, with header text and links to navigate to other page routes.
import Link from "next/link";
export default function Header() {
  return (
    <header
			className="flex justify-between items-center px-8 py-4 bg-[#020617] text-white">

			<h1 className="text-lg font-bold">
				<Link href="/">Learn Next.js</Link></h1>

			<nav className="flex space-x-6">
        <Link href="/">Home</Link>
        <Link href="/blog">Blog</Link>
        <Link href="/play">Play</Link>
        <Link href="/store">Store</Link>
        <Link href="/about">About</Link>
      </nav>
    </header>
  );
}
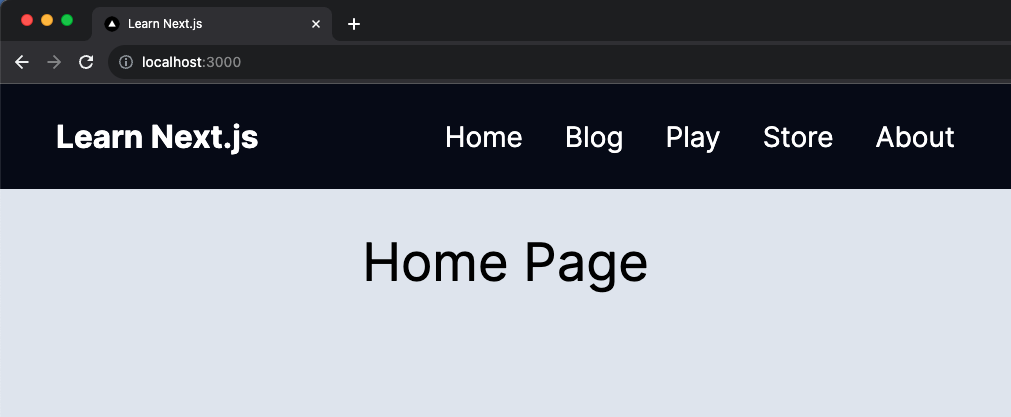
Notice that the Link component has a href property to specify a navigation route. Here is what the header component may look like with the navigation links:
The Link component is the best option to navigate to the route. However, you may need to change routes programmatically, for example, by clicking on a button you want to navigate to a route. In this case, you can use the useRouter hook from the next/navigation package, like this:
'use client'

import { useRouter } from 'next/navigation'

export default function Page() {
  const router = useRouter()

  return (
    <button type="button" onClick={() => router.push('/blog')}>
      Blog
    </button>
  )
}
- Please note that, to use any ReactJS hooks in NextJS components, you must declare the component as a client component. We have demonstrated this in the code above, deploying the
'use client'directive at the top of the page (before import statements). - The
useRouterhook gives us access to the router object. We use this to navigate another route by clicking a button and pushing a new route segment (/blog) to the router.
We can gracefully handle a runtime error in a route segment by adding an error.js file and exporting a client-side React component from it. In the image below, we see an error.js file has been added at the root level to catch all unexpected runtime errors.
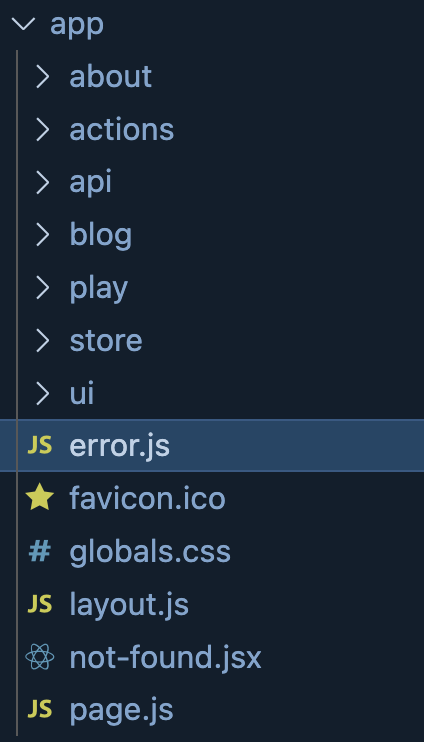
The React component in the error.js file must be a client component, so we must mention the 'use client' directive at the top.
'use client'

import { useEffect } from 'react'

export default function Error({ error, reset }) {
  useEffect(() => {
    // Log the error to an error reporting service
    console.error(error)
  }, [error])

  return (
    <>
      <h2 className='text-3xl p-2'>Brum!!! Something went wrong.</h2>
      <button
        className='bg-purple-500 text-white text-md rounded-lg p-1 cursor-pointer'
        onClick={
          // Attempt to recover by trying to re-render the segment
          () => reset()
        }
      >
        Try again
      </button>
    </>
  )
}
When the application encounters a runtime error, the error page will look like this:
Handling a ‘page not found error’ for a missing route
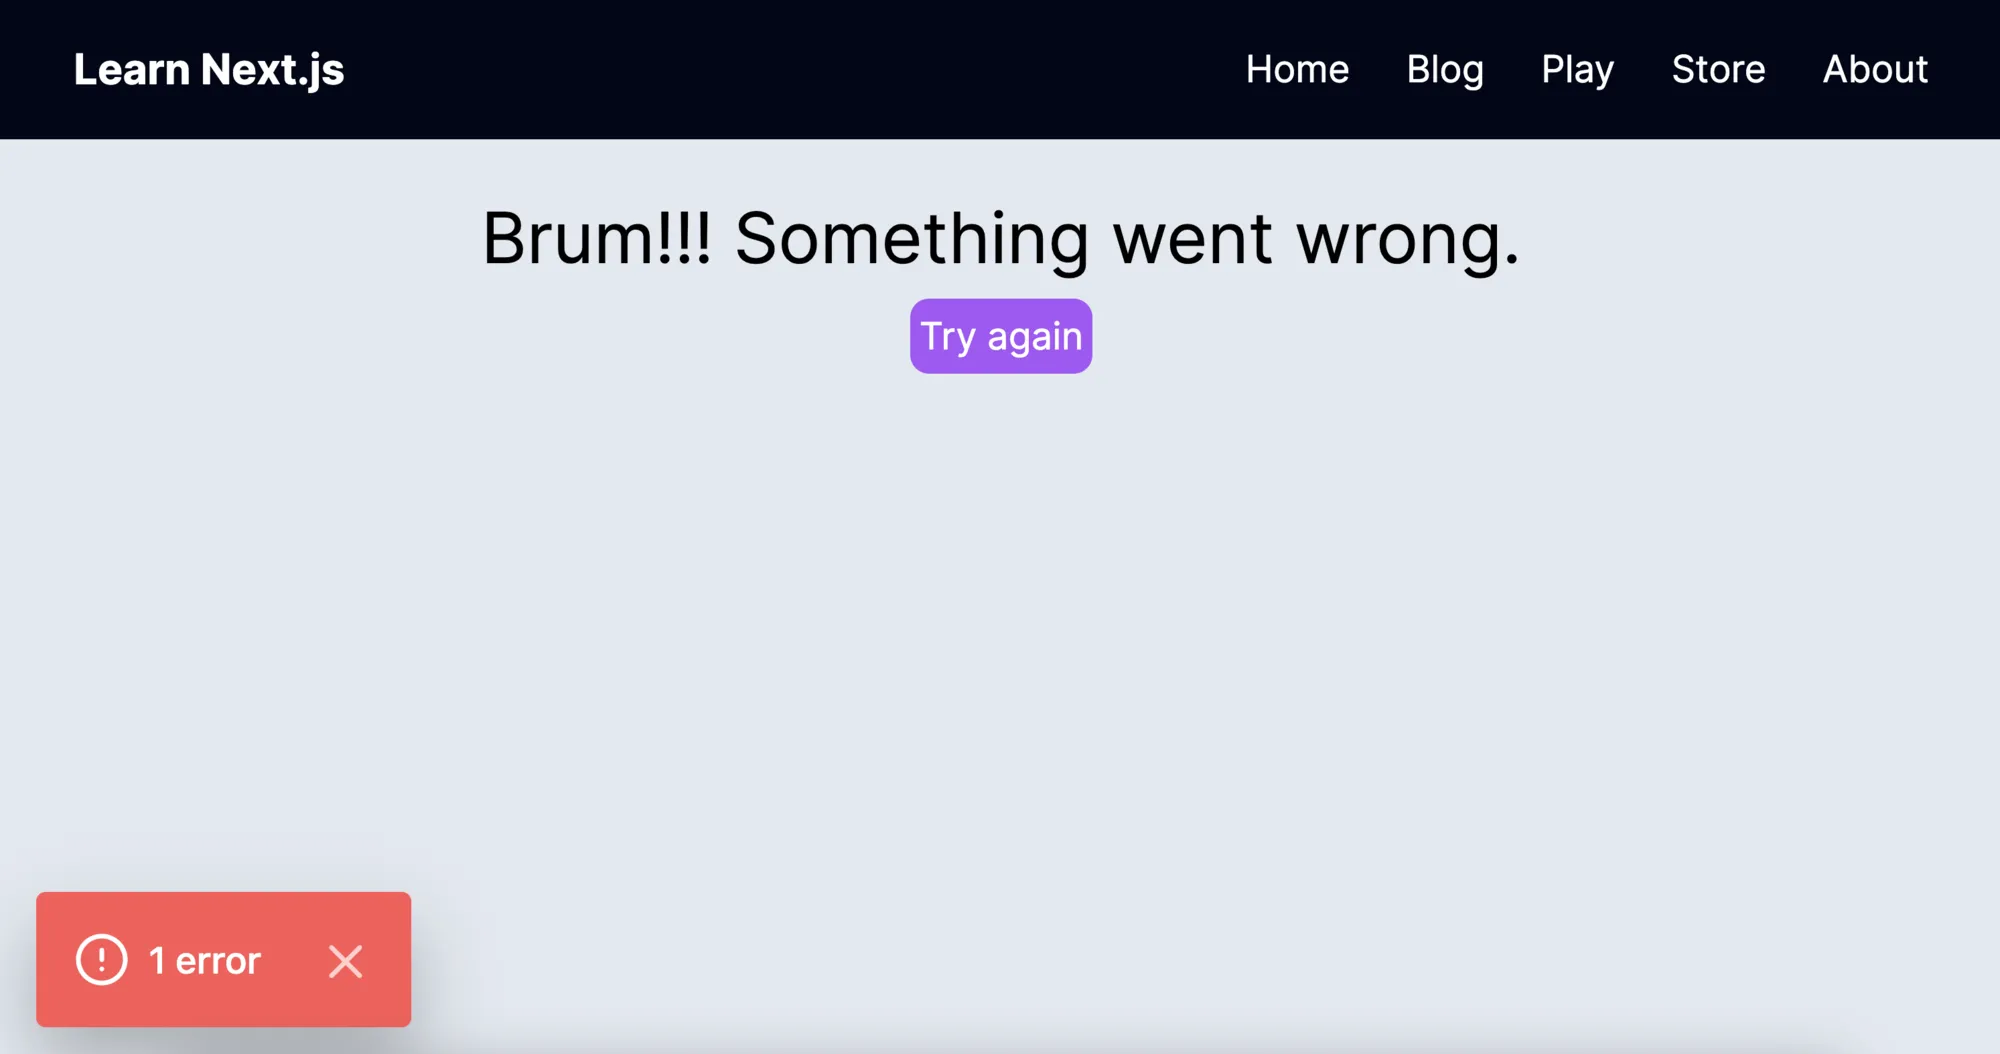
When you visit an unmatched route, the application will show a standard 404 message indicating the page you are looking for has not been found. This message is a bit cold and impersonal, so you may want to customize it with better text and graphics.
You can create a not-found.js under the app/ directory to handle any unmatched route throughout the application. Not that the special not-found.js file must export a React component.
Here is an example where we have customized texts and a button to return to the home page.
import Link from 'next/link'

export default function NotFound() {
  return (
    <>
      <h2 className='text-3xl pb-2'>Not Found</h2>
      <p className='text-xl pb-4'>Could not find requested page/resource</p>
      <Link
        className='bg-purple-500 text-white p-2 text-md rounded-lg'
        href="/">Return Home</Link>
    </>
  )
}
The page:
Additionally, you can also invoke a notFound() function from a route segment to throw the NEXT_NOT_FOUND error. This will stop the rendering of the current route segment and render the nearest not-found.js file.
import { notFound } from 'next/navigation'

async function fetchPost(id) {
  const res = await fetch('<https://exampleblog/api>')
  if (!res.ok) return undefined
  return res.json()
}

export default async function Blog({ params }) {
  const post = await fetchPost(params.id)

  if (!post) {
    notFound()
  }

  // ...
}
Handling loading state for a slow page load
Next.js uses the loading.js convention to show the loading indicators in an optimized way. You can create a loading.js file under a route segment to trigger the loading state, and use it to fetch data using suspense (which we’ll show you below).
Consider this as the loading.js file under the app/ directory.
export default function Loading() {
  return(
		<p>Loading....</p>
	)
}
Then you can use the loading component to automatically wrap the page.js file, and any children below, in a <Suspense> boundary.
<Header />
  <Suspense fallback={<Loading />}>
  <div
    className="flex flex-col items-center p-4 bg-slate-200 h-screen">
    {children}
  </div>
  </Suspense>
</body>
Understanding dynamic routing
So far, everything we’ve discussed about routing has focused on static routes. This means we have known the route segment name in advance. However, there will be situations when you may have to create routes with dynamic data.
For example, consider a blogging application. You may have a static route to list the blog posts, but individual blog post details should be created as the dynamic route. Creating individual blog post routes statically will require too much work, with additional maintenance required for every new blog post.
Instead, you can use dynamic data like a slug to create dynamic routes.

How to create dynamic routes
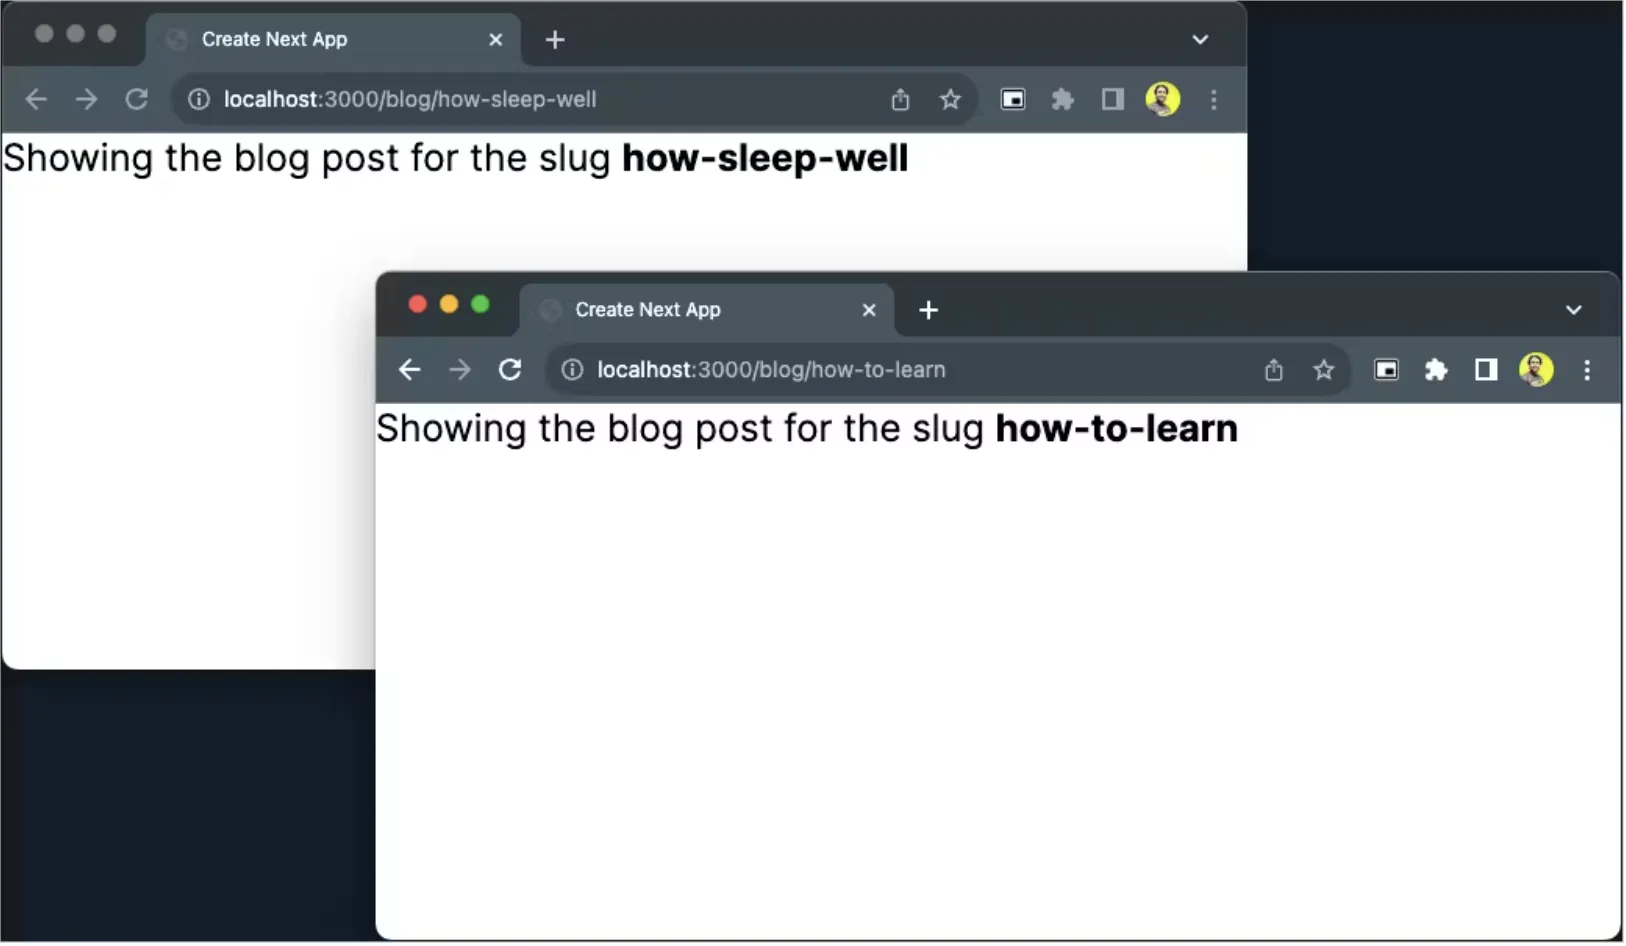
To create a dynamic route, you need to create a directory like before. This time, however, the directory name must be enclosed in a pair of square brackets, such as [name] or [slug].
So, if we have to create dynamic routes for each blog post, we will create a [slug] directory under app/blog/, like this:
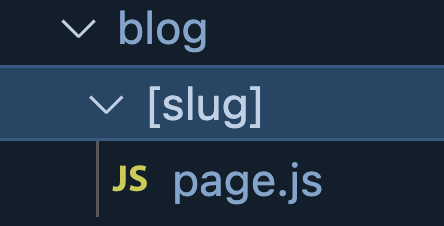
Also, notice the page.js file under the [slug] folder: this helps us define a page for that dynamic route.
The page.js file will have a React component exported as usual, and it may look like this for the individual blog post page:
const BlogPost = ({params: {slug}}) => {
  // Make a call to get the post content
  // for the slug.

  return(
    <p className="text-2xl">
      Showing the blog post for the
      slug <strong>{slug}</strong>
    </p>
  )
}

export default BlogPost;
A few points to note here:
- The page receives a
paramsprop with the information about the dynamic segment and its value. Here, we can extract the value of theslugfrom theparamsprop. - Now, taking this slug value, we can fetch the content for the post from a local store or database (in fact, we can take it from practically anywhere) and display it.
How to create catch-all dynamic routes
The dynamic route matching methodology can be extended to support catch-all dynamic route segments. This means we define one route to match multiple route segments.
To create a catch-all route segment, simply add an ellipsis inside the square brackets before the dynamic segment name, like this: [...slug].
For example, app/car/[...model] will match /car/bmw, /car/audi, and also /car/bmw/X1, /car/audi/A5, /car/bmw/X1/navy-blue, and so on.
To achieve this, create a car/ directory under the app/ directory. Now, create a directory with the name [...model] under the app/car/. That’s it.
You can now create a page.js file as usual under the app/car/[...model] directory to handle the page for these routes:
const CarPage = ({params: {model}}) => {
  console.log(model);
  return(
    <p className="text-2xl">
      Showing the car page for the
      model name <strong>{model}</strong>
    </p>
  )
}

export default CarPage;
Parallel Routing
Parallel Routing helps you to render one or more pages in the same layout simultaneously.
You can define the independent loading state and error state for each route, but remember that you must create named slots, defined with the @folder convention for each parallel route. These slots are passed to the same-level layout as props.
Before parallel routing, we had to navigate away from one page to another for every route switch, which was a major hassle… and it’s certainly not ideal for features like dashboards and social media feeds. The parallel route offers a better alternative in these highly dynamic sections.
Now, let’s create a /dashboard route by establishing a dashboard/ directory under the app/ directory. Then, we can create a page file with the following code:
// dashboard/page.js

export default function Dashboard() {
  return (
    <h2>Dashboard page</h2>
  )
}
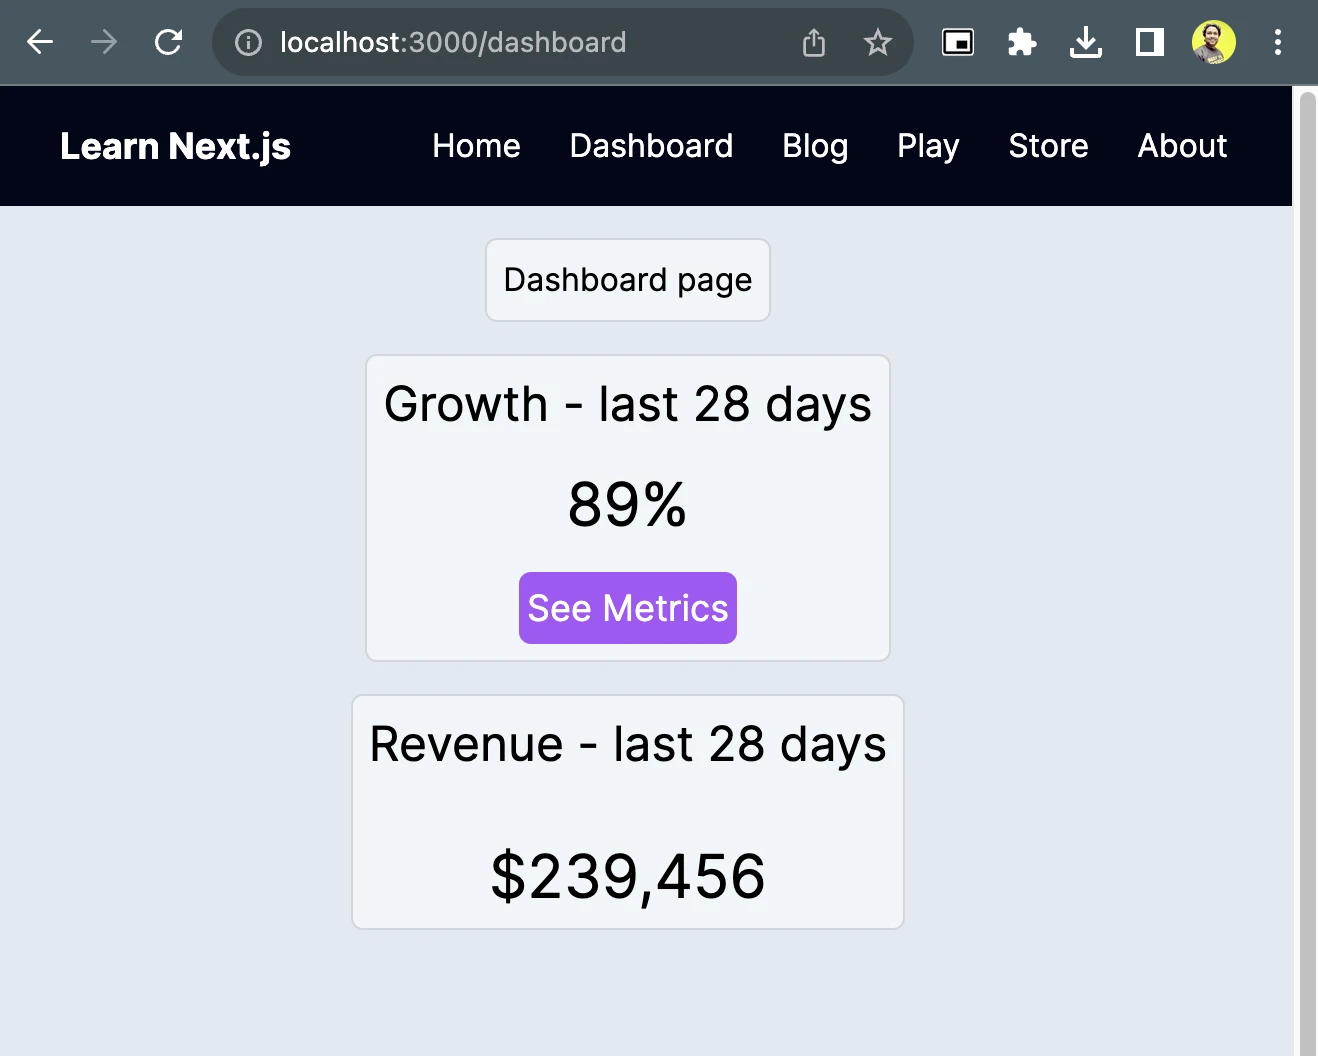
The next step is to create two slots that lead to two parallel routes:
@growth: To show the growth data@revenue: To show the revenue data
We can create a folder called @growth inside the dashboard/ directory, and then create a page for this slot. To do so, create a page.js file under the @growth folder with the following code:
// dashboard/@growth/page.js

import Link from "next/link"
export default async function Page() {
  return(
    <div className="h-42">
      <h2 className="text-2xl pb-4">Growth - last 28 days</h2>
      <div className="flex flex-col justify-center items-center text-center">
        <p className="text-3xl pb-4">89%</p>
        <Link
          href="/dashboard/metrics"
          className="bg-purple-500 text-white p-1 rounded-md text-lg">
            See Metrics
        </Link>
      </div>
    </div>
  )
}
A simple React component shows a growth number and a button that links to another page. To take the next step, let’s create a page for the @revenue slot.
// dashboard/@revenue/page.js

export default async function Page() {
  return(
    <div className="h-42">
      <h2 className="text-2xl pb-8">Revenue - last 28 days</h2>
      <p className="text-3xl text-center">$239,456</p>
    </div>
  )
}
Great! Now we have two slots for the two parallel routes, we can use them in the dashboard layout, which will receive these slots automatically as props.
We can create a layout.js file under the dashboard/ directory with the following code:
// dashboard/layout.js

import { Inter } from "next/font/google";

import Header from "../ui/Header";

const inter = Inter({ subsets: ["latin"] });

export const metadata = {
  title: "Learn Next.js - Dashboard",
  description: "Dashboard for the parallel routes!",
};

export default function DashboardLayout({ children, growth, revenue }) {
  return (
    <div className="flex flex-col justify-center items-center">
      <div className="bg-slate-100 p-2 mr-4 mb-4 rounded-md border border-gray-300">
        {children}
      </div>
      <div className="flex flex-col justify-center items-center sm:flex-col md:flex-row lg:flex-row xl:flex-row">
        <div className="bg-slate-100 p-2 mr-4 mb-4 rounded-md border border-gray-300">
          {growth}
        </div>
        <div className="bg-slate-100 p-2 mr-4 mb-4 rounded-md border border-gray-300">
          {revenue}
        </div>
      </div>
    </div>
  );
}
As you can see, we are passing growth and revenue slots to the layout as props and using them to render in the JSX. The children prop is contained in the dashboard page.
Now, if you access the /dashboard route, you will see it like this:
The directory structure would look like this:
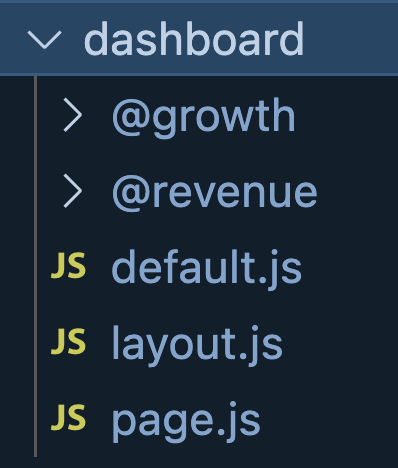
A few more essential points for parallel routing:
- The slots are not the actual route segments. This means
@growthand@revenuewill not be accessible on the route path likedashboard/@growth. - We can define a
default.jsfile for Next.js, so we have a place to fall back to when it finds an unmatched slot and can not recover from it.
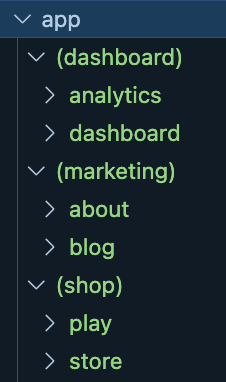
What is route grouping?
We can group the routes logically inside the app/ directory. The grouping folder must be created with a pair of parenthesis around them, like (marketing) and (analytics), to get committed from the route URL.
We have reorganized the directories in the image below into dashboard, marketing, and shop groups. As you see, the relevant routes have been grouped inside the group folders.
Next.JS API Route Handlers
The Next.js framework is not limited to user interfaces alone. In fact, it is a framework to develop full-stack applications.
You can also implement API services using route handlers , which harness the Request and Response APIs so we can create custom request handlers for a particular API route and handle a server action.
By convention, you must create a route.js (or .ts file) inside the app folder to define Route Handlers. They support the following HTTP methods:
- GET
- POST
- PUT
- DELETE
- PATH
- HEAD
- OPTIONS
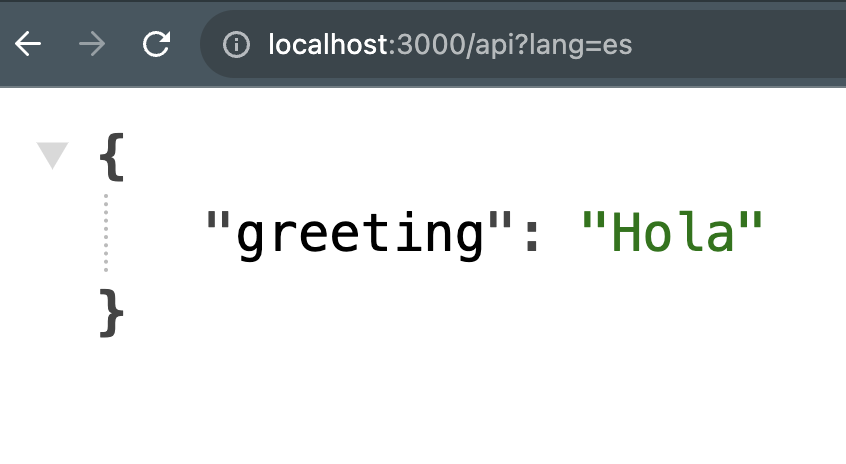
Now let’s create our first route handler. A greeting service will return a message in the language we pass to it, with the query parameter.
To get started, create a directory called api/ under the app/ directory. Now create a route.js file under the app/api/ directory, with the following code:
export async function GET(request) {

  const data = {
    'en': 'Hello',
    'es': 'Hola',
    'bn': 'হ্যালো'
  }
  const { searchParams } = new URL(request.url);
  const lang = searchParams.get('lang') || 'en';
  const msg = data[lang] || data['en'];
  return new Response(JSON.stringify({'greeting': msg}))
}
Here, we are dealing with a GET request, and we are reading the URL from the request to get the query parameter’s (lang) value. Based on the value of the lang parameter, we fetch the greeting message and send back a response object.
Now, if you access the route as /api?lang=es, you will get a response back from the service as shown below:
Now let’s take another example: we will use an external API to get data and send the response back. A route like this could process data from an external API service and send back the processed data to the UI layer. We will also use the concept of dynamic routing with a route handler.
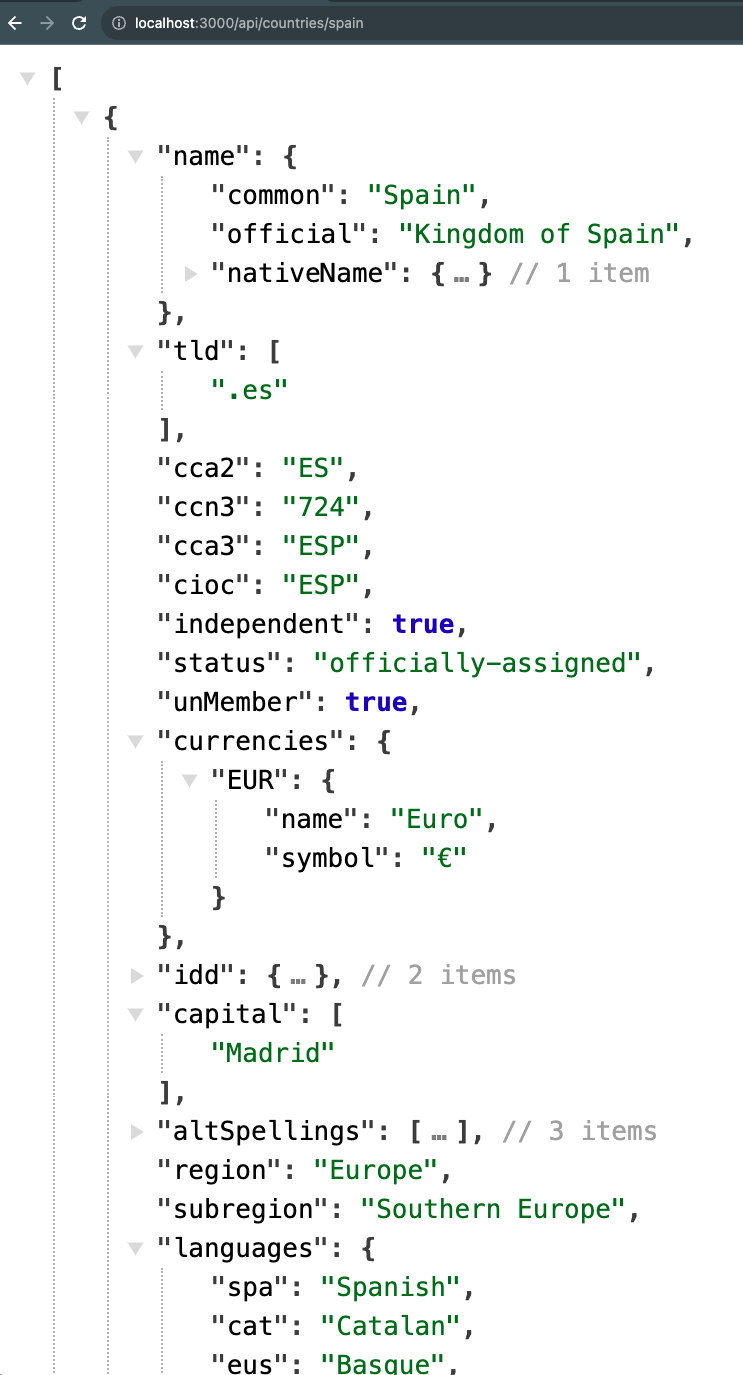
Let’s consider an API service that provides us with the details of a particular country. We can pass the country name as the dynamic route segment.
To get started, create a directory called countries/ under the app/api/ directory. Now, create a [name] directory under it for dynamic segments.
The last thing is to create a route.js under the [name] directory, with the following code:
import { NextResponse } from "next/server";

export async function GET(request, {params}) {
  const countryName = params?.name;
  const res = await fetch(`https://restcountries.com/v3.1/name/${countryName}`);

  const data = await res.json();
  if(res !== null) return NextResponse.json(data);

  return NextResponse.json({'error': 'Country not found'});
}
As you’ll (hopefully) see, we can read the name parameter and pass it to the underlying API service doing an asynchronous fetch. Then, we can send back the response as we receive it. Now it’s possible access the country information using our new route.
You can find out more about the route handlers from the Next.js documentation.
To sum up
- Next.js is a ReactJS-based framework that helps build production-ready full-stack applications.
- Next.js App router offers significant improvements on previous-gen page routers, ensuring better project structure management and, thus, smoother routing.
- Next.js uses a file-system-based routing system whereby a folder under the
app/directory acts as a route, and a special file calledpage.js|.tsacts as the page for the route. - We can create nested routes using the nested directories.
- We can create dynamic routes using the folder name enclosed in the square brackets to map the dynamic route segment.
- Parallel Routing helps us simultaneously render one or more pages in a single layout.
- The route grouping helps us group the routes logically in folders. The group folder must have a special naming convention of the folder name, enclosed in parenthesis.
- The route handler is a replacement of the API routes we previously created with the old page router in Next.js. This is a great feature that extends Next.js beyond a mere UI framework.
That’s all for now. I hope you found this article insightful and that it helps you get started with routing, one of the most important aspects of the Next.js frameworks. To get the most from this topic, you should explore other Next.js themes and try going deeper into each of the subjects we have discussed today. The Next.js documentation is one of the best resources to learn these concepts more deeply.
Here is the code repository containing the project code we have used in this article. Feel free to clone/fork and use it. If you like the work, please give the repository a star.
See you soon with another article. Until then, take great care and keep learning.
Expect The Unexpected!
Debug Faster With Bugfender

Tapas Adhikary
Tapas Adhikary is a Full Stack Developer. He loves building web apps, mobile apps, and JAMstack solutions. He is a technology blogger who publishes articles for freeCodeCamp, daily.dev, dev.to, his blog.greenroots.info and also in his YouTube Channel. Follow him on Twitter(@tapasadhikary) to stay connected.