6 Minutes
Swift Code Analysis: Integrating Sonarqube
Fix Bugs Faster! Log Collection Made Easy
SonarQube and Its Benefits
SonarQube is an open-source platform that allows you to continuously inspect and measure code quality as you develop your project. It provides static code analysis for code issues, security issues, and code smells in various programming languages, including Swift. This helps development teams maintain and improve code quality by identifying and finding issues in the development lifecycle, if paired with a good testing methodology it can make a difference in your app quality.
These are some key benefits of using SonarQube:
- SonarQube performs static code analysis to identify code quality issues without executing the code.
- SonarQube measures code metrics such as duplicate code, complexity, and test coverage. These metrics provide project insights into the maintainability, reliability, and efficiency of the code.
- SonarQube has security rules to identify potential issues in the code, which help developers to work on security issues during the development process.
- SonarQube is good to integrate into continuous integration (CI) and continuous delivery (CD) pipelines. This aids automatic code analysis and reporting as part of the build process.
- SonarQube provides a web dashboard to display an overview of the code quality and metrics of the project. It also generates detailed reports for developers, managers, and other stakeholders to track progress and make decisions.
- SonarQube supports a wide range of programming languages including Java, C#, C, C++, JavaScript, TypeScript, Python and Swift.
- Users is able to define custom rules and quality profiles based on their coding standards and requirements.
- SonarQube has an active worldwide community of users and contributors.
Table of Contents
Steps to Integrate
To integrate SonarQube into a Swift project, we must go through several steps. These include setting up the SonarQube server, configuring your Swift project, and performing analysis. Here are the steps in more detail:
Step 1: Install and configure the SonarQube server
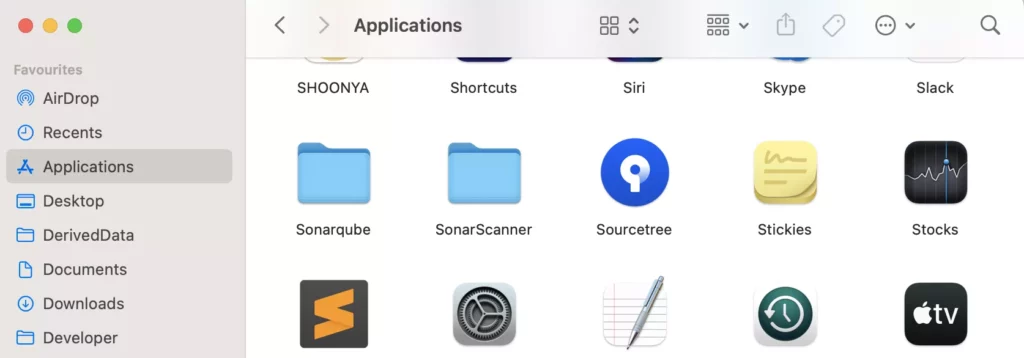
Install SonarQube.
- Download the community edition. https://www.sonarsource.com/products/sonarqube/downloads/success-download-community-edition/
- Unzip the downloaded file.
- Move the downloaded folder to /Applications.
Update the .bash_profile with new path.
- Start ‘Terminal’ and run the following command.
open -e ~/.bash_profile - This command will open the .bash_profile in editor.
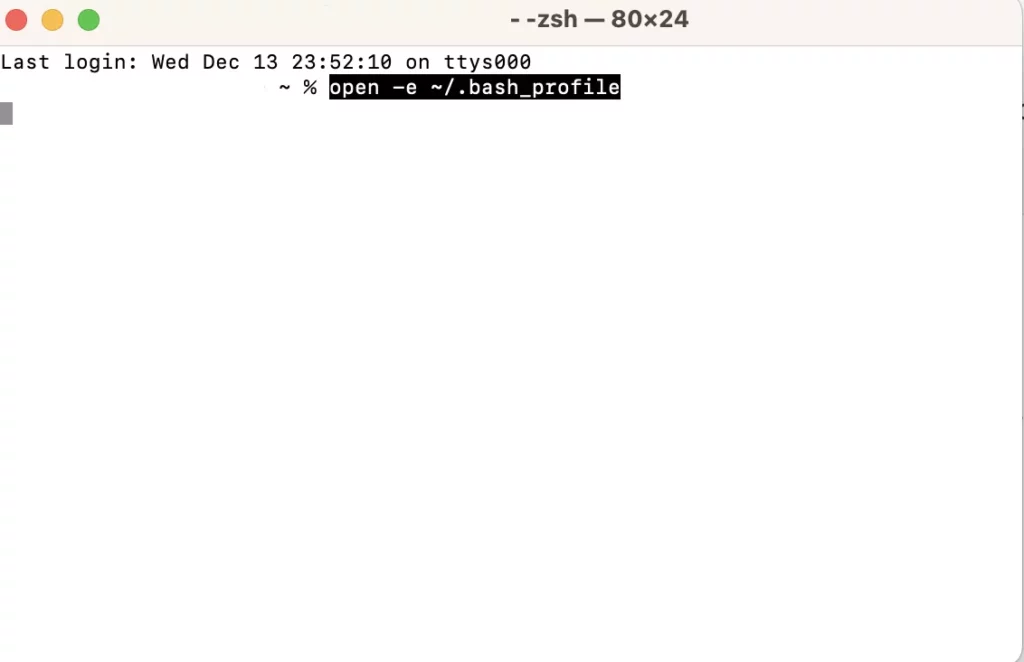
- Copy and paste the following lines to update the path.
export PATH=$PATH:/Applications/SonarScanner/binexport
PATH=$PATH:/Applications/SonarQube/bin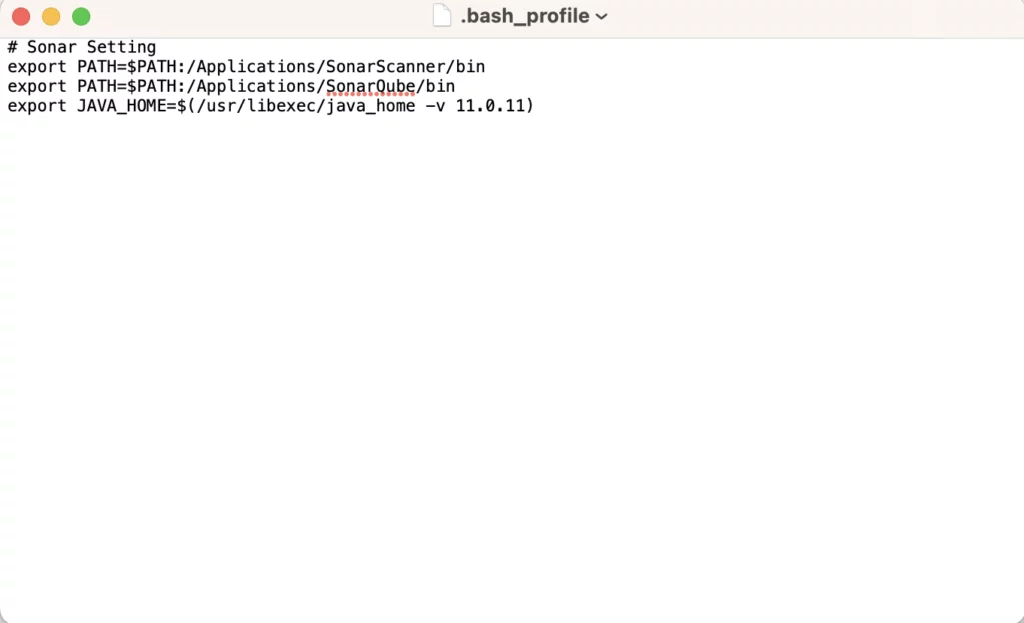
- Save this file.
Start the SonarQube server
Initiate the SonarQube server by running this command in terminal.
sh /Applications/SonarQube/bin/macosx-universal-64/sonar.sh console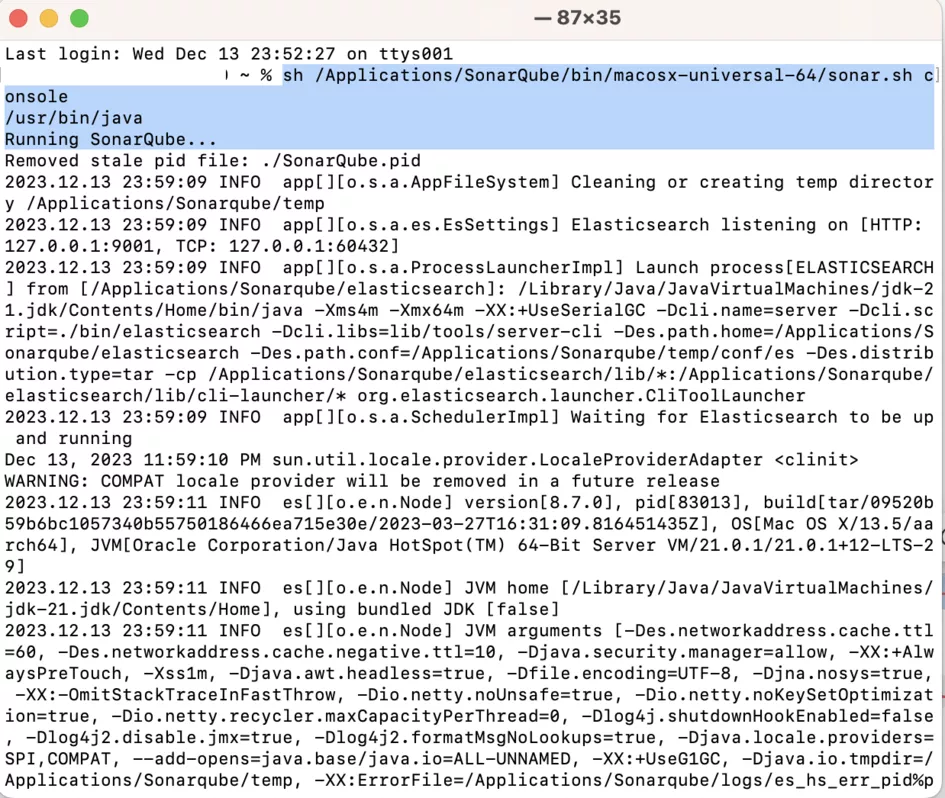
Make sure you have the latest supported version of Java. https://docs.sonarsource.com/sonarqube/latest/requirements/prerequisites-and-overview/
If not, install this version.
brew install openjdk@17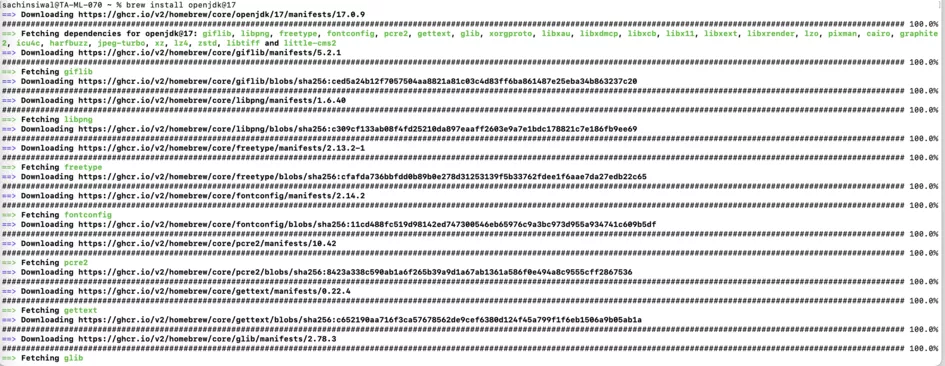
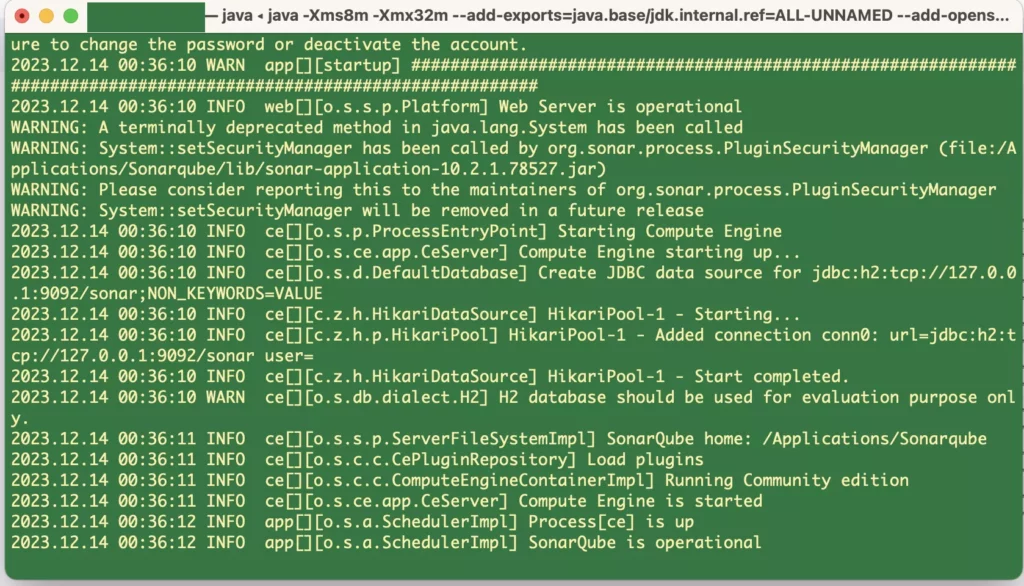
Finally, you will see the SonarQube is operational if your installation is successful.
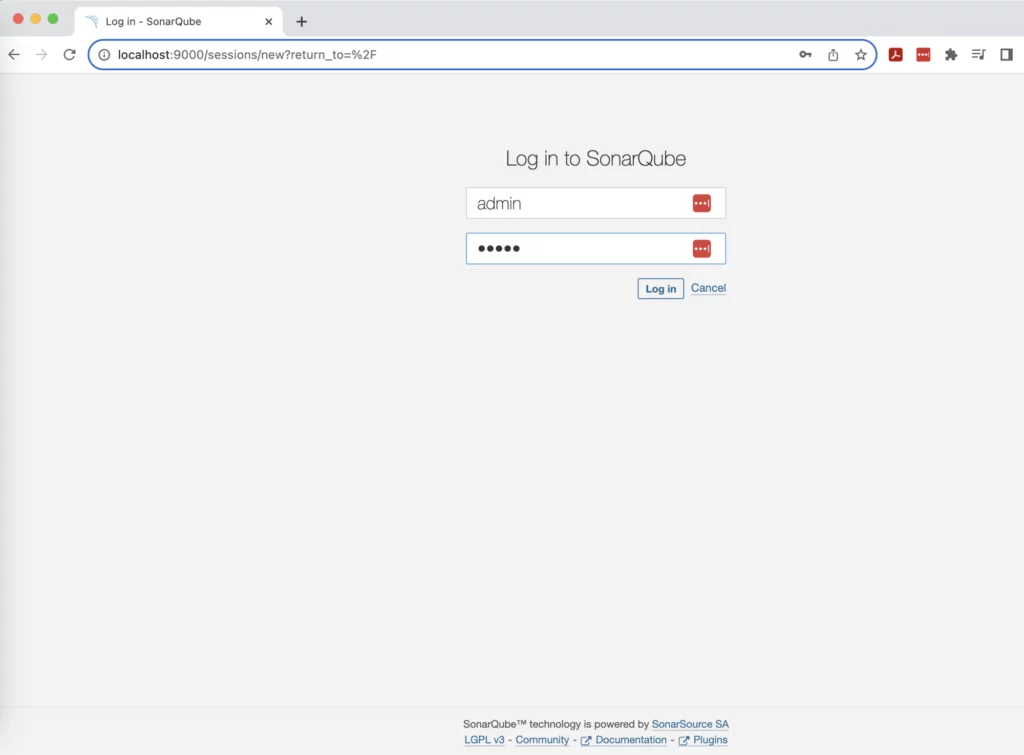
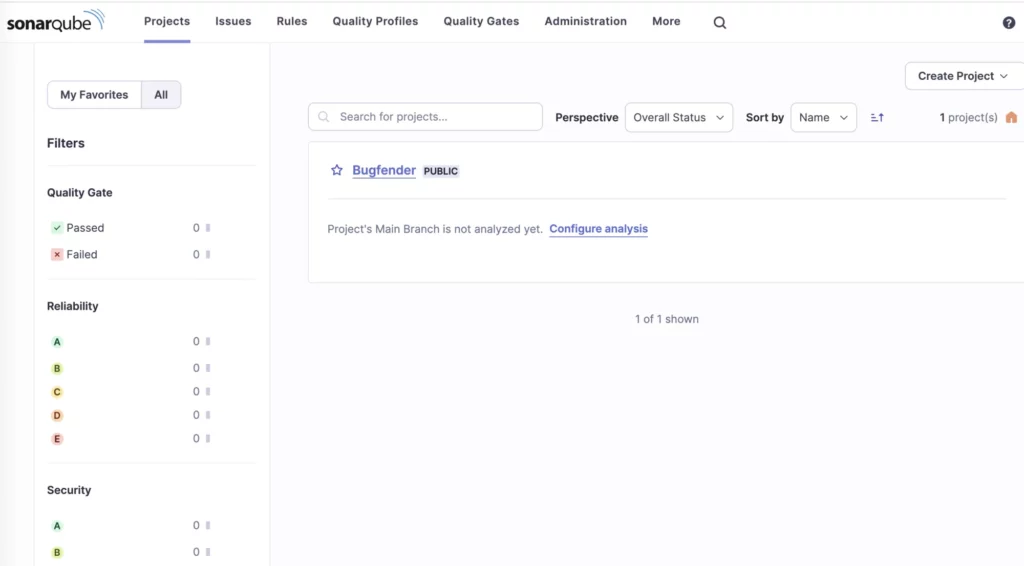
Now, you can access the SonarQube interface at http://localhost:9000 and log in with its default credentials (admin/admin). You will see this web page:
After you log in, it will ask you to update your password and you will be redirected to the web dashboard of SonarQube:

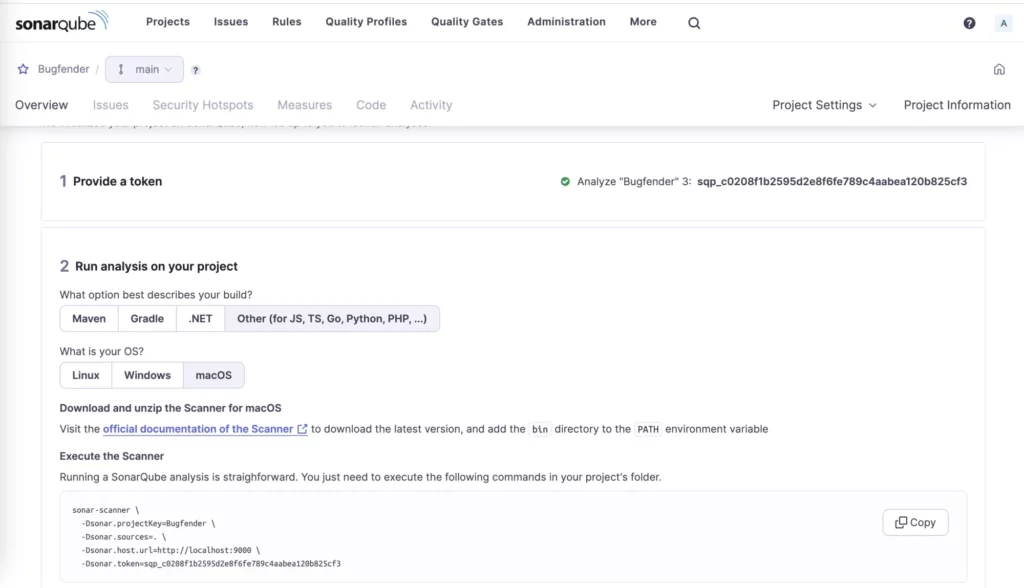
Create a SonarQube Toke
- In the SonarQube web interface, create the project key and generate the token.
- Generate a token for your user account. This token will be used for authentication during the analysis.
Step2: Install and Configure the SonarScanner
Download SonarScanner
- Download the program from the official website: https://docs.sonarsource.com/sonarqube/latest/analyzing-source-code/scanners/sonarscanner/
- After downloading, Place SonarScanner in your /Applications folder.
Configure the SonarScanner
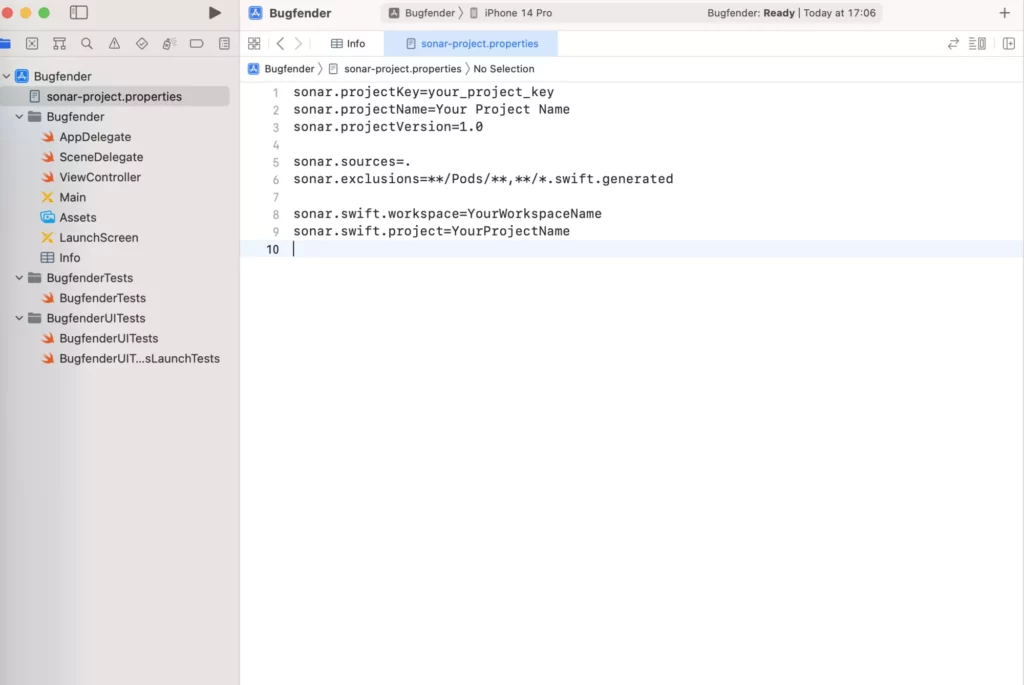
- Create the configuration file in your project’s root directory, called
sonar-project.properties.
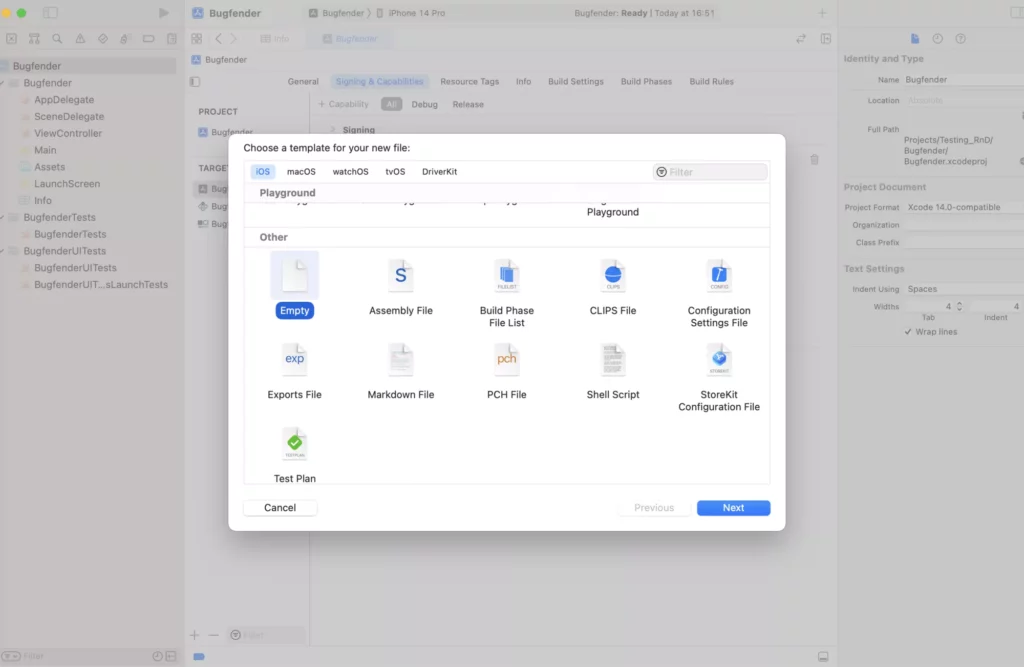
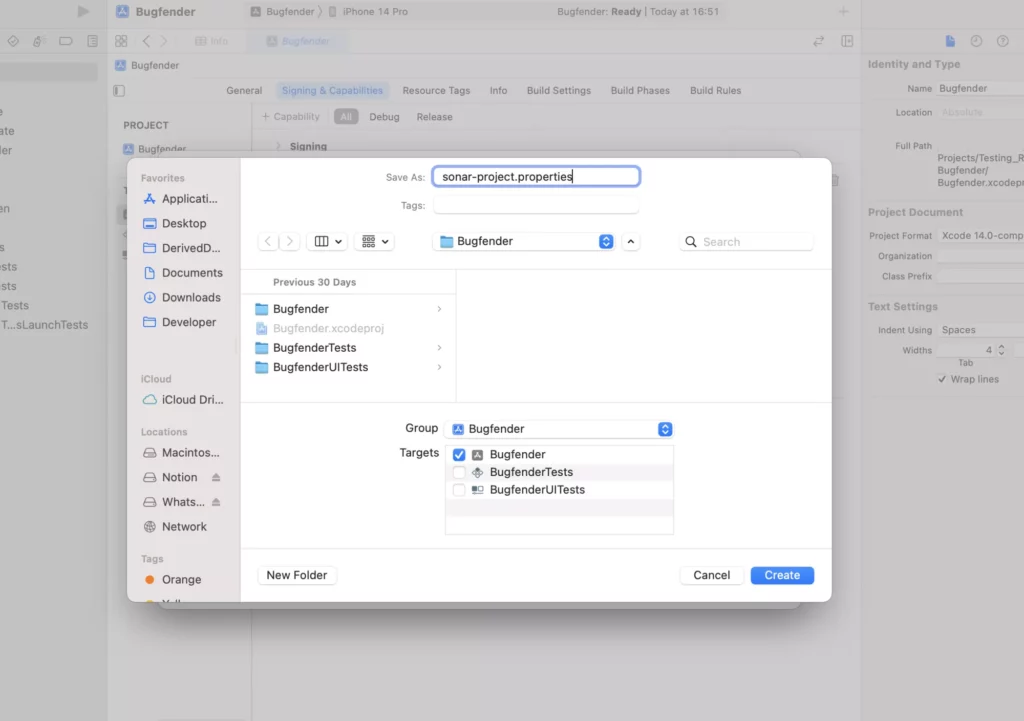
- Create a
sonar-project.propertiesfile with the following content.
sonar.projectKey=your_project_key
sonar.projectName=Your Project Name
sonar.projectVersion=1.0

sonar.sources=.
sonar.exclusions=**/Pods/**,**/*.swift.generated

sonar.swift.workspace=YourWorkspaceName
sonar.swift.project=YourProjectName
Replace placeholders (your_project_key, Your Project Name, YourWorkspaceName, and YourProjectName) with your actual values.
Step 3: Install SwiftLint
Install SwiftLint
Install SwiftLint Using HomeBrew (macOS).
brew install swiftlint 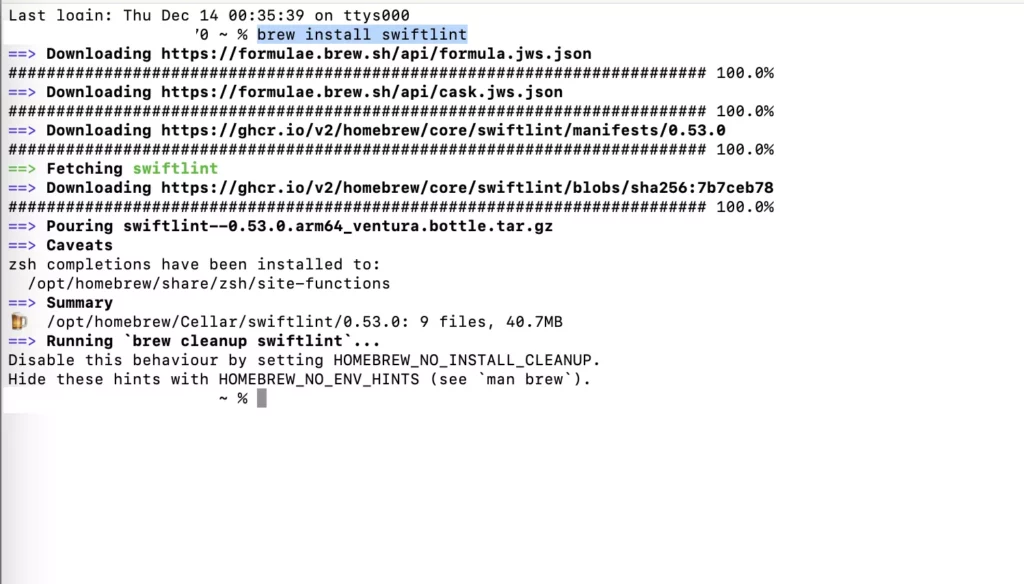
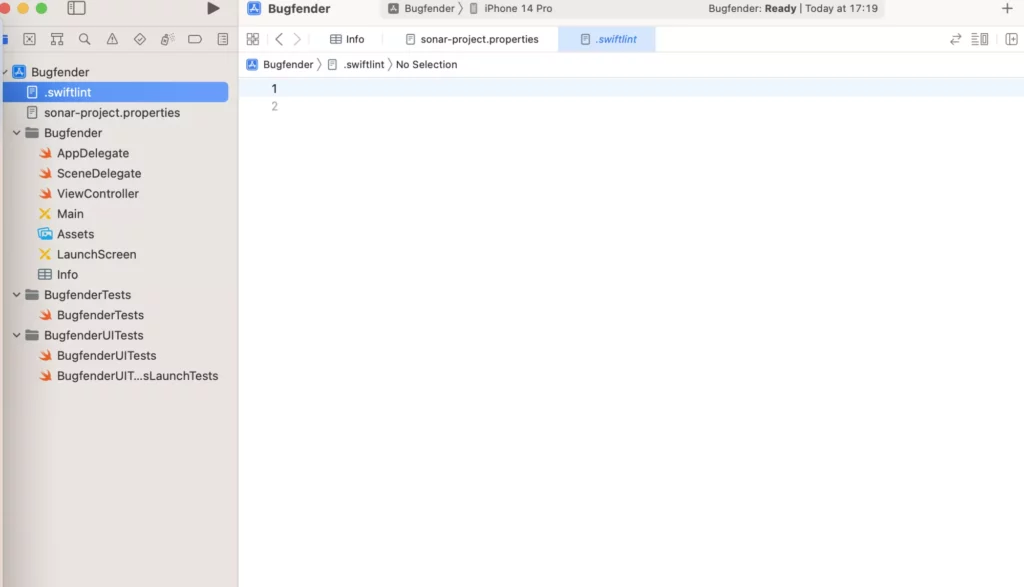
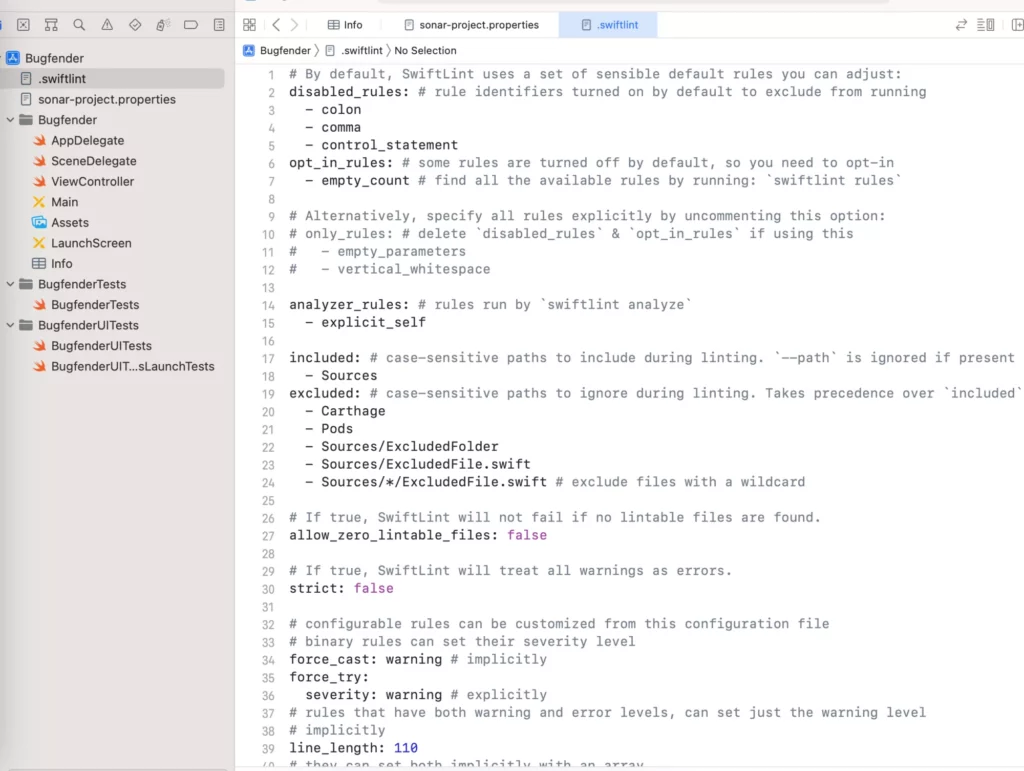
Configure SwiftLint (Optional)
Create a file named .swiftlint.yml at the root of your project with your preferred SwiftLint configuration.
You can learn more about the configuration settings here: https://github.com/realm/SwiftLint?tab=readme-ov-file#configuration.
Step 4: Run SonarScanner
Run SonarScanner
- In the Mac terminal, navigate to your project’s root directory.
- Execute the following command:
sonar-scannerThis command will analyze your Swift code and send the results to the SonarQube server.
Step 5: Analyse and View Results
Check SonarQube Dashboard
Open your SonarQube dashboard in a web browser. Open the url http://localhost:9000/projects.
Navigate to your project to view the analysis results.

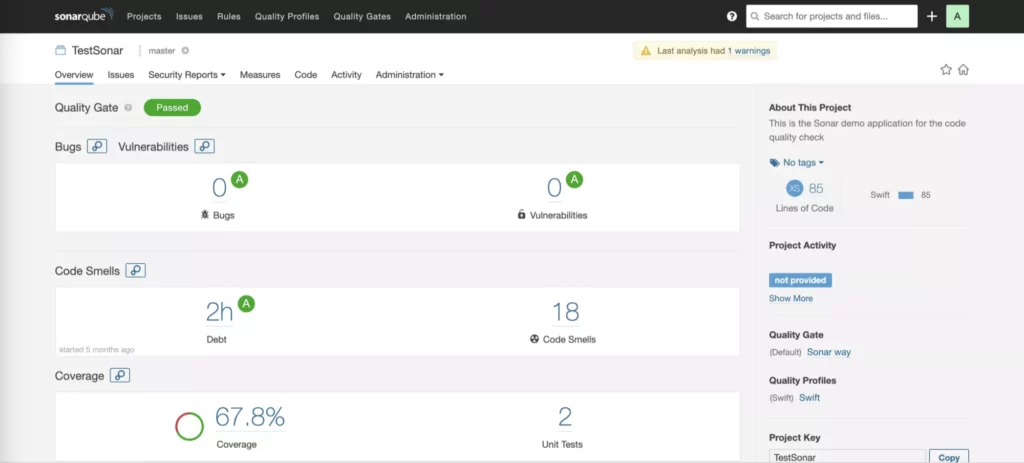
The detailed report of SonarQube will help the development and project management team to set priorities and fix potential bugs.
Important points on reporting
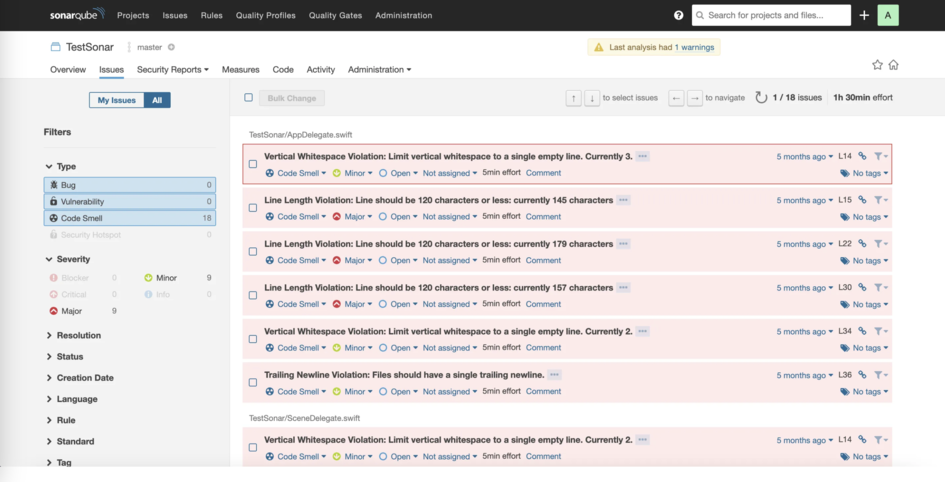
- SonarQube reports are very interactive, enabling users to navigate through the code and view specific issues in detail.
- The reports provide severity levels for issues, helping to prioritize and address critical problems first.
- The SonarQube interface is very user-friendly and provides a consolidated view of the project.
Additional Considerations
Integrate with CI/CD
SonarQube can be integrated into your Continuous Integration (CI) or Continuous Delivery (CD) pipeline, enabling you to automatically analyze your code for issues as part of your development workflow.
Integrate with Jenkins
- Install the SonarQube Scanner for the Jenkins plugin. You can find this easily in the Jenkins Plugin Manager.
- Configure the Sonar scanner for Jenkins, and navigate to “Manage Jenkins” > “Configure System.” Then find the section for “SonarQube servers” and add your SonarQube server details, including the server URL and authentication token.
- Configure global tool configuration and navigate to “Manage Jenkins” > “Global Tool Configuration.” Add the SonarQube Scanner installation and provide the path to the SonarQube Scanner exe file.
- Configure the Jenkins Pipeline and add a step to your Jenkins file for SonarQube analysis.
- Trigger your Jenkins pipeline, and it will now include the SonarQube analysis step.
pipeline {
    agent any

    stages {
        stage('SonarQube Analysis') {
            steps {
                script {
                    withSonarQubeEnv('YourSonarQubeServer') {
                        sh 'sonar-scanner'
                    }
                }
            }
        }
        // Add other stages as needed
    }
}- Replace ‘YourSonarQubeServer’ with the name of the SonarQube server configured in Jenkins.
Custom Rules and Quality Profiles
Customize the SonarQube rules and quality profiles based on your project requirements.
Review and Fix the Issues
Review the SonarQube reports to identify and address code quality issues.
To sum up
SonarQube integrations improve the development process by providing the insights into code quality and security. They also supports a proactive approach to the software development lifecycle and help the teams deliver more robust and maintainable applications.
The regular incorporation of SonarQube analysis into your development flow will contribute to a process of regular improvement in your software development practices..
Today we have given a thorough overview of SonarQube and its benefits, as well as discussing the installation and configuration of SonarQube into Mac machines with an end-to-end installation guide.
We have also discussed SwiftLint installation and configuration, which aids static code analysis and helps developers write solid code, and raised the possibility of integrating SonarQube with CI/CD tools Jenkins.
By taking all these steps, you will go a long way towards maintaining and improving code quality, security, and overall maintainability.
Expect The Unexpected!
Debug Faster With Bugfender

Sachin Siwal
Sachin is an accomplished iOS developer and seasoned technical manager, combining 12 years of mobile app expertise with a knack for leading and delivering innovative solutions. You can contact him on Linkedin