
20 Minutes
How to Use Bugfender with a Vue.JS Application
Fix Bugs Faster! Log Collection Made Easy
It is an exciting era for web developers with so many open-source frameworks and libraries around to help them. Of all the frameworks that have emerged in recent years, Vue.js stands out for its simplicity, adaptability and rapid load times.
In this article, we will learn how to get started with Vue.js. We will also go through the steps to integrate and use Bugfender with a Vue.js application.
What are we building today?
We will build a simple TODO application, which will enable us to add, fetch, edit, and delete TODO items. Though the app sounds simple, we will learn the concept of CRUD (Create-Read-Update-Delete) operations using a Vue.js application.
In the later part, we will integrate Bugfender APIs to log the activities from the application. Lastly, we will use some of Bugfender’s advanced features, like send feedback , to send user feedback from the TODO app to the Bugfender log server.
At any point in time, you can have a look at the code in the GitHub repository.
And you can also play around with the app from here.
Vue.js – installation, setup, and structure
Vue.js is a progressive web app framework that helps build the view part of the MVC (Model-View-Controller) paradigm. It empowers you to build single-page applications using the core Vue.js library and its tooling ecosystem.
Installation
To install and work with Vue.js, we need to have Node.js installed. If you do not have Node.js installed, please download and install it from here. Node.js comes with the npm utility that we will use to install other packages. Alternatively, you can also use yarn for installing packages.
Please note, unlike other UI libraries/frameworks, Vue.js provides an option to include the library from the CDN. You can use the CDN URL to include the
Vue.jsin your project’s script tag. However, in a production-like application, you cannot do that. Instead, you are obliged to rely on a Node.js-based environment. So this article doesn’t cover the CDN-based approach in great detail.
First we will install vue-cli. The vue-cli is a command line utility to manage your Vue.js app. To access it, open a command prompt and install vue-cli.
npm install -g @vue/cli
# OR
yarn global add @vue/cli
It will take a while to install the vue-cli globally. This means you will be able to access Vue.js from anywhere on your computer drives, using the binary name vue. Check tgat the cli is installed correctly using this command.
vue --versionIf all is good, you should see the vue-cli version printed in the console.
Setup
Next, we will create a Vue.js project using the vue-cli tool. You can use the following command to create a Vue.js project structure with required libraries.
vue create vue-todoThe command vue create <app-name> creates a Vue.js app with a given name. In our case, the app name is vue-todo. You will be asked to select the Vue.js version to create the app. You can proceed by selecting either the Vue 2 or Vue 3 Preview option.
Please note: If you are using
GitBashas your command prompt, the interactive menu may not work well. In that case, please use this command:winpty vue.cmd create vue-todo
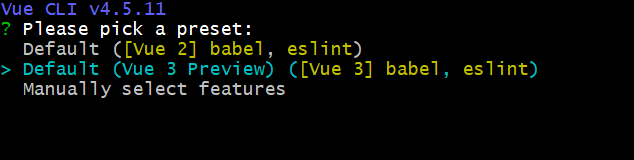
Press select the item and press the enter key to complete the setup. Once completed, you will find a project folder created with the app name you typed in the create command. In our case, it is vue-todo. Now you can import the project folder in your favorite source code editor.
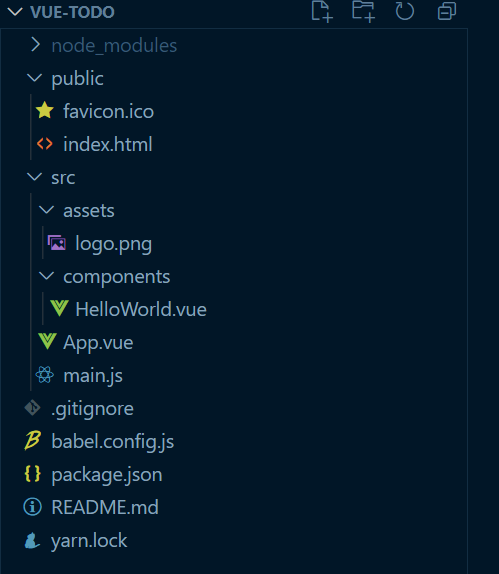
At this point, it should have the following structure:
Now let’s run the app. In the command prompt, use this command to run the application:
npm run-serve
# OR
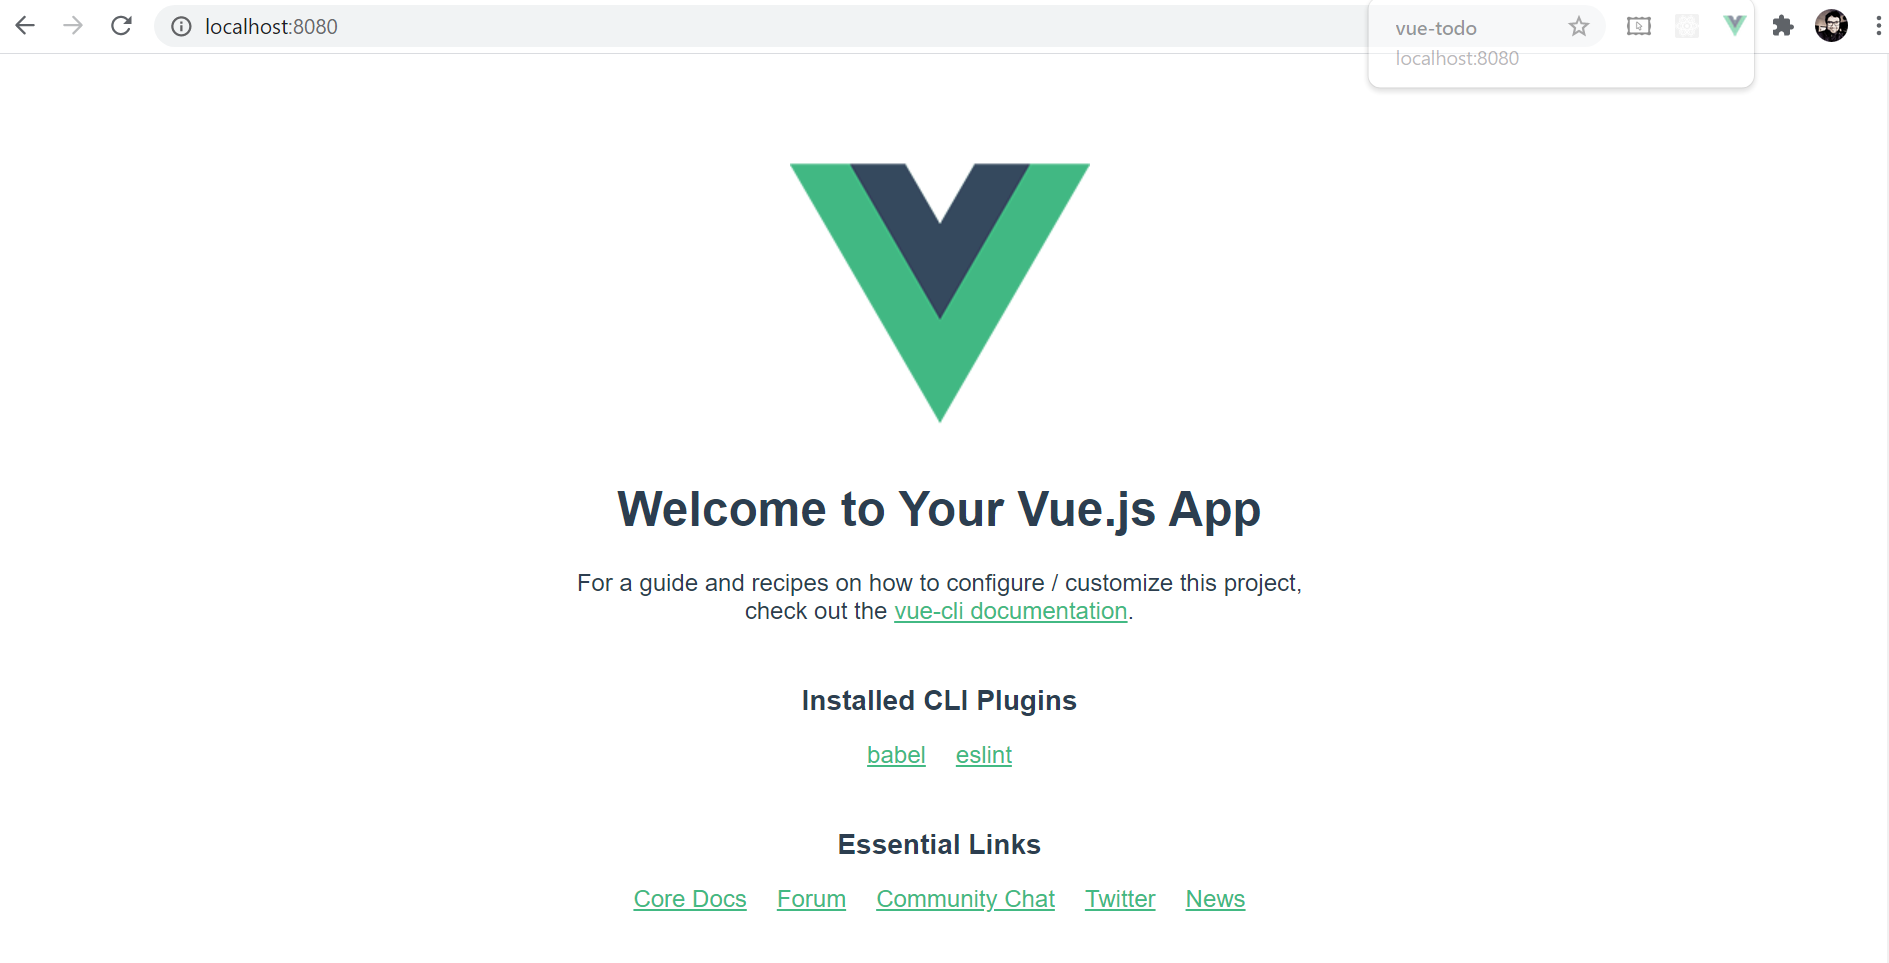
yarn serveIt will compile the app and deploy it on a local server. By default, the app will run on the URL http://localhost:8080/. Access this URL from your favorite browser. You should see a page like this:
Structure
Let’s take a look at some of the important folders and files to understand how the Vue.js project structure works in practice. First, open the file called index.html under the public folder. Notice the line
<div id="app"></div>This div with the id app is the wrapper of our entire application. You can think of it as the root of the application we are going to build.
Next, open the main.js file under the src folder. This file is the entry point of a Vue.js application. Let’s have a look at the content:
import { createApp } from 'vue'
import App from './App.vue'

createApp(App).mount('#app')- First, we import the method
createAppfrom thevue. - We import a component called
Appfrom the fileApp.vue. We will see this component in more detail in a while. - Lastly, we create the app using the
Appcomponent and mount it to the root element which is a div with the idapp. We have seen this div already in theindex.htmlfile.
Finally, let’s have a look into a Vue.js component. We already have a component created for us: App.vue. Open the file and you’ll notice that there are three primary sections.
<template>
...
</template>

<script>
...
</script>

<style>
...
</style>
It is a standard structure for any Vue.js component. The HTML part of the component goes inside the <template> tags, the data and script portion goes inside the <script> tags and the <style> tags contains the component styles.
The structure may seem a bit strange at first glance. You may feel that there is no separation of the HTML, Script, Data, and Style. But if you think about it from a component perspective, each of the components is an isolated unit. They have their data, template, script, and style composed within.
The TODO app
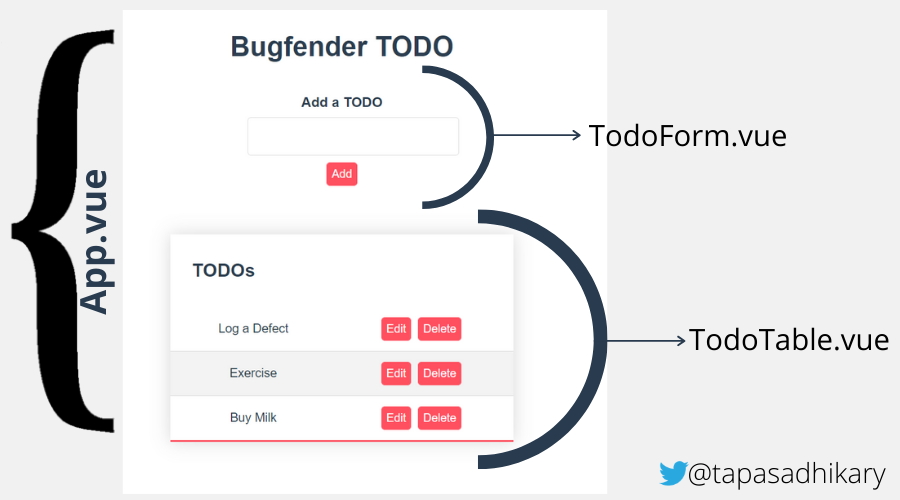
At the end the TODO app will look like this:
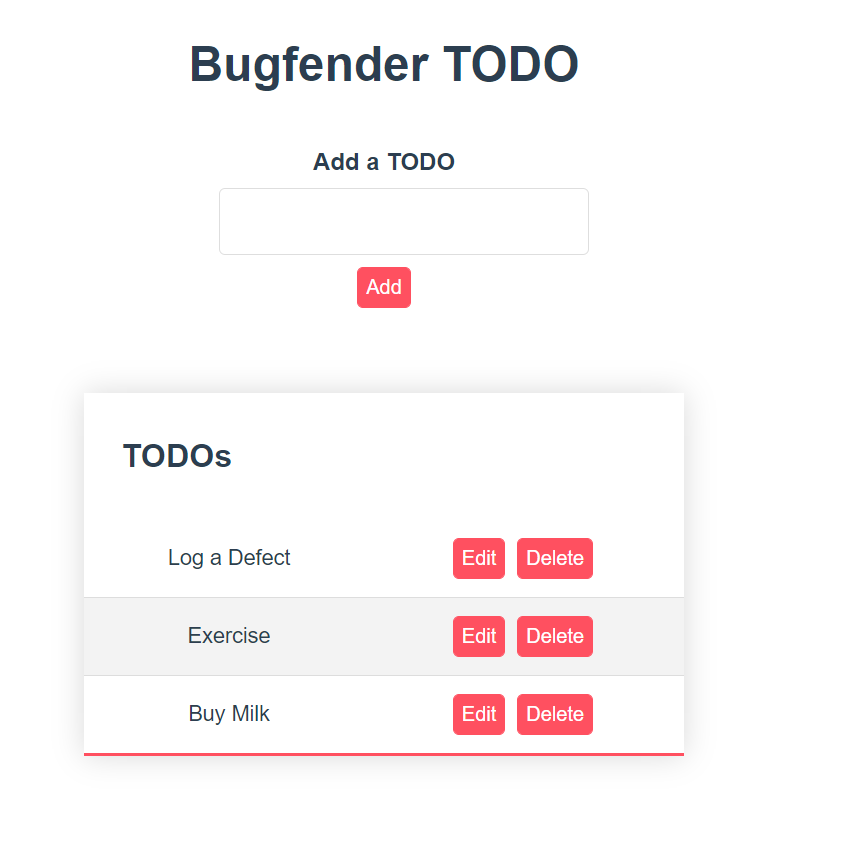
As you see, it has:
- A header.
- A text-box and a button to create a TODO item.
- A table below to list all the TODO items with options to edit and delete them.
At a high level we can then divide the TODO app into two major components:
- TodoForm.vue ⇒ This component will contain the text-box and button for the ‘TODO item create’ action.
- TodoTable.vue ⇒ This component will contain the table to list the TODO items along with the buttons to edit and delete them.
Finally, these two components can be combined into the App.vue component.
TODO app – The TodoForm component
Now create a file called TodoForm.vue inside the src\components folder, with the following content:
<template>
  <div id="todo-form">
    <form @submit.prevent="handleSubmit">
      <label>Add a TODO</label>
      <input v-model="todo.name" type="text" />
      <button>Add</button>
    </form>
  </div>
</template>

<script>
  export default {
    name: 'todo-form',
    data() {
      return {
        todo: {
          name: ''
        },
      }
    },
    methods: {
        handleSubmit() {
            this.$emit('add:todo', this.todo)
        },
    },
  }
</script>

<style scoped>
  form {
    margin-bottom: 2rem;
  }
</style>
- First, we are creating the
templatefor the component. The template has a form with an input text box, and a button. The text box has an attribute calledv-model, which helps to convey the data from the text-box to Vue’s component state. - The form has an attribute
@submit.prevent="handleSubmit"which is Vue.js’s syntax for adding an event handler. In this case, we are adding anonSubmitevent handler. We are specifying to call a methodhandleSubmitwhen the user submits this form by clicking the button. - Next, lets move towards the
scriptsection of the component. We define the name of the component astodo-form. This name will be applied when we use this component in the template of theApp.vuecomponent. We can also define the data as thetodoobject with a property calledname. This structure is important as this property(todo.name) has a bind with the text-box using thev-modelattribute. Hence Vue.js will take care of updating the name property value when the value of the text-box gets updated. - The purpose of the
methodssection of a component is to define all the methods required to support its functionality. In this case, we need to handle the submission of the form. Hence we define thehandleSubmit()method. - The
handleSubmit()method broadcasts the name of an event and data to its parent component using the$emit()method. In this case, the event name isadd:todoand the data is thetodoobject itself. - Finally, the
stylesection contains the styling(CSS) for the component. Notice thescopedattribute there. It means the styles are scoped for this component alone.
Great! Now we will import and use the TodoForm component in the App.view component. Replace the <script> section of the component with the following code:
<script>
import TodoForm from "@/components/TodoForm.vue";

export default {
  name: 'App',
  components: {
    TodoForm
  }
}
</script>
- Here we are importing the
TodoForm.vuecomponent. Please note the@symbol in the path. It refers to thesrcfolder. - Next, in the
componenentslist, we add the TodoForm as an entry.
Now it’s the time to change the <template> section of the App.vue component. Please replace it with the following code:
<template>
   <div id="app" class="small-container">
    <h1>Bugfender TODO</h1>
    <todo-form />
  </div>
</template>
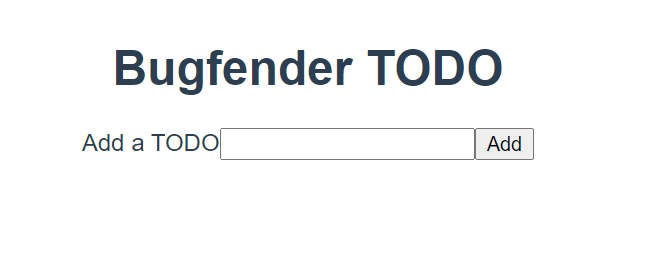
- Note: we have a header that says
Bugfender TODOand then we use the<todo-form>just below it. As you refresh your browser, the form will display like this:
Hold on! What about that event we broadcasted to add a TODO item? To manage this event, we need to add the attribute @add:todo="addTodo" to the <todo-form> in the template of App.vue.
<todo-form @add:todo="addTodo"/>Next, add a methods section in the <script> tag:
export default {
  name: 'App',
  components: {
    TodoForm
  },
  methods: {
    addTodo(todo) {
      console.log(todo);
    }
  }
}
At this point, we are just logging the todo object into the browser console. Go ahead and add a TODO item in the text box and click on the button. You should see the todo information logged in the console. This means the text change in the input box is changing the state of the application and we are able to use it elsewhere.

TODO app – The TodoTable component
Now we will focus on implementing the TodoTable component to list all the TODO items. Before we do so, let’s make a small change in the todos data structure. We would like to maintain an id property for each of the TODO items; this will help us to find a specific TODO item with its id, and then edit or delete it.
Let’s use a npm called shortid that generates a random id to use. Open a command prompt, browse to your project folder and try this command:
 npm install shortid
 # OR
 yarn add shortid
Next, import the generate() function of the shortid inside the <script> tag of the App.vue component.
import { generate } from 'shortid';Now we will add a data() method to the script section to initialize the TODO app with three default todo items.
<script>
... imports

export default {
  name: 'App',
  components: {
    ... components
  },
  data() {
    return {
      todos: [
        {
          id: generate(),
          name: "Log a Defect"
        },
        {
          id: generate(),
          name: "Exercise"
        },
        {
          id: generate(),
          name: "Buy Milk"
        },
      ],
    };
  },
  methods: {
    ...methods
  }
}
</script>
Notice the todos data structure: it is an array that has both id and name. To work on this, we can start by creating the TodoTable.vue component. First, create a file called TodoTable.vue under the components folder with the following content:
<template>
  <div id="todo-table">
    <p v-if="todos.length < 1" class="empty-table">No Todos</p>
    <table v-else>
      <thead>
        <tr>
          <th><h2>TODOs</h2></th>
        </tr>
      </thead>
      <tbody>
        <tr v-for="todo in todos" :key="todo.id">
          <td >{{ todo.name }}</td>
        </tr>
      </tbody>
    </table>
  </div>
</template>

<script>
  export default {
    name: 'todo-table',
    props: {
        todos: Array,
    }
  }
</script>

<style scoped>
  button {
    margin: 0 0.5rem 0 0;
  }
</style>
- The
templatesection contains the table to list the ToDo items. However there are a few things to note here: We can use the attributes likev-ifandv-elsefor conditional statements, and likewise we can usev-forfor looping. Here, we are checking whether theToDodata structure is empty. If so, we just show a message sayingNo. In case there areToDoToDoelements (the todos data structure is not empty) we iterate over it and render the ToDo names.- Ok, so where is the
ToDosscriptsection above. We can give it the nametodo-tableand also define that the component expects a props calledtodosarray.
- Ok, so where is the
- Finally, use
styleto define some scoped style for the component.
Now, go to the App.vue component and import the TodoTable component inside the script section.
import TodoTable from "@/components/TodoTable.vue";Next, please mention it under the components section:
components: {
    TodoForm,
    TodoTable
  }
Finally, add it to the template section:
<template>
... existing code
  <todo-form @add:todo="addTodo"/>
	<todo-table :todos="todos" />
... existig code
</template>
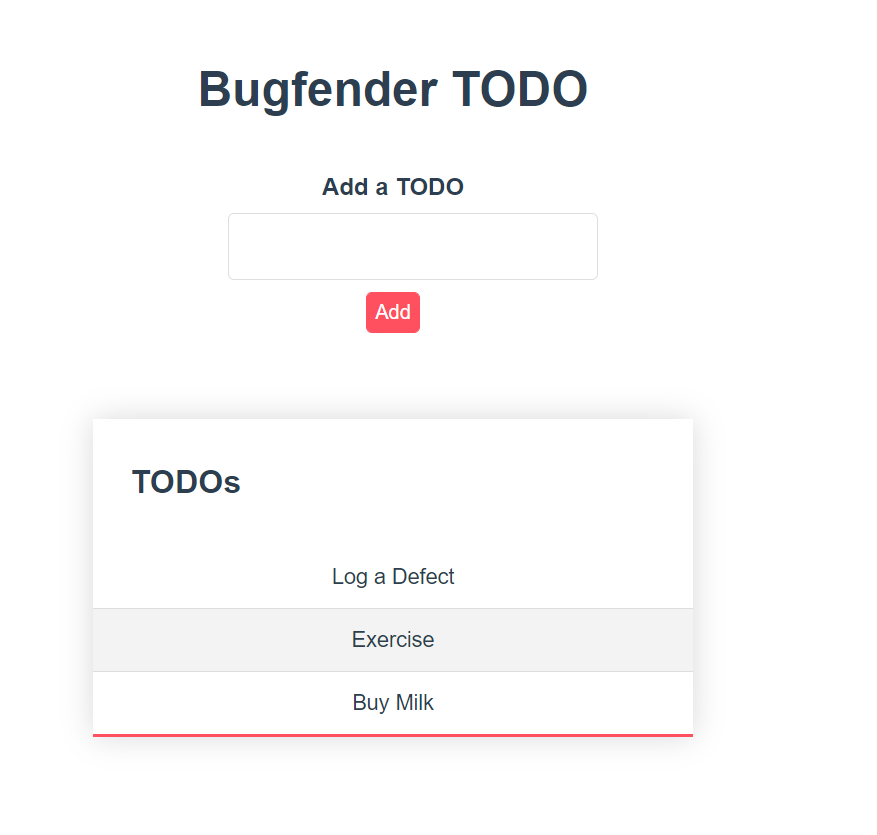
Note: we are passing the initial todos array as a prop to the todo-table component. Now refresh your browser and see the app list down the default ToDo’s.

Well, it works but it doesn’t look that great, so let’s add some overall styles to give it a better visual feel. Add the following styles inside the <style> tag of the App.vue component. Note that this style tag is not scoped, hence the styles can be applied outside the component as well.
button {
  background: #ff5060;
  border: 1px solid #ff5060;
  color: #FFFFFF;
  padding: 5px;
  border-radius: 4px;
  cursor: pointer;
}

.sendFeedback {
  position: absolute;
  top:10px;
  right: 30px;
}

.small-container {
  display: flex;
  flex-direction: column;
  justify-content: center;
  align-items: center;
}

table {
  border-collapse: collapse;
  margin: 25px 0;
  font-size: 0.9em;
  font-family: sans-serif;
  min-width: 400px;
  box-shadow: 0 0 20px rgba(0, 0, 0, 0.15);
  width: 100%;
}

table thead tr {
  text-align: left;
}

table th {
  padding: 12px 25px;
}

table td {
  padding: 12px 15px;
}

table tbody tr {
  border-bottom: 1px solid #dddddd;
}

table tbody tr:nth-of-type(even) {
  background-color: #f3f3f3;
}

table tbody tr:last-of-type {
  border-bottom: 2px solid #ff5060;
}

table tbody tr.active-row {
  font-weight: bold;
  color: #ff5060;
}

label {
    font-weight: 600;
    max-width: 100%;
    display: block;
    margin: 1rem 0 0.5rem;
}

input[type=text] {
  display: block;
  border: 1px solid #dedede;
  border-radius: 4px;
  padding: 0.75rem;
  outline: none;
  background: transparent;
  margin-bottom: 0.5rem;
  font-size: 1rem;
  width: 100%;
  max-width: 100%;
  line-height: 1;
}
Now refresh the browser. It looks much better than before.
Let’s get things together – Add, Edit, and Delete
It’s time to complete the add, edit, and delete todo functionalities.
Add TODO Item
We have a placeholder addTodo method that logs a todo in the browser console. Let’s modify it to add a TODO item in the todo table. To do so, replace the addTodo method in the App.vue component with the following code:
addTodo(todo) {
 const id = generate();
 const newTodo = { ...todo, id };
 this.todos = [...this.todos, newTodo];
},
Here, we take the todo object and create a new instance by adding an id. Finally, add the new todo to the todos array. That’s all.
Delete TODO Item
Now let’s implement the ‘delete TODO item’ functionality. Go to the TodoTable component and add the delete button. We will also emit a delete event and broadcast the todo id to be deleted.
...existing code
<tr v-for="todo in todos" :key="todo.id">
          <td >{{ todo.name }}</td>
           <td>
            <button @click="$emit('delete:todo', todo.id)">Delete</button>
           </td>
 </tr>
...existing code
In the App.vue file add the @delete:todo attribute to the todo-table to catch the delete event.
<todo-table
      :todos="todos"
      @delete:todo="deleteTodo"/>
Finally, add the deleteTodo method in the methods object of the script section. Here we are just filtering out the todo we want to remove from the todos array.
deleteTodo(id) {
 this.todos = this.todos.filter(
   todo => todo.id !== id
 )
},
Ok, that’s about it! We have the ‘delete TODO’ item implemented.
Edit TODO Item
But what the ‘edit TODO’ item? Let me leave that one to you. But if you need any references, please check out the GitHub repo mentioned above.
Hint: You need to add an event handler to the edit button like we did for the delete. Then you need to turn on the edit mode to show the todo name in a text box. On saving the changed name, you need to turn off the edit mode and, finally, alter the todos array to reflect the change.
All the best!
Logging using Bugfender
Bugfender is a remote logging service which allows users to collect logs for everything that happens in the application. It is very easy to integrate Bugfender with a JavaScript-based framework like Vue.js and get started. There are SDKs available to integrate with mobile applications as well.
To kick things off, simply create an account with Bugfender. Once logged in, create a Bugfender application for web apps using the Web SDK option. You can follow this step-by-step guide to create a Bugfender application, and you will find an API key ready for you. Keep it safe.
Once you have created your app, the Bugfender dashboard will enable you to keep track of logs, issues, feedback and crashes. This is how my dashboard looks:

Install Bugfender SDK
Open a command prompt and the root of the project folder and use this command to install the Bugfender SDK:
npm i @bugfender/sdk
# Or
yarn add @bugfender/sdk
Add the Bugfender API Key
We need the Bugfender API key to communicate with its APIs. We do not want to make this API key public. So, please create a .env file at the root of your project folder and add a key-value pair like this,
VUE_APP_BUGFENDER_API_KEY=<YOUR_BUGFENDER_API_KEY>Please note: All the Vue.js specific keys in the .env file should be prefixed with VUE_APP_.
Add Bugfender Logs
Open the App.vue component and import the bugfender sdk:
import { Bugfender } from '@bugfender/sdk';Then initialize the BugFender service by calling the init method. We pass the API key to this method.
Bugfender.init({
    appKey: process.env.VUE_APP_BUGFENDER_API_KEY
});
Now you can start adding logs of different log levels (info, warn, error, etc.) in your application code. Here is an example, in which we add a normal info log in the addTodo method:
addTodo(todo) {
const id = generate();
const newTodo = { ...todo, id };
this.todos = [...this.todos, newTodo];
Bugfender.log(`Added a TODO with id ${id}, and name ${todo.name}`);
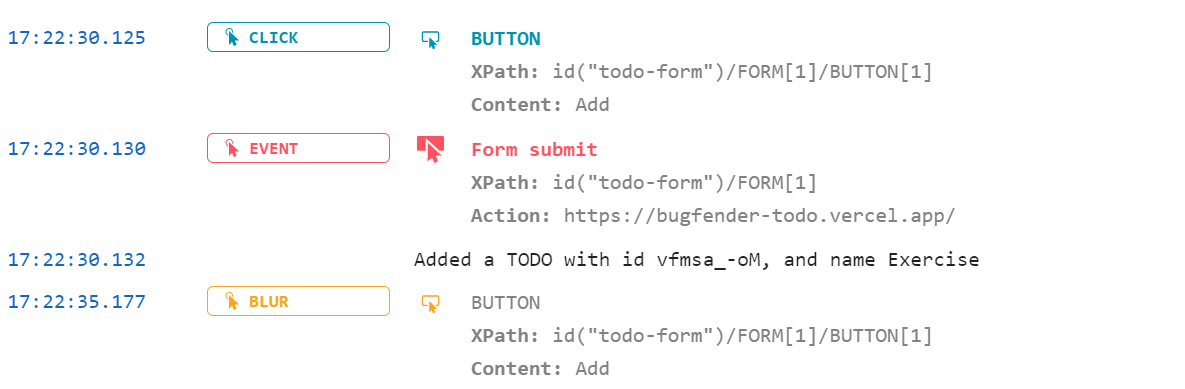
}Similarly, you can add deleteTodo and editTodo methods as well. Now as you start adding, editing, or deleting TODO items from your app, it will log the relevant details to the Bugfender app. You can view them from the Bugfender dashboard.
Here are a few examples:


Importantly, we can also capture other browser event logs:
Bugfender – Advanced API Usages
The Bugfender SDK provides APIs for many of the advanced usages, like:
- sendIssue – To send an issue with the title and details to the Bugfender log server.
Bugfender.sendIssue('Issue title', 'Description of the issue');- sendLog – Send logs with tags so that you can filter the log accordingly.
Bugfender.sendLog({ tag: 'tag1', text: 'this is my log' });- sendUserFeedback – You can send user feedback using this API and see all the user feedback under the
Feedbacksection of the Bugfender Dashboard.
Bugfender.sendUserFeedback('Love the App!', 'You are doing a great job with it.')- As an additional option, we can also use the
getUserFeedback()method to create a modal user interface for collecting the feedback.
Bugfender.getUserFeedback().then((result) => {
    if (result.isSent) {
        // User sent the feedback
        // `result.feedbackURL` contains the Bugfender feedback URL
    } else {
        // User closed the modal without sending the feedback
    }
});
In a Vue.js app, you can easily create a component for this functionality. Here is an idea of a sample SendFeedback.vue component (you can refer to this component from here as well).
<template>
  <div class="hello">
    <button @click="sendFeedback()">Send Feedback</button>
  </div>
</template>

<script>
import { Bugfender } from '@bugfender/sdk';
export default {
  name: 'HelloWorld',
  methods: {
    sendFeedback() {
      console.log('Sending Feedback');
      Bugfender.getUserFeedback().then((result) => {
        if (result.isSent) {
            // User sent the feedback
            // `result.feedbackURL` contains the Bugfender feedback URL
            Bugfender.info('User has sent the Feedback to Bugfender', result.feedbackURL);
        } else {
            Bugfender.warn('User feedback has not been sent.');
        }
      });
    },
  }
}
</script>

<!-- Add "scoped" attribute to limit CSS to this component only -->
<style scoped>

</style>
You can add this component anywhere in your app to collect the feedback using the modal user interface.
You can see the feedback under the Feedback tab of your Bugfender dashboard page.

To drill down to it, all you need to do is click on a feedback name to see the associated logs. You can also track the feedback as a GitHub issue.

Where to go from here
That’s all for now. Thanks for reading through! I hope you found the article insightful. Please start exploring Vue.js if you are new to it. As a next step, you can connect this TODO app to a database and persist the todo item to it.
Please explore Bugfender to find out more about other usages.
Here are a few links you may find useful:
- Vue.js user guide
- Bugfender Web SDK
- GitHub repository of the vue-todo app. Please feel free to star/fork/contribute.
Bugfender is a tool that helps you finding errors in your production apps. We strongly believe in sharing knowledge and that’s why we create articles like this one. If you liked it, help us to continue creating content by sharing this article or signing up in Bugfender.
Expect The Unexpected!
Debug Faster With Bugfender

Tapas Adhikary
Tapas Adhikary is a Full Stack Developer. He loves building web apps, mobile apps, and JAMstack solutions. He is a technology blogger who publishes articles for freeCodeCamp, daily.dev, dev.to, his blog.greenroots.info and also in his YouTube Channel. Follow him on Twitter(@tapasadhikary) to stay connected.